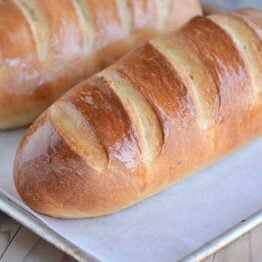
Easy Homemade French Bread
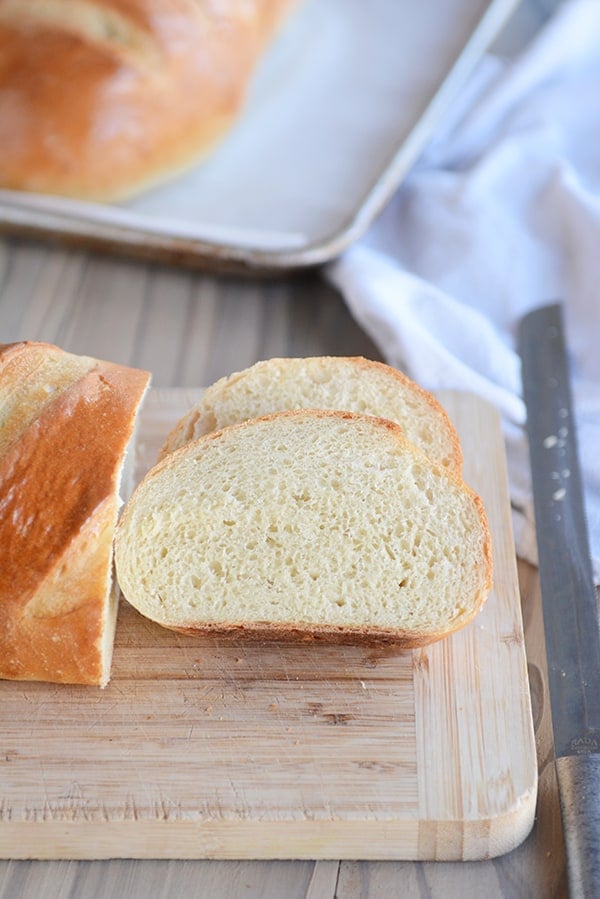
Homemade French bread has never been easier! This simple recipe produces a light and fluffy loaf of French bread that will rival any bakery!
This easy homemade French bread is so simple and perfect for a bread making beginner.
But as you can see from all the comments below, it’s just as valued by expert bread makers, too!

Making French Bread Dough
This straightforward bread dough can be made in a stand mixer or by hand.
- Warm water
- Yeast (instant or active dry yeast)
- Bit of sugar and oil
- Salt
- Flour (all-purpose or bread flour)
At the start, the dough will look shaggy and rough.

But as it kneads, it will become soft and smooth.
The most important part of this dough (and other yeast doughs) is to judge the amount of flour by the look and feel of the dough rather than the exact amount of flour called for in the recipe.
Factors such as humidity, elevation, room temperature, how we each measure flour, and more can affect the amount of flour added. So don’t stress about precise flour measurements and continuously feel the dough to achieve a soft dough that is slightly tacky but doesn’t leave a lot of residue on your fingers.
Too little flour and the dough will be a mess to handle. Additionally, the bread won’t hold its shape as it rises and bakes.
Too much flour and the dough won’t rise well and the bread will be tough and dense.

Two Methods for Dough Rising
In the recipe, there are two methods to letting the dough rise:
- Leave the dough in the mixer, cover with a lid or towel, and let the dough rest for 10 minutes. Stir it down by turning on the mixer for 10 seconds or so. Repeat the “rest and stir down” cycle five more times.
- Transfer the dough to a lightly greased bowl and cover with a towel or greased plastic wrap. Let the dough rise until doubled, about an hour or so, depending on the warmth of your kitchen.
I alternate between the two methods depending on my mood. The 10-minute increment rising method is unique to this original French bread recipe. The idea is that allowing the dough to rise this way produces a lighter crumb.
But the more traditional rising method also results in a delicious, fluffy loaf.
How to Shape French Bread Loaves
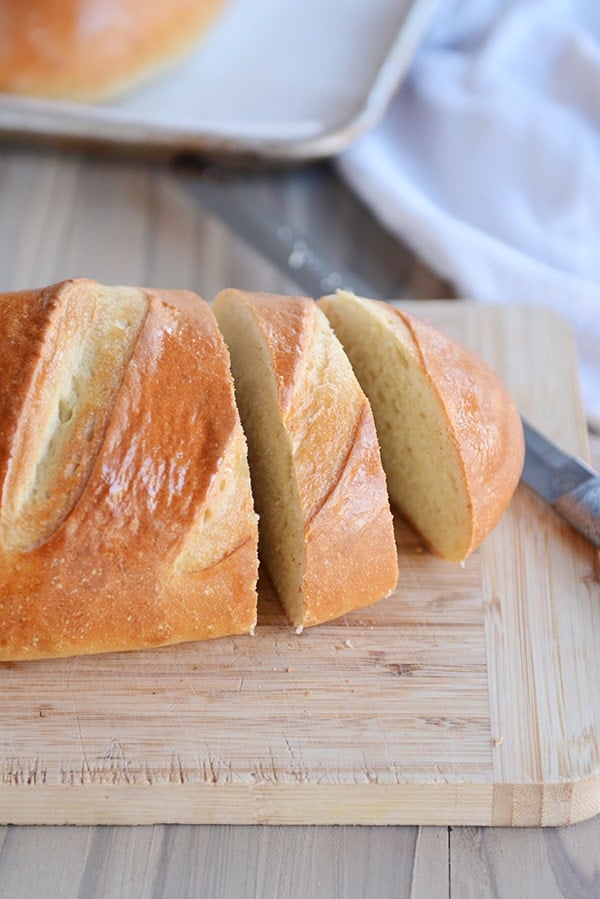
The question I get asked the most about this easy homemade French bread is how to shape the loaves.
The loaves can really be made any size or shape; I usually end up making 12-inch loaves, but if they end up being a bit thinner or chubbier, it’s no big deal!
Press each portion of dough into a flat rectangle and fold the bottom edge up and over the dough, pressing the seam flat with your hand.

Then, roll the dough up again to meet the top edge.
Fold the top edge over and press or pinch lightly.

Take the end of the bread dough and fold it up and over an inch or two to give an even thickness all the way down the loaf.
Pinch to seal the end. Repeat on the other end of the dough.
Then, deliberately and thoroughly pinch and seal the entire length of the loaf.

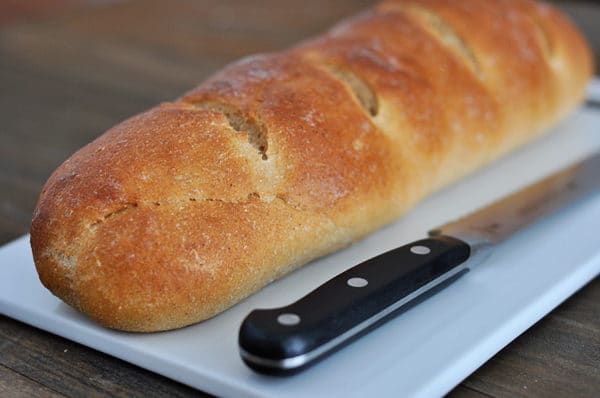
How to Score the French Bread Dough
Scoring the bread dough (in my house, also called: slashing or gashing) helps the dough rise better AND prevents it from cracking in unexpected places while baking.
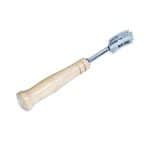
Using a bread lame for this task is extremely helpful. A bread lame is a long stick or utensil with a razor blade on the end. The razor is used to make thin cuts in the dough.
If you don’t have a bread lame, using a clean, sharp razor blade or an extremely sharp kitchen knife can work. Be aware that if the knife isn’t sharp enough, it’ll likely deflate the dough.
The bread loaves can be scored before or after the final rise. I prefer to do the slashing and gashing before they rise as I’ve had one too many loaves of risen bread deflate at the first touch of the razor, and there is nothing so soul crushing as when that happens.

Let the bread loaves rise until noticeably puffy before baking.

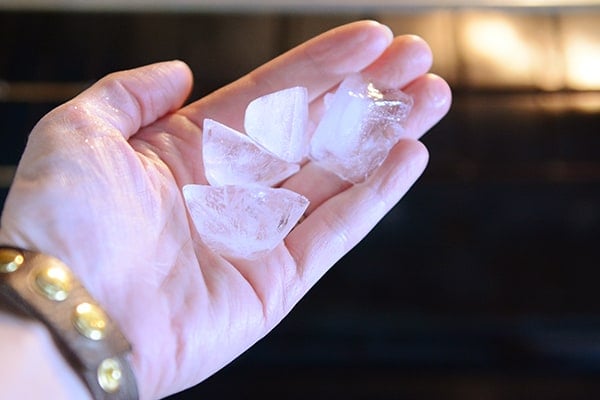
Easy Hack for Crusty French Bread
For a delicious golden crust, immediately before putting the bread in the oven, toss 3-4 ice cubes onto the bottom of the oven. Add the bread and quickly (but gently!) close the oven door.
The steam as the ice cubes hit the toasty bottom of the oven will lightly crisp up the outer crust as the bread bakes.
Important Note! Please consult your oven’s manual for details or caution on putting ice/water on the bottom of the oven floor – I’ve never had a problem, but everyone should do their own research and use their own best judgment (also take care not to toss the ice cubes on the glass oven door as it could crack).
If you are struggling to get a deeper golden crust on the French bread, try:
- Increasing the oven temperature by 25 degrees and/or
- Moving the oven rack up one position (I find my bread browns the best in the middle or upper middle area of my oven)
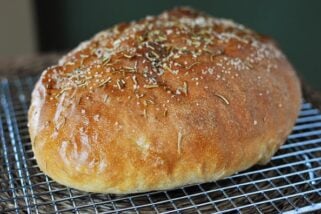
Whole Wheat French Bread
As noted in the recipe, French bread works quite well using whole wheat flour. I’ve found the best results are when using white whole wheat flour (red whole wheat flour makes a denser, heavier loaf).
I recommend subbing in half whole wheat flour to start and then adding more whole wheat flour as you continue to make subsequent batches of bread.
If using whole wheat flour, add a 2-3 minutes to the kneading time to help develop the gluten (also, adding a couple tablespoons of vital wheat gluten/gluten flour can also help the whole wheat bread bake up light and fluffy).

Helpful Tip: If you’ve struggled with your bread flattening out while baking instead of holding the perfect shape, you might try these French bread pans {aff. link}. I have them and LOVE them. I don’t use them every time I make this bread, but I do pull them out quite often (I also use them for this rosemary bread).
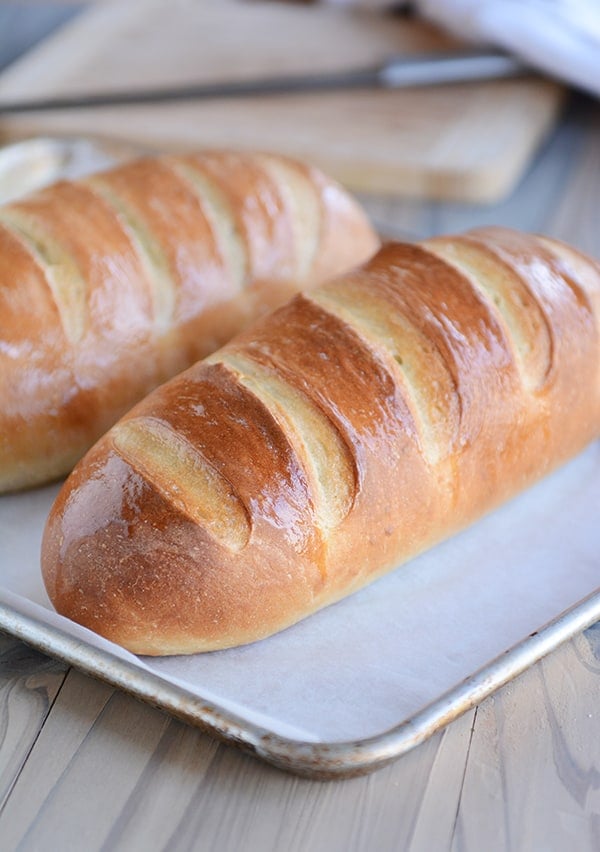
Perfect Homemade French Bread
With over 2,500 5-star reviews, this homemade French bread has become a favorite for so many of you.
Hundreds of you have let me know that you have been intimidated by homemade bread until you found this recipe! It is easy, foolproof, and will make you feel like a bread making rock star.
Helena says: Finally, after 5 failed bread attempts using other places recipes, this is THE recipe to use! Happy dance! Thank you for sharing this awesome recipe! Delicious bread!
Valerie writes: Such a fantastic, easy recipe. The “hands on” time is minimal and it comes out perfect every time. Thanks for sharing a recipe that’s become my “to do” dinner bread!
Nichole says: Followed instructions exactly! First time making any sort of bread ever. The bread turned out perfect!!!!
Pia commented: Hands down my go-to bread recipe. Today’s edition is 1/3 dark rye flour, with Italian herbs and caraway seeds mixed in and sprinkled with everything bagel topping. Yum! Best bread recipe ever, and so easily customizable!
FAQs for Homemade French Bread
Yes! Halve all the ingredients straight across – just keep an eye on the amount of flour and judge the final amount by the look and feel of the dough.
Yes, it freezes great (after baking and cooling).
Moving an oven rack up or down can help. In my oven, the bread browns best in the upper half of the oven. Also, you can try increasing the oven temp by 25 degrees.
Absolutely! You can mix the ingredients in a bowl with a spatula or spoon and knead by hand.
I always use the same amount interchangeably. Recently, I’ve heard that active dry yeast doesn’t need to be proofed in liquid first, but I always still do when using active dry yeast (no need to proof with instant yeast).
Yes, just keep an eye on baking time – smaller loaves may need less baking time.
One Year Ago: Harvest Pasta Sauce {Trader Joe’s Copycat}
Two Years Ago: Peanut Butter Cup Cheesecake with Chocolate Cookie Crust
Three Years Ago: Easy Homemade Egg Noodles {Step-by-Step Pictures Include Food Processor Method or By Hand}
Four Years Ago: Black Bean and Butternut Enchilada Skillet
Five Years Ago: Chocolate Chip Peanut Butter and Oatmeal Cookies
Easy Homemade French Bread
Ingredients
- 2 ¼ cups warm water, 110-115 degrees F
- 2 tablespoons granulated sugar
- 1 tablespoon instant or active dry yeast
- 2 ¼ teaspoons salt (see note)
- 2 tablespoons olive oil, canola oil, vegetable oil or avocado oil
- 5 ½ – 6 cups (781 – 852 g) all-purpose flour or bread flour (see note)
Instructions
- In the bowl of an electric stand mixer fitted with the dough hook, combine the water sugar and yeast. If using active dry yeast, let the mixture bubble and foam before proceeding (this can take 3-5 minutes). If using instant yeast, proceed with the recipe (no need to let the yeast activate).
- Add the salt, oil and 3 cups of flour and mix. Add in 2 1/2 to 3 more cups of flour gradually. The dough should clear the sides of the bowl and form a soft ball that doesn't leave a lot of dough residue on your fingers.
- Knead for 2-3 minutes until the dough is smooth. If the dough starts to cling to the sides of the bowl (or the center column if using a Bosch or other mixer with a center), add 1/4 cup of flour at a time until a sturdy but soft ball of dough forms.
- Rising Method 1: Leave the dough in the mixer, cover with a lid or towel, and let the dough rest for 10 minutes. Stir it down by turning on the mixer for 10 seconds or so. Repeat the "rest and stir down" cycle five more times.
- Rising Method 2: Instead of letting the dough rest for 10 minute spurts and then stirring it down, transfer the dough to a lightly greased bowl and cover with a towel or greased plastic wrap. Let the dough rise until doubled, about an hour or so, depending on the warmth of your kitchen.
- Turn the dough onto a lightly greased surface and divide in half. Pat each section into a thick rectangle, 9X13-inches or thereabouts (doesn't have to be exact). Roll the dough up starting from the long edge, pressing out any air bubbles or seams with the heel of your hand, and pinch the edge to seal. Arrange seam side down on a large baking sheet lined with parchment paper (I use separate baking sheets for each loaf).
- With a bread lame, razor blade or VERY sharp knife, cut several gashes at an angle on the top each loaf (you can wait to score the bread until after it rises, but it can easily deflate if the razor/knife isn't sharp enough).
- Cover the loaves with greased plastic wrap or a kitchen towel, and let rise until noticeably puffy and nearly doubled in size, about an hour.
- Preheat the oven to 375 degrees F and make sure an oven rack is in the center position. If you find your bread isn't browning as much as you like, preheat the oven to 400 or 425 degrees and/or move the oven rack up one position (watch carefully so the bread, especially the bottom, doesn't burn).
- Optional: for an extra golden, crisp crust, place the loaves in the preheated oven and immediately toss 3-4 ice cubes on the bottom of the oven. Close the oven door quickly but gently. (See note below!)
- Bake the loaves for 25-30 minutes until golden and baked through.
- If desired, brush melted butter over the hot loaves (this softens the crust a bit, so if you want a crispier crust, don't butter the top).
Notes


Recipe Source: adapted slightly from The Sister’s Cafe


Delicious, and so easy. I baked both loaves and froze one. Can’t wait to make French toast in the morning!
I’ve made this recipe about 4 times already and the bread disappears. Can you use loaf pans for this recipe or would it mess things up?
Yes, you can! The bottom of the bread is much softer, but a lot of people have done so with good results.
Hi. Delicious bread. But can more than our family of four needs at once. Can you tell me if it works ok to put leave the second loaf in the fridge and make it 12-18 hours later?
Usually bread dough like this does fine slow rising in the refrigerator like that.
Thank you!
And I just have to let you know…the next day bread was EVEN better.
Thank you Mel. This was my very first attempt at making bread. I woke up today, after practicing self quarantine for over a month now. I had a craving for fresh French Bread. I followed your recipe. The bread was / is FABULOUS!!! Thank you so much for sharing this incredible recipe. Because I had great success, this recipe is definitely fool proof!
Way to go, David!!
Can I make this without a mixer?
If I missed it in the post I sincerely apologise.
Yes! You can mix the ingredients together in a large bowl by hand (with a wooden spoon, etc). Just take care not to overflour the dough.
I made it with out a mixer. It turned great!
( It took about 30 minutes to need by hand)
Can the dough be made in a bread machine using this recipe? I twould save a lot of work.
Feel free to experiment! I don’t have a bread machine so I can’t give any expert advice.
The recipe (as stated) is ‘jaw droppingly delicious’. It was easy to use and worked like perfection. I used bread flour, so I used little over 6 cups of flour. The waterbath/ice crube trick really got this beautiful crust encasing the soft bread. Thank you so much.
I will definitely be making this again.
Made this , this morning because the dog got me up again.I digress turned out lovely but have made two , one by the kenwwod chef and the other in the panasonic bread maker so will compare when ready.
Thanks for a great recipe was easy.
I love this recipe … one of my loaves went flat as I was about to put it in the oven! I don’t know what happened but it happened fast, haha. I baked it anyway and it actually turned out just fine!
I made this bread out of boredom sitting at home – I did everything as the recipe said but it looks good though it became very hard- any idea why?
I may try again as it’s such an easy recipe.
Have you actually cut into it and tried it? I made it today and it looked and felt super hard and maybe overcooked, but when I cut into it it was super soft inside.
Hey mel!
This recipe is absolutely fantastic! Not only it is simple, its end result was better than any other bread I have made to date, and I make dough and bread every day at work.. I was blown away by how tender the insides were compared to the crispness of the crust, if you are struggling with that you probably need to cook longer. Thank you for this awesome recipe!
Hello! I’m pretty sure I didn’t make the dough the right consistency. I think it may be a bit too soft. It wasn’t sticking to the bowl anymore, but felt sticky when I transferred to a greased bowl. Anyways, I only want to cook one loaf. Can I freeze the other dough loaf? Or should I cook both? If I can freeze, what is best way to do that? Thank you!
I’ve only ever frozen the baked loaves, but you could try freezing the dough
This recipe is my go to for delicious French bread. If you want the bread to be lighter, you can knead it for an extra 5 minutes.
The critical part of this recipe is to make sure your yeast activates by producing foam. If you don’t have a thermometer to indicate water temperature, I highly recommend purchasing one.
Perfect. Seriously it came out perfect.
I’ve made this bread 4x within the last 3 weeks. My husband goes COMPLETELY crazy over it. It’s easy and delicious.
Since there are only 2 of us in the house, I chunk the bread up in 4’s, wrap it in wax paper then foil and pop in the freezer. When we’re ready to eat our portion, I pop in the micro for 30-45 seconds and it comes out tasting like you JUST baked it. Y’all. This is so good.
I am about to make this bread! If I am using active dry yeast do I also use 1 tablespoon or the whole package (I believe about 2 1/4 tablespoons)?
You should only use a tablespoon and not the whole package.
Yep!
My daughter (8) said it’s the best bread she’s ever had.
I have never had much success with bread but made this out of boredom while “Staying Home”. It was AMAZING! I was sure that I had some crazy beginners luck but I made it again. Also AMAZING! I used rapid rise yeast and poured a small amount of boiling water in a small oven proof bowl on a rack below the bread for the steam effect. If I can make this, anyone can make this. Winner!
So good! I was craving garlic bread, so I came here to find an easy French bread recipe. This was super easy to make and came out crispy on the outside and soft and fluffy on the inside (thanks to the ice cube trick!). I would have added more salt though (I used 3/4 Tbsp).
VERY GOOD STUCK TO THE RECIPE better than store made an much cheaper
This was my first attempt ever at making bread, and it couldn’t have been easier than with this recipe. I followed it to a T, with the only difference being I brushed it with an egg wash, and it turned out delicious. I threw in the ice and it did indeed make a crunchy, crumbly exterior. My neighbor loved it, and I think it will be a family staple.
After trying and failing with two other recipes I decided to try one more. This was fantastic!! I added the full six cups but had to add more and unfortunately I just eyed it and don’t have an accurate measurement. I am not well-versed in the skills of bread making and was nervous trying to determine when I had added enough flour. I let my kitchen aid do the bulk of the work but kneaded a few more times before placing it in the bowl for the first rise. My husband and daughter were very pleased! Thank you so much.
You know I don’t know that it’s necessarily French bread, mine kind of came out tasting like Olive Garden breadsticks but with crust, but I’m also not complaining…
Hi…can you use self rising flour instead of yeast? I am not a baker so hopefully this is not a stupid question. Lol
No, unfortunately this recipe needs the yeast for rising (not a stupid question, by the way!)
This was a huge hit in my home. Made this yesterday with my youngest (10) who is bored because of the stay home orders. The bread was delicious! We used the second loaf to make french bread pizzas today for lunch. I am adding this to my go to recipe collection.
Too salty! Do not add so much salt.
This bread recipe is amazing.
1. The second rise I topped with some roasted veggies.
2. Coated with an egg wash
3. Covered loosely with parchment paper to protect the veggies.
I could seriously eat the entire loaf! Wish I could post a picture.
This bread is more like Italian bread, not French. French bread does not have sugar nor oils in it. This bread was too sweet and flavorless for my liking.
Italian or french or IRISH IT TASTED GREAT
Isn’t that Italian bread? I thought French bread did not include sugar and oil.
How do you store French bread so it maintains its crust?
It will inevitably soften over time…I usually store in a bread bag so I don’t have a great way to store it to keep the outside crusty (without drying out the entire loaf).
Oh my heavenly French bread!!! Thank you Mel, I’m going to gain the Covid-19# with all of these delicious recipes!
Made this twice and love it! Shared with neighbors who are requesting it again! Going to make it again today but attempt to use small loaf pans to make it easier to share. Fingers crossed!
Made it today and it came out perfect on the first try. My oven took the full 30 minutes to get the nice golden finish. Thank you!!
Yes brenda 30 mins perfect
Made this today, and wow so perfect! One thing I did do, after removing the first loaf and putting the butter on, it got soft. So, I tossed it back in for 5 minutes. PERFECTION! Thank you!!! My son is doing online school bragging to his friends 🙂
This is a perfect recipe for french bread. It man two beautiful loads of bread, delicious!
Hmmmm. This recipe was just ok. I have made bread before so not my first time. I may have needed more flour because the dough seemed too soft. Bread came out more dense than I like. I didn’t get the browning I would like but I DID forget the ice. Also I like a yeastier flavor.
I made this once already and it turned out great. Can I divide the dough and bake in two regular loaf pans? I would Like to use for sandwiches.
I haven’t tried that but you could definitely experiment…
I made this today halfed it for one loaf only issue I had was it did flatten some. The second issue is not very browned after 34 minutes. Any ideas? Longer cook
Sometimes moving the oven rack up a level will help the bread brown better. If it’s flattening, it sounds like it may need a bit more flour to hold structure so it rises up instead of out.
We noticed as soon as we buttered the bread when it came out , it browned up! Made this earlier and omg. Tha is for this delicious recipe.
I have a hard time picturing step 5, not sure what to do here.
How can I help? You basically want to roll the dough up into a log or loaf shape, pressing the seam so it seals. Does that help?
Any advice for making the recipe into individual sized loaves? I’d like to use them for sandwiches next week. Would the cooking time change? Thanks in advance!
It should work really well! You could probably cut the baking time down by 5-6 minutes.
Thank you!!!!
A couple of questions: first, rather than risking your stove by tossing ice cubes in it, couldn’t you put an empty cake pan in the bottom of the oven and toss the ice cubes into that when you put the loaves in to bake? And second, with almost all ovens and microwaves having a proofing setting these days, could you use that setting instead of conventional rising based on time?
I don’t have a proofing setting on my oven or microwave so I’m not sure, but you could definitely try (sounds like it should work great!). I’ve heard of some people saying their heated glass baking pans cracked when they came into contact with something cold so I wouldn’t recommend that, but if the pan is metal, that should work.
I used my proofing setting on my oven. I still let it rise for about an hour for both rises. It turned out amazing but I was silly and let it cool on the pan instead of a rack so I lost the great crustiness of the outside. Definitely won’t make that mistake again!
I’m on social distancing in Canada here, and I decided to learn to bake. My baking skill is pretty much zero, I’ve made buns 3 x and bread once in the last few day and I just made this bread… it’s a keeper!! My family is beyond happy with it also! So thank you!!
Easy to follow and turned out great. Thanks for the recipe!
Hi Mel
I will try this French bread tomorrow can’t wait actually! question why do you say bake the loaves separately ? what do I risk if I bake them at the same time? And does the second loaf over rise while it sits waiting to be baked? can or should I put corn meal at bottom of pan?
thanks
I am unable to fit both loaves on one baking sheet so I bake them separately but if you can bake them at the same time, definitely do that!
I made this bread today and it came out great. I followed the recipe and times, especially for the rise. After the initial 3 cups of flour, I used another 2 1/2 to get it to the right consistency, and kneading it by hand a few times got it really smooth….that nice dough feel. I put the cuts in before the second rise. I’m not a frequent bread-baker and I found this recipe easy and produced delicious bread.
Just made this and it’s perfection!!! Thank you!
SPOILER ALERT: I never made French Bread Baguettes before today – the fluffy inside, crunchy outside, and beautiful golden brown loaves of joy in the grocery store always seemed like something I could never achieve. Mel, you are an absolute genius and thank you for sharing this incredible recipe with the world! I followed exactly as recommended, used bread flour, and a good ol’ fashioned glass bowl, wooden spoon, and my hands. Kudos to you for the the luscious smell of fresh bread still lingering here as I wonder where the first loaf has disappeared to! 6 stars if I could give it! 🙂
So easy to do with a stand mixer! I have made this recipe a couple o times in the last 2 weeks and it turns out perfectly every time! Thanks for an easy, tasty, and quick to pull together recipe!
Looks lovely. I would love to try it myself, I have a few questions if you may be kind enough to answer.
-I only want to bake one loaf, how should I go about dividing the ingredients then?
-Also since I don’t have a stand mixer- can I use a hand mixer with the kneading hook? Or would I get better results kneading by hand?
-Is it ok to use the ‘default’ baking tray that you get with the oven? It has taller edges than the one shown in your recipe.
-Is it crucial to slash the top of the bread or is it mostly for the appearance?
Thanks!
You can divide the ingredients exactly in half for one loaf. I would suggest kneading by hand. I’m not sure what default baking tray you are referring to – I’m sorry! The slashing on top helps the bread rise.
I made the bread taste great but did not slice the top and it’s not crispy the bottom is not the top I did pour melted butter on bread please advise
Thanks for sharing this. Posted a while ago, but it is still reaching people! In COVID-19 lockdown with the immediate family in Northern California. We just received active dry yeast and 24 lb bag of flour today. Will use your instructions to make some awesome fresh bread! (Baker’s lame has been ordered and should be here later this week.)
Thanks for well described steps. Stuck at home due to our state being on lockdown and I was actually able to make this. Also, fun to do with your kiddos so they can learn life skills while they’re at home.
This is excellent homemade bread, and easy to make. My only wish is that it had a crispier exterior, as it had softened as it cooled.
Made my first loaf. Thanks! A nice distraction during these times. Always good to break bread with family.