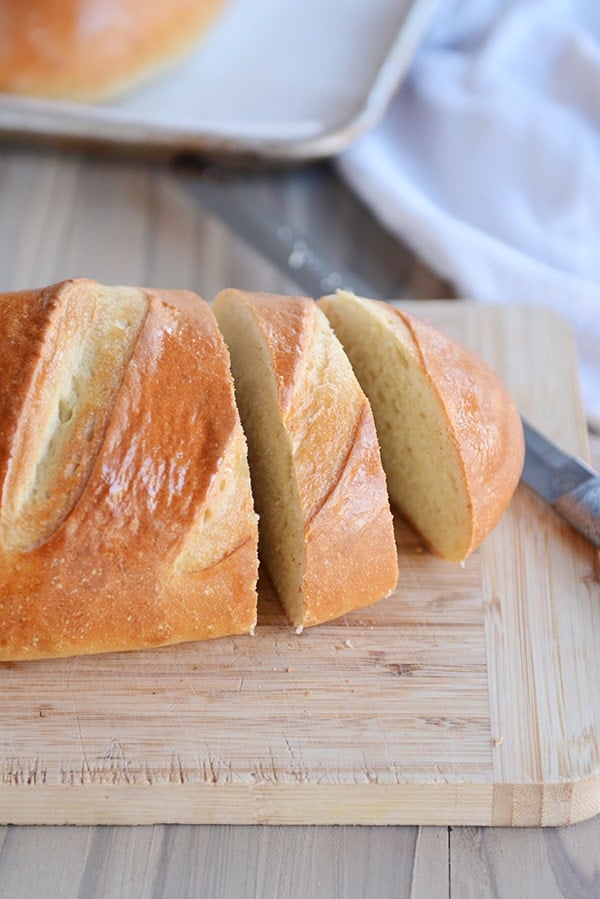
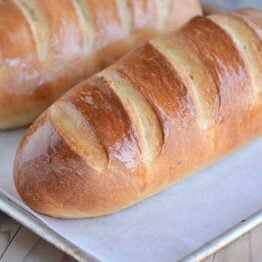
Easy Homemade French Bread
Homemade French bread has never been easier! This simple recipe produces a light and fluffy loaf of French bread that will rival any bakery!
This easy homemade French bread is so simple and perfect for a bread making beginner.
But as you can see from all the comments below, it’s just as valued by expert bread makers, too!

Making French Bread Dough
This straightforward bread dough can be made in a stand mixer or by hand.
- Warm water
- Yeast (instant or active dry yeast)
- Bit of sugar and oil
- Salt
- Flour (all-purpose or bread flour)
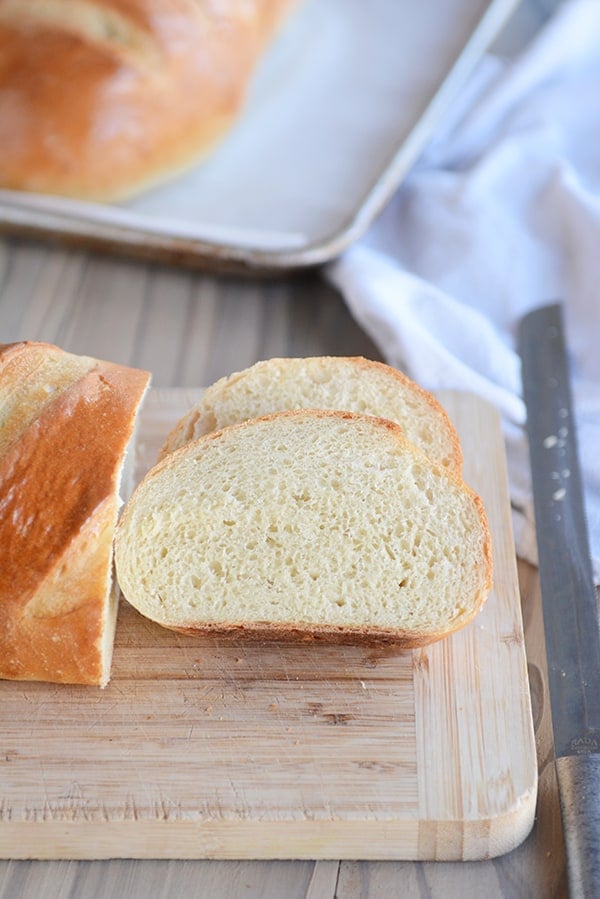
At the start, the dough will look shaggy and rough.

But as it kneads, it will become soft and smooth.
The most important part of this dough (and other yeast doughs) is to judge the amount of flour by the look and feel of the dough rather than the exact amount of flour called for in the recipe.
Factors such as humidity, elevation, room temperature, how we each measure flour, and more can affect the amount of flour added. So don’t stress about precise flour measurements and continuously feel the dough to achieve a soft dough that is slightly tacky but doesn’t leave a lot of residue on your fingers.
Too little flour and the dough will be a mess to handle. Additionally, the bread won’t hold its shape as it rises and bakes.
Too much flour and the dough won’t rise well and the bread will be tough and dense.

Two Methods for Dough Rising
In the recipe, there are two methods to letting the dough rise:
- Leave the dough in the mixer, cover with a lid or towel, and let the dough rest for 10 minutes. Stir it down by turning on the mixer for 10 seconds or so. Repeat the “rest and stir down” cycle five more times.
- Transfer the dough to a lightly greased bowl and cover with a towel or greased plastic wrap. Let the dough rise until doubled, about an hour or so, depending on the warmth of your kitchen.
I alternate between the two methods depending on my mood. The 10-minute increment rising method is unique to this original French bread recipe. The idea is that allowing the dough to rise this way produces a lighter crumb.
But the more traditional rising method also results in a delicious, fluffy loaf.
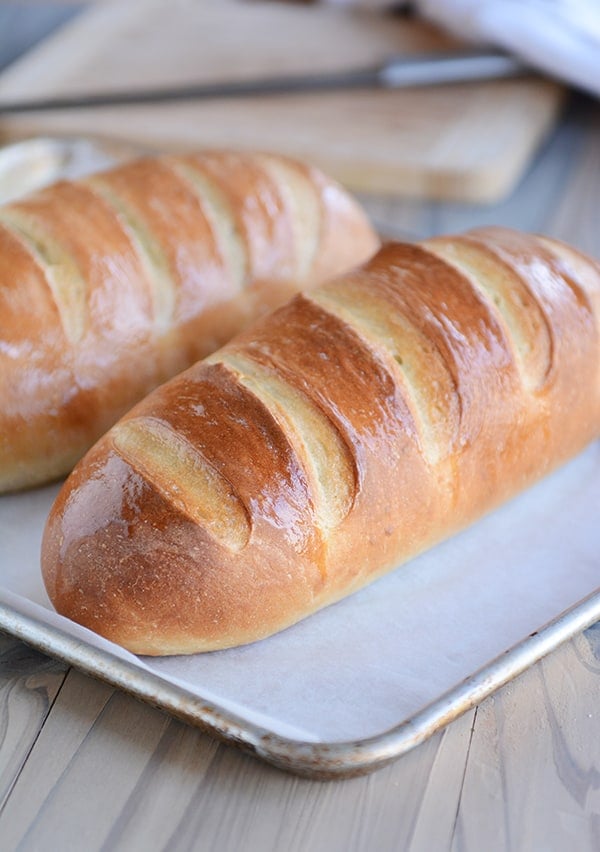
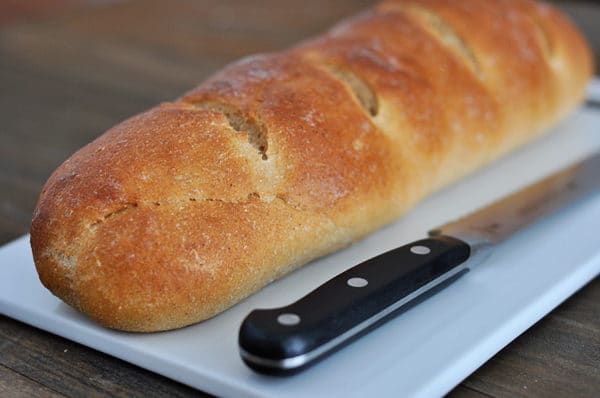
How to Shape French Bread Loaves
The question I get asked the most about this easy homemade French bread is how to shape the loaves.
The loaves can really be made any size or shape; I usually end up making 12-inch loaves, but if they end up being a bit thinner or chubbier, it’s no big deal!
Press each portion of dough into a flat rectangle and fold the bottom edge up and over the dough, pressing the seam flat with your hand.

Then, roll the dough up again to meet the top edge.
Fold the top edge over and press or pinch lightly.

Take the end of the bread dough and fold it up and over an inch or two to give an even thickness all the way down the loaf.
Pinch to seal the end. Repeat on the other end of the dough.
Then, deliberately and thoroughly pinch and seal the entire length of the loaf.

How to Score the French Bread Dough
Scoring the bread dough (in my house, also called: slashing or gashing) helps the dough rise better AND prevents it from cracking in unexpected places while baking.
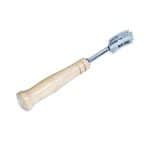
Using a bread lame for this task is extremely helpful. A bread lame is a long stick or utensil with a razor blade on the end. The razor is used to make thin cuts in the dough.
If you don’t have a bread lame, using a clean, sharp razor blade or an extremely sharp kitchen knife can work. Be aware that if the knife isn’t sharp enough, it’ll likely deflate the dough.
The bread loaves can be scored before or after the final rise. I prefer to do the slashing and gashing before they rise as I’ve had one too many loaves of risen bread deflate at the first touch of the razor, and there is nothing so soul crushing as when that happens.

Let the bread loaves rise until noticeably puffy before baking.

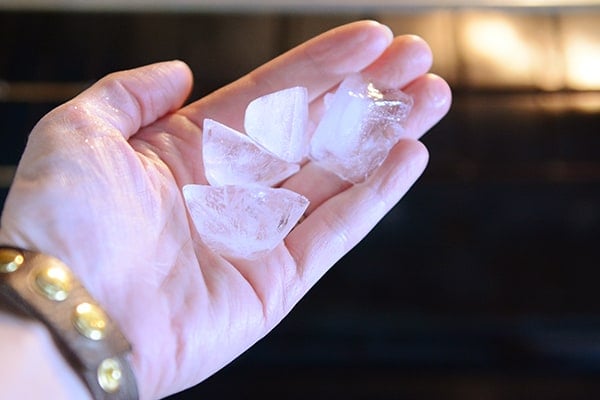
Easy Hack for Crusty French Bread
For a delicious golden crust, immediately before putting the bread in the oven, toss 3-4 ice cubes onto the bottom of the oven. Add the bread and quickly (but gently!) close the oven door.
The steam as the ice cubes hit the toasty bottom of the oven will lightly crisp up the outer crust as the bread bakes.
Important Note! Please consult your oven’s manual for details or caution on putting ice/water on the bottom of the oven floor – I’ve never had a problem, but everyone should do their own research and use their own best judgment (also take care not to toss the ice cubes on the glass oven door as it could crack).
If you are struggling to get a deeper golden crust on the French bread, try:
- Increasing the oven temperature by 25 degrees and/or
- Moving the oven rack up one position (I find my bread browns the best in the middle or upper middle area of my oven)
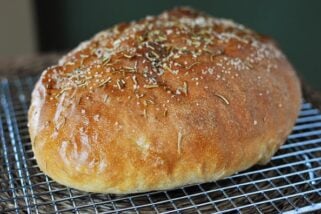
Whole Wheat French Bread
As noted in the recipe, French bread works quite well using whole wheat flour. I’ve found the best results are when using white whole wheat flour (red whole wheat flour makes a denser, heavier loaf).
I recommend subbing in half whole wheat flour to start and then adding more whole wheat flour as you continue to make subsequent batches of bread.
If using whole wheat flour, add a 2-3 minutes to the kneading time to help develop the gluten (also, adding a couple tablespoons of vital wheat gluten/gluten flour can also help the whole wheat bread bake up light and fluffy).

Helpful Tip: If you’ve struggled with your bread flattening out while baking instead of holding the perfect shape, you might try these French bread pans {aff. link}. I have them and LOVE them. I don’t use them every time I make this bread, but I do pull them out quite often (I also use them for this rosemary bread).
Perfect Homemade French Bread
With over 2,500 5-star reviews, this homemade French bread has become a favorite for so many of you.
Hundreds of you have let me know that you have been intimidated by homemade bread until you found this recipe! It is easy, foolproof, and will make you feel like a bread making rock star.
Helena says: Finally, after 5 failed bread attempts using other places recipes, this is THE recipe to use! Happy dance! Thank you for sharing this awesome recipe! Delicious bread!
Valerie writes: Such a fantastic, easy recipe. The “hands on” time is minimal and it comes out perfect every time. Thanks for sharing a recipe that’s become my “to do” dinner bread!
Nichole says: Followed instructions exactly! First time making any sort of bread ever. The bread turned out perfect!!!!
Pia commented: Hands down my go-to bread recipe. Today’s edition is 1/3 dark rye flour, with Italian herbs and caraway seeds mixed in and sprinkled with everything bagel topping. Yum! Best bread recipe ever, and so easily customizable!
FAQs for Homemade French Bread
Yes! Halve all the ingredients straight across – just keep an eye on the amount of flour and judge the final amount by the look and feel of the dough.
Yes, it freezes great (after baking and cooling).
Moving an oven rack up or down can help. In my oven, the bread browns best in the upper half of the oven. Also, you can try increasing the oven temp by 25 degrees.
Absolutely! You can mix the ingredients in a bowl with a spatula or spoon and knead by hand.
I always use the same amount interchangeably. Recently, I’ve heard that active dry yeast doesn’t need to be proofed in liquid first, but I always still do when using active dry yeast (no need to proof with instant yeast).
Yes, just keep an eye on baking time – smaller loaves may need less baking time.
One Year Ago: Harvest Pasta Sauce {Trader Joe’s Copycat}
Two Years Ago: Peanut Butter Cup Cheesecake with Chocolate Cookie Crust
Three Years Ago: Easy Homemade Egg Noodles {Step-by-Step Pictures Include Food Processor Method or By Hand}
Four Years Ago: Black Bean and Butternut Enchilada Skillet
Five Years Ago: Chocolate Chip Peanut Butter and Oatmeal Cookies
Easy Homemade French Bread
Ingredients
- 2 ¼ cups warm water, 110-115 degrees F
- 2 tablespoons granulated sugar
- 1 tablespoon instant or active dry yeast
- 2 ¼ teaspoons salt (see note)
- 2 tablespoons olive oil, canola oil, vegetable oil or avocado oil
- 5 ½ – 6 cups (781 – 852 g) all-purpose flour or bread flour (see note)
Instructions
- In the bowl of an electric stand mixer fitted with the dough hook, combine the water sugar and yeast. If using active dry yeast, let the mixture bubble and foam before proceeding (this can take 3-5 minutes). If using instant yeast, proceed with the recipe (no need to let the yeast activate).
- Add the salt, oil and 3 cups of flour and mix. Add in 2 1/2 to 3 more cups of flour gradually. The dough should clear the sides of the bowl and form a soft ball that doesn't leave a lot of dough residue on your fingers.
- Knead for 2-3 minutes until the dough is smooth. If the dough starts to cling to the sides of the bowl (or the center column if using a Bosch or other mixer with a center), add 1/4 cup of flour at a time until a sturdy but soft ball of dough forms.
- Rising Method 1: Leave the dough in the mixer, cover with a lid or towel, and let the dough rest for 10 minutes. Stir it down by turning on the mixer for 10 seconds or so. Repeat the "rest and stir down" cycle five more times.
- Rising Method 2: Instead of letting the dough rest for 10 minute spurts and then stirring it down, transfer the dough to a lightly greased bowl and cover with a towel or greased plastic wrap. Let the dough rise until doubled, about an hour or so, depending on the warmth of your kitchen.
- Turn the dough onto a lightly greased surface and divide in half. Pat each section into a thick rectangle, 9X13-inches or thereabouts (doesn't have to be exact). Roll the dough up starting from the long edge, pressing out any air bubbles or seams with the heel of your hand, and pinch the edge to seal. Arrange seam side down on a large baking sheet lined with parchment paper (I use separate baking sheets for each loaf).
- With a bread lame, razor blade or VERY sharp knife, cut several gashes at an angle on the top each loaf (you can wait to score the bread until after it rises, but it can easily deflate if the razor/knife isn't sharp enough).
- Cover the loaves with greased plastic wrap or a kitchen towel, and let rise until noticeably puffy and nearly doubled in size, about an hour.
- Preheat the oven to 375 degrees F and make sure an oven rack is in the center position. If you find your bread isn't browning as much as you like, preheat the oven to 400 or 425 degrees and/or move the oven rack up one position (watch carefully so the bread, especially the bottom, doesn't burn).
- Optional: for an extra golden, crisp crust, place the loaves in the preheated oven and immediately toss 3-4 ice cubes on the bottom of the oven. Close the oven door quickly but gently. (See note below!)
- Bake the loaves for 25-30 minutes until golden and baked through.
- If desired, brush melted butter over the hot loaves (this softens the crust a bit, so if you want a crispier crust, don't butter the top).
Notes


Recipe Source: adapted slightly from The Sister’s Cafe


I would like to make this in one loaf, preferably in a bakers pan. What temperature and length of time would I use? I have clay pans (Emile Henry).
I love your recipe.
I’m making bread pudding and have always used French Bread.
Thank you!
I don’t have or use clay pans so I’m not sure how they bake, but you could try 350 degrees for 30-35 minutes and see how that goes. Good luck!
I would like to make this in one loaf, preferably in a bakers pan. What temperature and length of time would I use? I have clay pans (Emile Henry).
I love your recipe.
I’m making bread pudding and have always used French Bread.
Thank you!
What would be some suggestions if I wanted to cook both loaves at the same time? Use a bigger baking sheet and rotate during cooking? Does it matter if loaves are horizontal or vertical when cooking two? Also does this freeze well after baking & what’s the best way to reheat ? Thank you so much!
It doesn’t or shouldn’t matter how the loaves are shaped. You can experiment cooking both loaves at once by rotating the pans. Yes, it freezes well after baking.
How do I half this recipe. I only want one loaf. It looks really good but I know you’re not supposed to just half everything. So how should I half this properly.
I would suggest halving all the ingredients – should work just fine (just keep an eye on the flour amount and judge the exact amount based on the texture of the dough).
I just made it and it’s so good! It was so easy and I can’t wait to make it again!
The ice cubes tip was great. Recipe turned out a perfect french bread. Made a garlic bread on 1 out of the 2.
I’ve made this recipe a couple of times now and while it is easy… this bread has NO flavor. It’s incredibly bland… maybe I’m doing something wrong but I did follow directions and added ice cubes to oven.Next time I might try to experiment with adding more salt or sugar?? Or I’ll probably just look for a different recipe.
I have seen some other recipes call for baking at 400 or 450. What is the reason for 375? Genuinely curious as to what the higher temp does for it? Would it rise more or have a thicker crust?
Every recipe has differences – I like the 375 degree temp for a slightly lighter, less dense crust.
I wanted some French bread to go with a pot of chicken soup and didn’t want to venture into a store just for a baguette. This fit the bill perfectly! I think I could have used a little more flour – at the end of the 1st rise, it was just a bit stickier than I thought it was at the beginning. They still turned out great! Most of my bread making has been rye breads in pans. I tried to minimize loaf spread by placing wine bottles under the parchment on each side of each loaf during the 2nd rise. No idea if this was actually beneficial or not but they came out looking like loaves of French bread! I’m looking forward to making future batches. Thanks!
Kevin! Hopefully you solved my issues of the bread spreading out! Using wine bottles!! Brilliant. My bread is always 4 feet wide and 1 inch high!! Hope this does the trick! Thanks!
This was my second time making bread and I loved this recipe!!! It was so easy and it turned out amazing! Very nice crunch on the outside and very fluffy on the inside!
Has anyone tossed the ice cubes in a sheet pan underneath the baking bread? I don’t want to break the oven. It’s not mine.
I did this today and it worked out! I live in an apartment and wasn’t willing to risk ruining my landlords oven
I am not a baker! This recipe caught my eye and so I said why not! OMG! I even surprised myself with how good it turned out. The whole family loved it! One of my son’s said “ wow, it looks like the one from the store”.
I have bookmarked this recipe for future needs. I will for sure bake this again!
Great recipe Mel! I usually do my french stick with sourdough but I was in a hurry and this turned out really well. I especially liked the ice cube trick! I sometimes put a dish of water in but last week I broke a dish in the oven and this trick is much easier!
Im not sure why others fail at this recipe, I make it on average twice a week. I do sometimes add a quarter cup of sourdough starter (because I have the starter but not the patience to make that bread) in place of the last quarter cup of water. This does give the bread a bit of additional flavor for those who feel it is lacking.
Excellent recipe, first time success, just need confirmation of “cup” amount in grams for U.K. going to try more of your recipes. Thanks for helping me take a step forward.
I halved this recipe and boy does my family wish I hadn’t. I went with the original amount of salt and can see why the poster cut it down a bit. It wasn’t too overwhelming, but it was a lot of salt flavor. All in all it tasted great and the texture was perfect, I’ll definitely be using this recipe again.
Has anyone ever used a pizza stone to bake these on? I was thinking it might do a great job crisping them (of course they would be on parchment paper that would first go on the pizza stone until they are crisp enough on the bottom to remove the paper).
Hello,
First let me start by saying that this was my very first time making bread from scratch. I feel like I followed the recipe but my bread came out flat and pale. Did I under or over proof it? Also, how do you get a nice golden color on the bread?
It does taste good, so I’m definitely going to eat but I want to be able to improve it.
Hey Katie, just scrollin’ the comments and noticed yours, without any reply. 🙁
Flat is a very big problem, and could be related to the following? In order of importance?
Yeast. Internet “proofing yeast”, which will give you tons of info related to your specific yeast and techniques. Get this right e.g. make sure your yeast is proofing or bread-making will just go sideways. Thermometer for your proper proofing water temp is the only tool I might suggest.
Kneading. Might as well internet that as well. After making sure yeast is truly active, an appropriate amount of kneading for your recipe is pretty important. Sometimes less is better…for a beginner I would pick a less is better recipe. Try inter-netting “no-knead bread”, and I bet you’ll get very rewarding recipe ideas.
Proofing. All about the yeast first, and then kneading. if it ain’t rising, those steps failed.
if this advice fails…I’m sorry. Maybe replace your yeast (it can go bad quick), and start again! Bread can be very easy, but has some tricky beginnings before you can bake multiple loaves a day!
I am vegan and love this recipe made it so many times. I was wondering if I can make them into like small bread loaves instead of two big ones. If so would the temperature or time change?
Yes, absolutely! The baking temperature stays the same but you might want to check them about 5-7 minutes early (depending on the size of the loaves).
My second time making this & it has been great both times. I used Option #1 for rising.
Very easy to make in the stand mixer, almost zero cleanup!
My go to recipe for French bread, we use this for pizzas, meatball subs or just as a side with dinner. I’ve made it probably 10 times and always perfect
Horrible. Dry and crumbly. Worst recipe ever
Perhaps you didn’t follow the recipe? I just made it and they came out perfect.
This a great recipe! Delicious bread! Great texture. I added “Everything bagel” seasoning after the egg wash to one of those loaves, and it was delicious.
This recipe is delicious. I’ve never made French bread before and it turned out great. !, thanks for the recipe. I will be making this bread again. I wanted French bread for beef dips but didn’t want to go out… yumm
Why is there no egg?
Hard as a rock
Full offence, you did something wrong here. I’ve made this like 3 times already and its always turned out very soft and fluffy, not “hard as a rock”
Maybe you used dead yeast and burnt it?
Also tons of breads don’t use eggs. Dairy is not a requirement for delicious.
I have seen other French bread recipes suggest leaving a cast iron skillet in the lowest rack and using that as the place to put your ice cubes or just a cup of boiling water, to create the steam. No need to worry over whether the oven can handle the ice cubes.
My wife stores our cast iron skillet in the oven when the oven is not in use., so I would use the skillet for the above technique.
Very easy and very good! I have also mixed it up with wheat flour, turns out wonderful every time ! I divide into four loaves, bake and then freeze a couple loaves! Nothing like homemade bread! I’m not sure why a few people have given negative comments because this recipe is as I said very easy and delicious! Thank you for sharing!
I make your white sandwich bread every weekend. Absolutely awesome! I totally trusted your recipe to venture out to French Bread. It’s baking now and so far has been absolutely perfect! I used method 1 for the first rise and the dough feel was great when done. I was daring and scored the bread after the second rise. Had to adapt and use a thoroughly cleaned cutter that normally serves in the garage. Super sharp and worked like a charm. Have now ordered a lame only addition was an egg wash and a valiant attempt to cook two loaves on one pan. If that doesn’t work, that’s on me, the product going in was perfect. Baking keeps me happy, so this is a great addition to my repertoire.
The finished product was amazing! Loved by my whole family and half a loaf sent home for lunch box treat for the grandkids ❤️
Made this bread for the first time tonight. We all loved it, especially the crisp crust! I have been baking bread for some time now, and really enjoy finding new recipes! I only baked one loaf, because I decided to freeze half of the dough after the first rise (I’ve done that before with other bread doughs and have had success). I would’ve liked to see a video on shaping the dough, as my loaf did expand (widen) a bit more than I would’ve liked it to, and it was a very long loaf! I felt like the texture/feel of the dough after being kneaded was good, but perhaps I will add a bit more flour next time and it won’t spread out as much. I have always done an egg wash over my breads before baking, and so did that with this too. It did have a nice shine. I used a lame to slash it, as well. Overall, delicious bread and easy to make! Thanks for sharing and I’ll be watching for that video!
This is an excellent french bread recipe that doesn’t last long in my house. Yes, it is that good.
This is now my go to recipe! Everyone thought that it was bakery grade. One suggestion for cutting slits that works well for me is using scissors. It helps avoid deflation.
First time making bread. Brand new kitchen aid mixer. Came out perfect! I did the pit in a bowl for an hour rise and shaped mine into round loaves. My hubby loved it. Excellent flavor nice crust. Thank you Mel.
Seriously, 1 Tablespoon of active dry yeast? I figure you would’ve caught the mistake before 12 years went by, but a Tablespoon?
I am kind of confused by your comment. How is this a mistake? I’ve been making this recipe with 1 tablespoon yeast for almost 15 years – turns out great!
I think what Alex means is a tablespoon of active dry yeast is a TON of yeast for homemade breads. Most NY style pizza recipes call for 1/4 teaspoon of yeast, because using more than that causes the bread to taste very yeasty and turns it grey/brown in color. This recipe is similar to most pizza recipes, except for the amount of yeast. That is a lot of yeast.
Most bread recipes call for a packet of yeast, which is 2 1/4 teaspoons. A tablespoon is three teaspoons. Having made this recipe along with many others, this recipe uses less yeast per loaf that most other bread recipes. Pizza dough doesn’t need as much yeast because it ends up being flat anyway. I’ve never had a problem with bread being too yeasty either, and this is a phenomenal recipe. You did a great job Mel, thank you for the great recipe!
This may be why several comment that their loaves were flat – they may have used 1 packet instead of 1 tablespoon.
Sometimes I think trolls like this just have zero life. I just made these and totally came out perfect with 1 TABLESPOON of yeast… which also happens to be the exact amount they give you in the single serving packets….
This is my favorite bread recipe! I make it every week for my family. However, we are moving to a state with a much lower altitude than where we currently live. Do you have any suggestions for what I may need to change?
Hi Laura, I would suggest making the bread as is and see how it goes. Chances are you may not need to change much (possibly adding a bit less flour but maybe not)
I love this recipe! Sometimes I add butter Cinnamon and sugar before I roll it up. My daughter who has five kids puts cheese and ham in before rolling. Best recipe ever, thanks so much.
Had to scroll for 5 minutes are so to get to the recipe. Did not bother with the recipe.
Not sure if you know, but I don’t want anyone missing out on this great recipe…….. there is a link directly under the title at the top of the post that reads “jump to recipe”. If you click the link, you can bypass the blog post.
Hi Mel,
Sorry for the extreme rudeness and lack of brain power from some of your commentors. I hope that doesn’t discourage you from releasing recipes. Thanks for all you do!
Thanks for your kindness, Allison! I’m not going anywhere! 🙂 But I really do appreciate the comments that are civil and kind (even if they don’t love the recipe!).
Tastes ok. Ended up flat and pale and not at all appealing looking. Not sure what I did wrong.
If it went flat, you most likely over proofed it. “French” bread isn’t meant to be incredibly flavorful. The goal is a pretty neutral bread you can dip, or add flavor on top of.
Mine is also pretty flat and pale, unfortunately.
Thank you! I chose this recipe because I just bought a perforated sandwich bread pan that would accommodate five, foot-long subs. This recipe worked out perfect. I tossed everything in the bread machine on dough cycle. I should have transferred it to another bowl because it rose to the very top, thankfully didn’t spill over. But I really loved the crisp crust and tender interior. We enjoyed them as carne asada tortas and will have them for cheesesteaks. Also looking forward to trying other readers creations.
My family loves the bread and asks me to make it once or sometimes twice in a week. It is so easy! I add garlic salt just before I place the bread in the oven. Thanks.
The hardest part of this recipe is the waiting! Amazingly flavorful and delightful. I’m going to devour the rest of the loaf before my husband gets here.
I just ran a crossed this today, I have made 2 loads, one soft crust other crunchy. Have to say it was really good bread.
I don’t normally comment on recipes, but this one is so good and foolproof that I felt compelled. My rating is for the recipe exactly as written. I’ve also found that it makes excellent sandwich bread. I follow the recipe to the end, but instead of rolling into loaves, I put into two 9” loaf pans. Rise and bake time is no different. I also like to make one of the loaves with fresh chopped rosemary. This is my go to recipe for every day bread!
Kevin! Hopefully you solved my issues of the bread spreading out! Using wine bottles!! Brilliant. My bread is always 4 feet wide and 1 inch high!! Hope this does the trick! Thanks!
I am a novice bread baker trying to improve my skills. I have made this recipe twice and it turns out so beautifully every time! Thank you for such an easy recipe that yields perfect results! I would love to try the whole wheat version next.
I’ve used this recipe countless times and it always comes out amazing. The ice trick changed my life. This is the perfect french bread!
Needed a quick French bread for family dinner tonight, made this recipe, both loaves look beautiful, house smells wonderful – can’t wait for the family to show up – thanks for the recipe!
Can you cook this on foil instead of parchment paper?
All I had was wax paper or foil.
I just baked directly on the baking sheet, as I also did not have parchment.
The crust didn’t stay “crunchy” once it cooled. Any suggestions?
No punching down after the second rose method?
You kinda end up punching it down when you roll it out into the rectangles, so not really necessary.
First time ever making any kind of bread. I baked it for 25 minutes, took it out put some butter . Then put it in for another 5 minutes.
The crust is golden…but not brown. Also, it’s kind of crumbly, but it doesn’t actually crumble. I was making this for bruschetta …but I don’t think it will work.
Where did I go wrong? Should I have baked it longer? Suggestions?
Have you checked your oven temperature? (I recognize I’m a few months late!)
I had this struggle when my oven was dying and the temperature wasn’t actually hitting my set point.
I have made this recipe multiple times. I love it and so does everyone else who eats some. It is gone within two days or less. I have also used it to make garlic bread and it was the perfect bread to do so.I recently got whole wheat flour and want to use it in this recipe by substituting all the all purpose flour for whole wheat. You mention adding a couple of tablespoons of gluten flour if using 100% whole wheat flour. Is this vital gluten flour? How much tablespoons would you recommend?
Yes, gluten flour is sometimes labeled vital wheat gluten. For this recipe, I’d use about 1/4 cup.
I just made this bread today after meaning to make it for over a month, and it ended up absolutely beautifully. I would 100% recommend this to any first-time baker. This was my first time making actual loaves of bread, having done bread machine bread (that turned out badly) and breadsticks (that turned out beautifully), and they came out soft, fluffy, and flavorful with a crispy crust that started quite dull. However, as soon as I brushed it with the melted butter, the color became absolutely vibrant and shiny, and the loaves were picturesque. I’m going to use one on its own and one to make into garlic bread!
just made this as my first time ever baking bread!! the recipe was easy and yields delish results. thank u so much!
I cut recipe down to 2/3 and it made two beautiful french baguettes. Only rose each time in warmed oven for 1 hr! Baked 30 minutes. Texture was light and delicious. This will be my go to recipe from now on! The quickest and best recipe I’ve ever made!