Easy Homemade French Bread
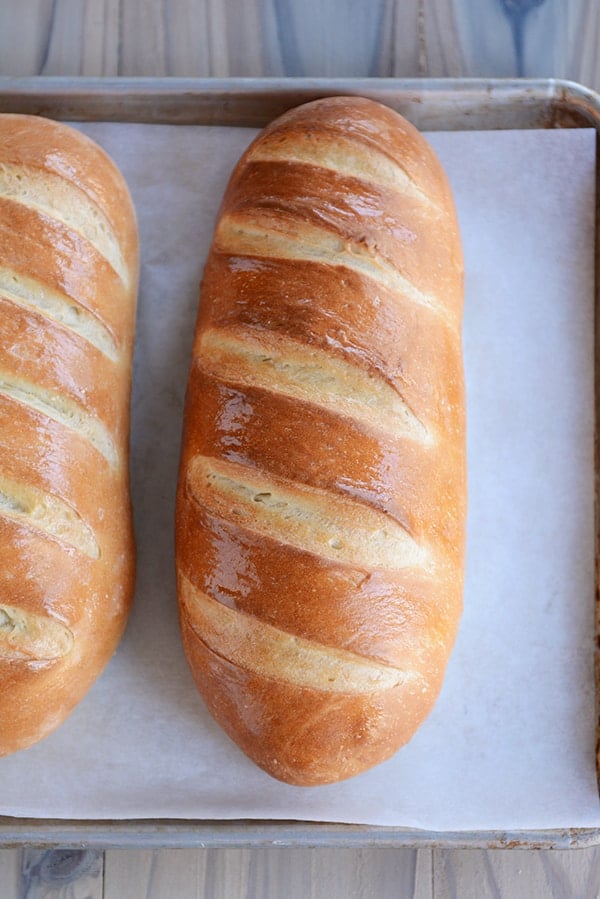
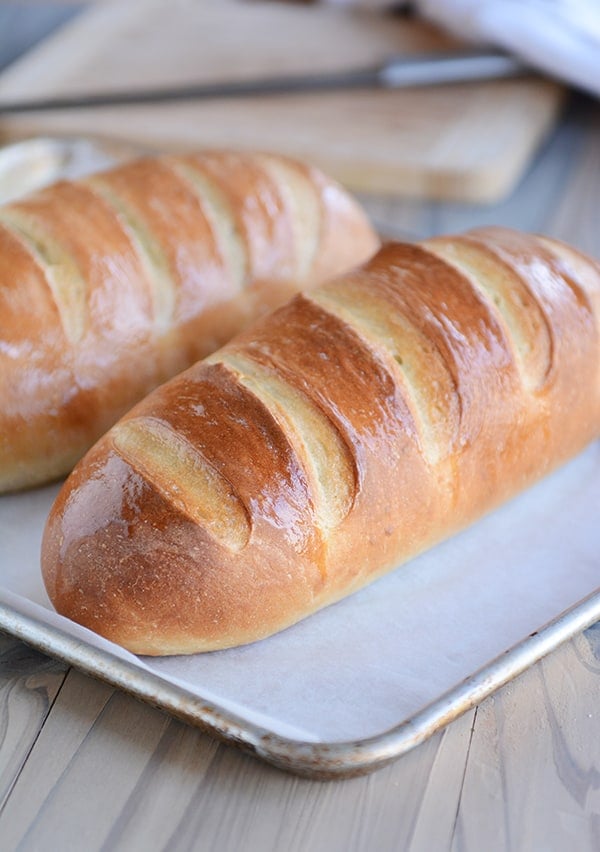
Homemade French bread has never been easier! This simple recipe produces a light and fluffy loaf of French bread that will rival any bakery!
This easy homemade French bread is so simple and perfect for a bread making beginner.
But as you can see from all the comments below, it’s just as valued by expert bread makers, too!
Making French Bread Dough
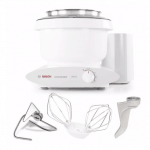
This straightforward bread dough can be made in a stand mixer or by hand.
- Warm water
- Yeast (instant or active dry yeast)
- Bit of sugar and oil
- Salt
- Flour (all-purpose or bread flour)
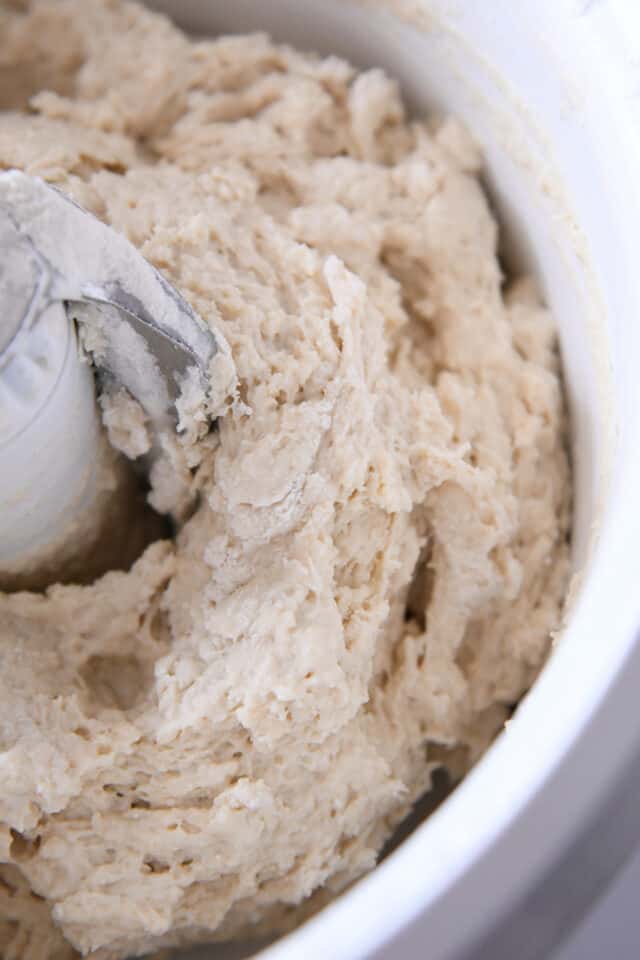
At the start, the dough will look shaggy and rough.
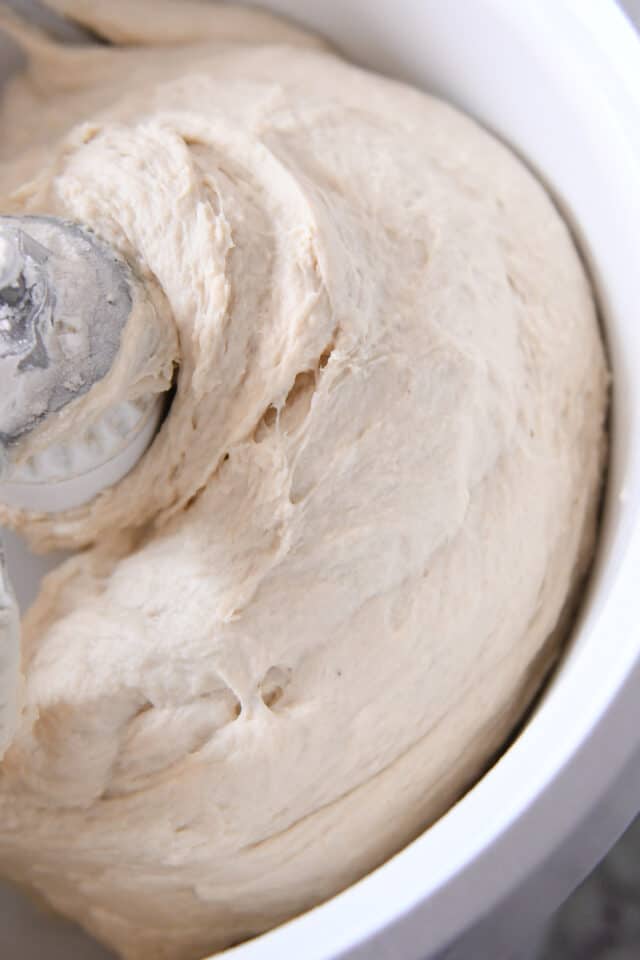
But as it kneads, it will become soft and smooth.
The most important part of this dough (and other yeast doughs) is to judge the amount of flour by the look and feel of the dough rather than the exact amount of flour called for in the recipe.
Factors such as humidity, elevation, room temperature, how we each measure flour, and more can affect the amount of flour added. So don’t stress about precise flour measurements and continuously feel the dough to achieve a soft dough that is slightly tacky but doesn’t leave a lot of residue on your fingers.
Too little flour and the dough will be a mess to handle. Additionally, the bread won’t hold its shape as it rises and bakes.
Too much flour and the dough won’t rise well and the bread will be tough and dense.
Two Methods for Dough Rising
In the recipe, there are two methods to letting the dough rise:
- Leave the dough in the mixer, cover with a lid or towel, and let the dough rest for 10 minutes. Stir it down by turning on the mixer for 10 seconds or so. Repeat the “rest and stir down” cycle five more times.
- Transfer the dough to a lightly greased bowl and cover with a towel or greased plastic wrap. Let the dough rise until doubled, about an hour or so, depending on the warmth of your kitchen.
I alternate between the two methods depending on my mood. The 10-minute increment rising method is unique to this original French bread recipe. The idea is that allowing the dough to rise this way produces a lighter crumb.
But the more traditional rising method also results in a delicious, fluffy loaf.
How to Shape French Bread Loaves
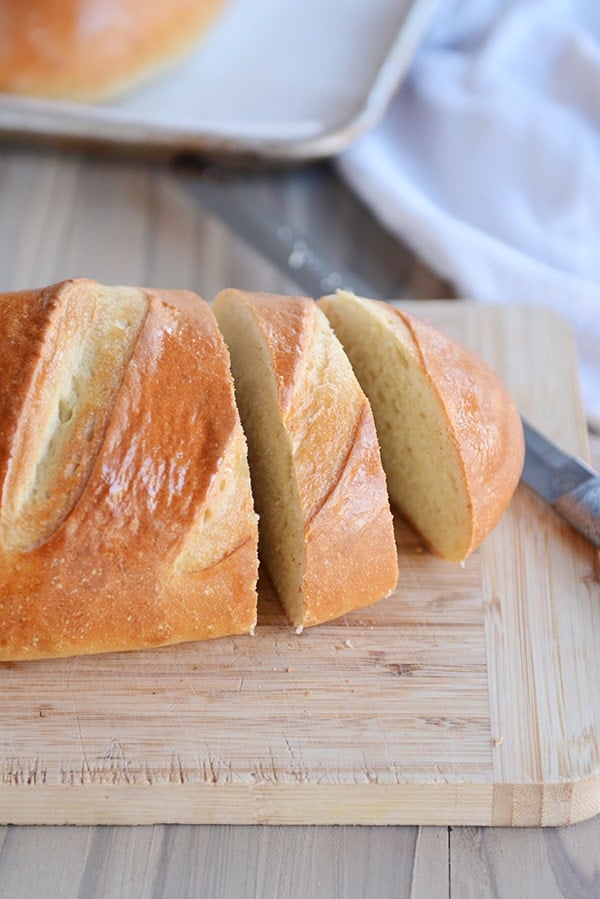
The question I get asked the most about this easy homemade French bread is how to shape the loaves.
The loaves can really be made any size or shape; I usually end up making 12-inch loaves, but if they end up being a bit thinner or chubbier, it’s no big deal!
Press each portion of dough into a flat rectangle and fold the bottom edge up and over the dough, pressing the seam flat with your hand.
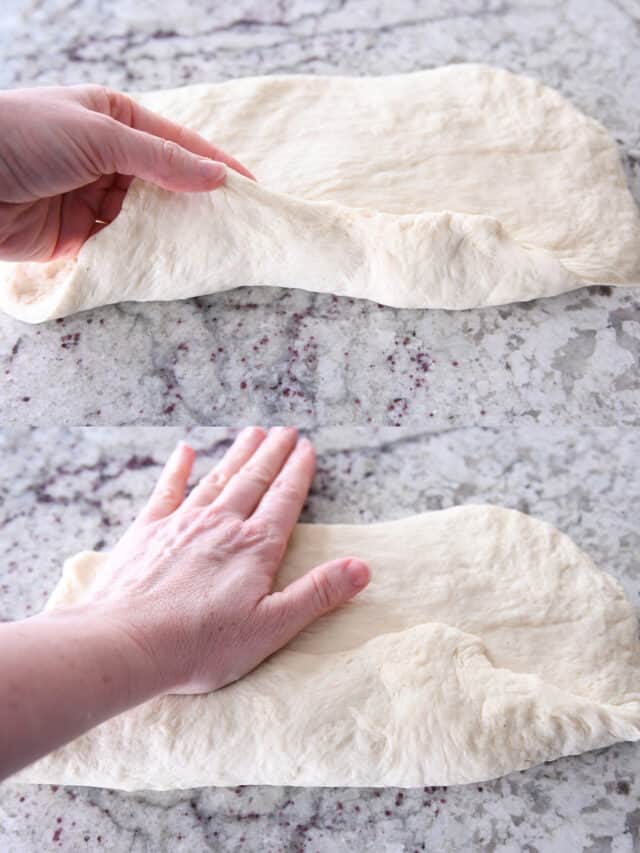
Then, roll the dough up again to meet the top edge.
Fold the top edge over and press or pinch lightly.
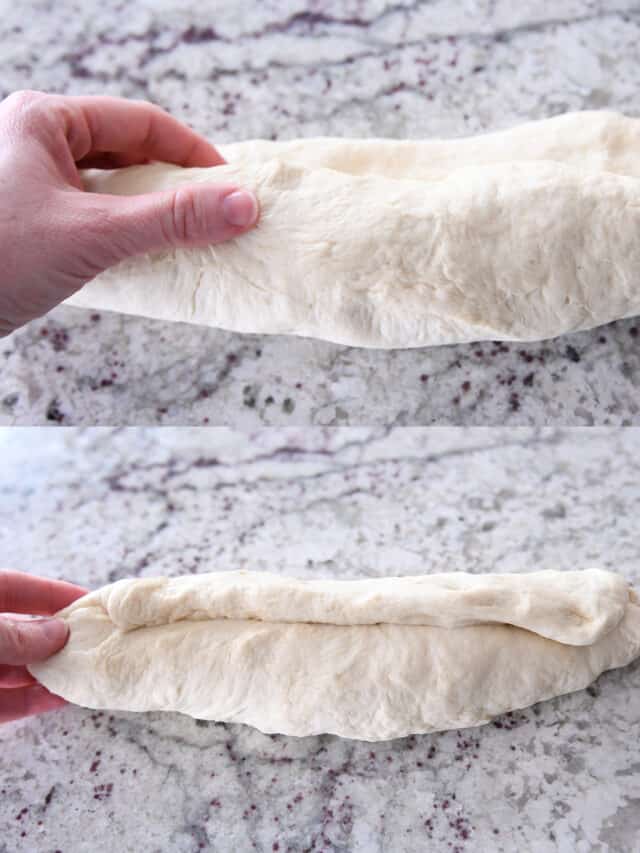
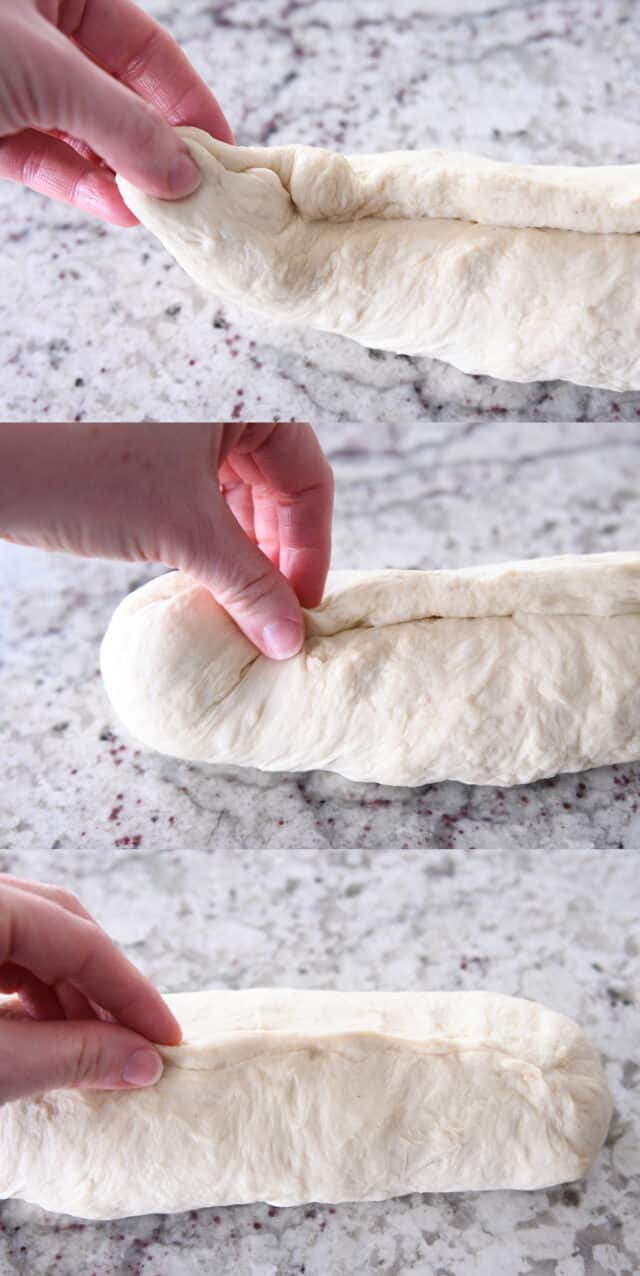
Take the end of the bread dough and fold it up and over an inch or two to give an even thickness all the way down the loaf.
Pinch to seal the end. Repeat on the other end of the dough.
Then, deliberately and thoroughly pinch and seal the entire length of the loaf.
How to Score the French Bread Dough
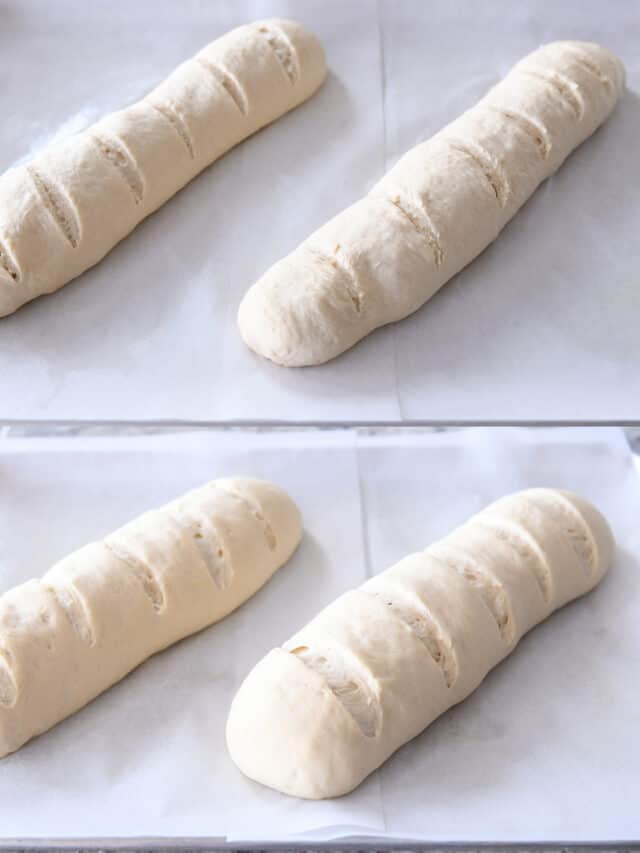
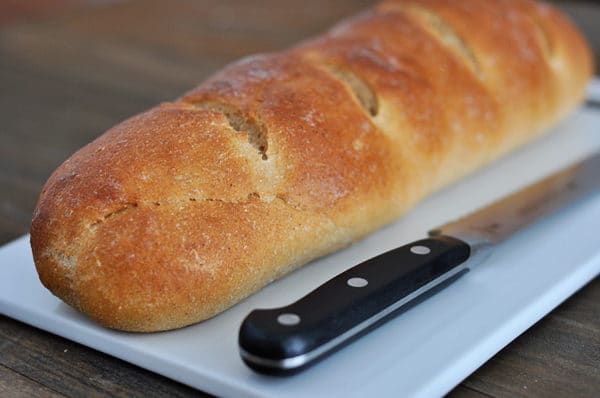
Scoring the bread dough (in my house, also called: slashing or gashing) helps the dough rise better AND prevents it from cracking in unexpected places while baking.
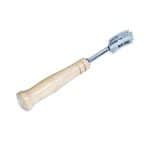
Using a bread lame for this task is extremely helpful. A bread lame is a long stick or utensil with a razor blade on the end. The razor is used to make thin cuts in the dough.
If you don’t have a bread lame, using a clean, sharp razor blade or an extremely sharp kitchen knife can work. Be aware that if the knife isn’t sharp enough, it’ll likely deflate the dough.
The bread loaves can be scored before or after the final rise. I prefer to do the slashing and gashing before they rise as I’ve had one too many loaves of risen bread deflate at the first touch of the razor, and there is nothing so soul crushing as when that happens.
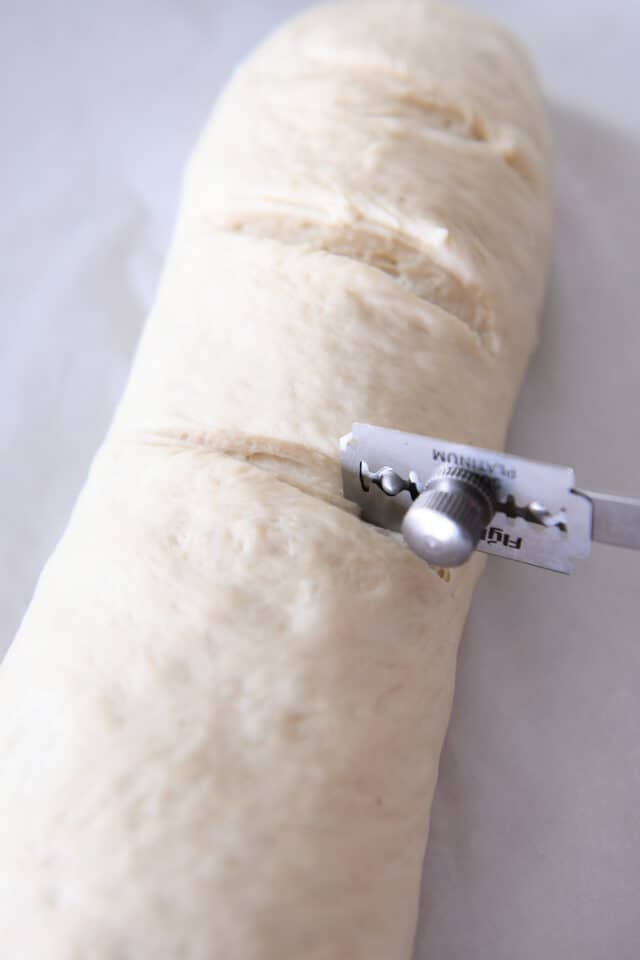
Let the bread loaves rise until noticeably puffy before baking.
Easy Hack for Crusty French Bread
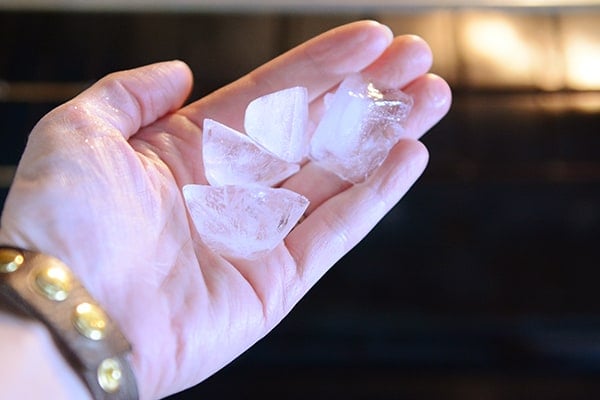
For a delicious golden crust, immediately before putting the bread in the oven, toss 3-4 ice cubes onto the bottom of the oven. Add the bread and quickly (but gently!) close the oven door.
The steam as the ice cubes hit the toasty bottom of the oven will lightly crisp up the outer crust as the bread bakes.
Important Note! Please consult your oven’s manual for details or caution on putting ice/water on the bottom of the oven floor – I’ve never had a problem, but everyone should do their own research and use their own best judgment (also take care not to toss the ice cubes on the glass oven door as it could crack).
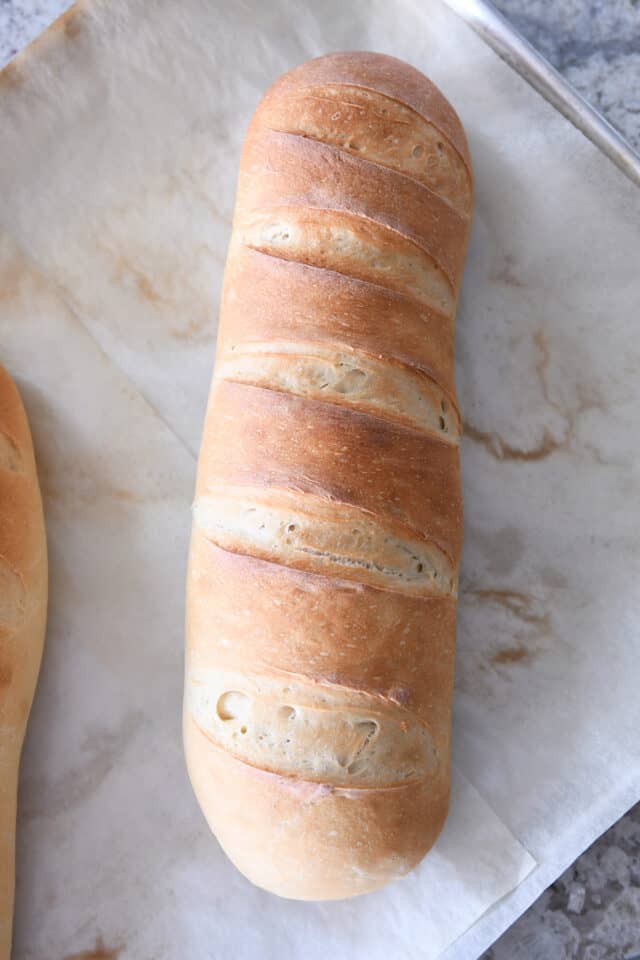
If you are struggling to get a deeper golden crust on the French bread, try:
- Increasing the oven temperature by 25 degrees and/or
- Moving the oven rack up one position (I find my bread browns the best in the middle or upper middle area of my oven)
Whole Wheat French Bread
As noted in the recipe, French bread works quite well using whole wheat flour. I’ve found the best results are when using white whole wheat flour (red whole wheat flour makes a denser, heavier loaf).
I recommend subbing in half whole wheat flour to start and then adding more whole wheat flour as you continue to make subsequent batches of bread.
If using whole wheat flour, add a 2-3 minutes to the kneading time to help develop the gluten (also, adding a couple tablespoons of vital wheat gluten/gluten flour can also help the whole wheat bread bake up light and fluffy).
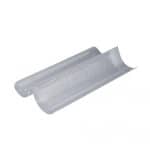
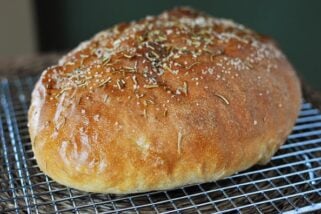
Helpful Tip: If you’ve struggled with your bread flattening out while baking instead of holding the perfect shape, you might try these French bread pans {aff. link}. I have them and LOVE them. I don’t use them every time I make this bread, but I do pull them out quite often (I also use them for this rosemary bread).
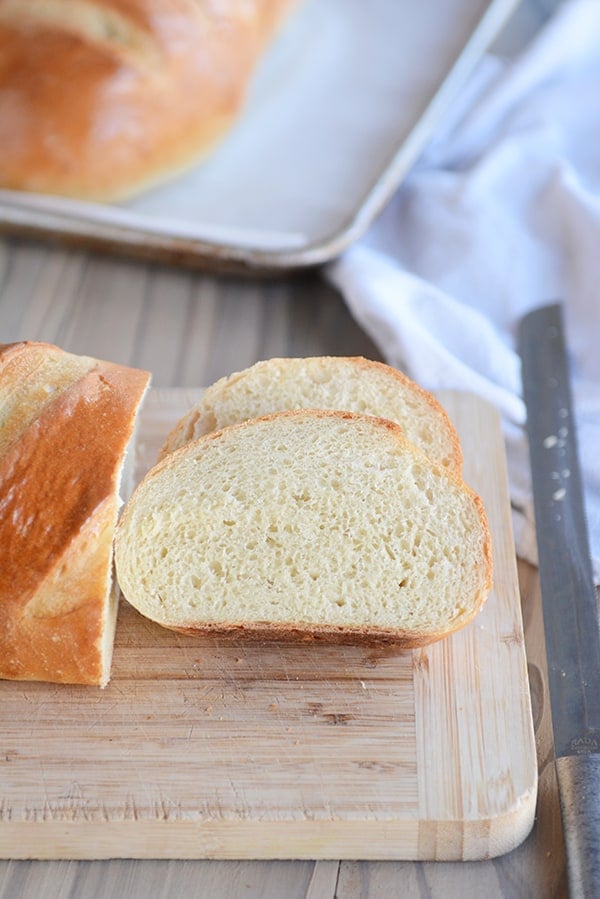
Perfect Homemade French Bread
With over 2,500 5-star reviews, this homemade French bread has become a favorite for so many of you.
Hundreds of you have let me know that you have been intimidated by homemade bread until you found this recipe! It is easy, foolproof, and will make you feel like a bread making rock star.
Helena says: Finally, after 5 failed bread attempts using other places recipes, this is THE recipe to use! Happy dance! Thank you for sharing this awesome recipe! Delicious bread!
Valerie writes: Such a fantastic, easy recipe. The “hands on” time is minimal and it comes out perfect every time. Thanks for sharing a recipe that’s become my “to do” dinner bread!
Nichole says: Followed instructions exactly! First time making any sort of bread ever. The bread turned out perfect!!!!
Pia commented: Hands down my go-to bread recipe. Today’s edition is 1/3 dark rye flour, with Italian herbs and caraway seeds mixed in and sprinkled with everything bagel topping. Yum! Best bread recipe ever, and so easily customizable!
FAQs for Homemade French Bread
Yes! Halve all the ingredients straight across – just keep an eye on the amount of flour and judge the final amount by the look and feel of the dough.
Yes, it freezes great (after baking and cooling).
Moving an oven rack up or down can help. In my oven, the bread browns best in the upper half of the oven. Also, you can try increasing the oven temp by 25 degrees.
Absolutely! You can mix the ingredients in a bowl with a spatula or spoon and knead by hand.
I always use the same amount interchangeably. Recently, I’ve heard that active dry yeast doesn’t need to be proofed in liquid first, but I always still do when using active dry yeast (no need to proof with instant yeast).
Yes, just keep an eye on baking time – smaller loaves may need less baking time.
One Year Ago: Harvest Pasta Sauce {Trader Joe’s Copycat}
Two Years Ago: Peanut Butter Cup Cheesecake with Chocolate Cookie Crust
Three Years Ago: Easy Homemade Egg Noodles {Step-by-Step Pictures Include Food Processor Method or By Hand}
Four Years Ago: Black Bean and Butternut Enchilada Skillet
Five Years Ago: Chocolate Chip Peanut Butter and Oatmeal Cookies

Easy Homemade French Bread
Ingredients
- 2 ¼ cups warm water, 110-115 degrees F
- 2 tablespoons granulated sugar
- 1 tablespoon instant or active dry yeast
- 2 ¼ teaspoons salt (see note)
- 2 tablespoons olive oil, canola oil, vegetable oil or avocado oil
- 5 ½ – 6 cups (781 – 852 g) all-purpose flour or bread flour (see note)
Instructions
- In the bowl of an electric stand mixer fitted with the dough hook, combine the water sugar and yeast. If using active dry yeast, let the mixture bubble and foam before proceeding (this can take 3-5 minutes). If using instant yeast, proceed with the recipe (no need to let the yeast activate).
- Add the salt, oil and 3 cups of flour and mix. Add in 2 1/2 to 3 more cups of flour gradually. The dough should clear the sides of the bowl and form a soft ball that doesn't leave a lot of dough residue on your fingers.
- Knead for 2-3 minutes until the dough is smooth. If the dough starts to cling to the sides of the bowl (or the center column if using a Bosch or other mixer with a center), add 1/4 cup of flour at a time until a sturdy but soft ball of dough forms.
- Rising Method 1: Leave the dough in the mixer, cover with a lid or towel, and let the dough rest for 10 minutes. Stir it down by turning on the mixer for 10 seconds or so. Repeat the "rest and stir down" cycle five more times.
- Rising Method 2: Instead of letting the dough rest for 10 minute spurts and then stirring it down, transfer the dough to a lightly greased bowl and cover with a towel or greased plastic wrap. Let the dough rise until doubled, about an hour or so, depending on the warmth of your kitchen.
- Turn the dough onto a lightly greased surface and divide in half. Pat each section into a thick rectangle, 9X13-inches or thereabouts (doesn't have to be exact). Roll the dough up starting from the long edge, pressing out any air bubbles or seams with the heel of your hand, and pinch the edge to seal. Arrange seam side down on a large baking sheet lined with parchment paper (I use separate baking sheets for each loaf).
- With a bread lame, razor blade or VERY sharp knife, cut several gashes at an angle on the top each loaf (you can wait to score the bread until after it rises, but it can easily deflate if the razor/knife isn't sharp enough).
- Cover the loaves with greased plastic wrap or a kitchen towel, and let rise until noticeably puffy and nearly doubled in size, about an hour.
- Preheat the oven to 375 degrees F and make sure an oven rack is in the center position. If you find your bread isn't browning as much as you like, preheat the oven to 400 or 425 degrees and/or move the oven rack up one position (watch carefully so the bread, especially the bottom, doesn't burn).
- Optional: for an extra golden, crisp crust, place the loaves in the preheated oven and immediately toss 3-4 ice cubes on the bottom of the oven. Close the oven door quickly but gently. (See note below!)
- Bake the loaves for 25-30 minutes until golden and baked through.
- If desired, brush melted butter over the hot loaves (this softens the crust a bit, so if you want a crispier crust, don't butter the top).
Notes
Recipe Source: adapted slightly from The Sister’s Cafe


Can you freeze the bread?
Yes
Best French bread recipe, I made today.
I’ve been making bread for decades. I use to use a recipe off of an old bread machine. But I graduated to making breads the old fashion way, proofing, kneading & such. Then came the KitchenAid mixer #1 and a few years ago upgraded to the “professional “ model. Making bread is a breeze now. Unfortunately, I lost that recipe & have been looking for YEARS trying to duplicate it, always with disappointing result. Searching once again for French Bread recipes, I came across your recipe. I was intrigued by the 10 minute rest followed by a “stir” down in the same mixer bowl, you had me. Today….I made the most delicious loafs of French Bread I had EVER made. Large loaves with perfect, tender texture. And the ice cube trick- brilliant! I always threw water in my oven to achieve a crunchy crust. Everyone RAVED about the bread. Tomorrow morning- French toast from the leftover 1/2 loaf. Can’t wait to make those freezer burritos either
If you’re worried about tossing ice cubes into your oven, place an old small loaf or cake pan on the bottem rack while you’re preheating the oven and put the ice cubes in it. Works just as well. Thanks for the great recipe. Second loaf froze beautifully.
Do you still bake at 375° for same time if using convection oven?
If using convection, I’d suggest lowering the temperature by 25 degrees.
The loaves baked up beautifully but mine turned out rather salty! I would definitely make it again but with much less salt.
Mel,
I have used your recipe twice, and both times it came out fantastic! Thanks so much for sharing with us!
Great recipe!!! This was my first attempt at making homemade bread. It came out amazing! My sister was so surprised that it was homemade. Will definitely be making this again. Now I’m not afraid to start baking breads!!! Thanks!!!
Great recipe! I have never been able to successfully bake bread – even bread machines give me a problem. But this bread turned out GREAT! Following other reviews; I put a pan of hot water in the bottom of the oven. Increased salt to 1 TBS., used 29 oz. King Arthur flour (1 c bread, rest AP). Preheated convection oven to 425F but immediately dropped to 375F. Brushed with egg wash and sesame seeds first. Baked both together for 23 min. They looked very ugly going in, but came out beautiful, and tasted even better! I’ll probably add an extra 1/4 tsp salt next time. Thank you! The bread was fabulous! I’m trying to give this a 5/5 star rating, but the website only gives me a column of single stars with no meanings…
Delicious recipe, thanks. I am always wary of putting ice in a hot oven, so I have a small spray bottle for just this purpose. I spritz the loaves right before I close the oven door and it works wonderfully. My sourdough recipe calls for the same thing to get that beautiful crust. I turned this into an amazing cheesy garlic pull-apart bread, and took it to a staff party. The entire loaf was gone in 20 minutes! Thank you. I linked to this recipe on my blog as well.
Baking my third batch. First was great, second batch I over baked, my fault,but still good. My wife wants to give some bread to shut ins in our church. Follow recipes and you you doo well.
This recipe worked very well! I used the second rise method. I also used Demerara sugar to make the bread vegan. The colour of the finished loaf was a little pale but the taste was perfect! My mom’s French bread recipe says to put a shallow pan of water on the bottom rack so I did that. Maybe that is better than throwing ice cubes in the bottom of the oven. I have tried several different yeast bread and roll recipes in the past and this one is by far the best and easiest! Thank you!
I’ve been looking online about doubling bread recipes, some places suggest to double the yeast and some don’t. Would you suggest doubling it with this recipe?
Thanks
Yes, I would double the yeast if doubling this bread recipe.
can i half this recipe?
Yes
I just baked my first loaf of bread ever and think this would make a great second attempt. A question about the yeast though. I would be proofing Active dry yeast. Your instructions call for 1 tablespoon of instant or active yeast. Are you saying to use only 1 tablespoon of what is produced when proofing? Or just use 1 package and use all the mixture produced?
If using active dry yeast, use a tablespoon of the yeast and proof it in a bit of warm water and a pinch of sugar and then use the entire mixture in the recipe. Does that make sense?
Have you ever used French Wheat Flour?
I haven’t.
I followed the recipe exactly, but.. after I added up to an extra 2 cups of flour and the dough was still sticky, I wasnt comfortable compromising taste by adding even more flour so I left it be. It rose beautifully but was completely unable to be handled or shaped due to stickiness. I’ve made bread for years and never had this problem. Ideas of what could have gone wrong?
Probably needed more flour – always go by the texture and feel of the dough vs the exact flour measurements.
This was the easiest and tastiest bread. We make it at least once a week!
Can I use self rising flour to make this recipe
I haven’t tried that, Patricia, but I would recommend using all-purpose or bread flour.
Self rising flour has baking soda/powder which are metallic rising agents. They would kill the yeast.
What’s the shelf life once it’s baked. I baked two loads and one was gone before the other could cool. So great recipe. Thank you.
I’ve made this twice. The first time I think I overproofed it with Rise Option 1. It was super dense and never really rose.
I just made it for the 2nd time with the Rise Option 2 and it’s much better, but not perfect. I’m thinking I must be doing something wrong. It’s not as dense, but it’s also not golden brown like French bread usually is. It’s just white. Any suggestions??
Hi Ashley, try raising your oven rack a bit higher than middle position and/or increasing the oven temp by 25 degrees – that should help the browning!
Gorgeous loaves! Thank you Mel! Wish I could posts pic! It would’ve the main coarse if it was up to me!
I tried this recipe as soon as I found it. I liked the instructions… they were very specific which was helpful for this first time bread baker. I found it so nerve wracking figuring out if my bread was done. I fussed with it and I kind of broke it so it deflated a little. I was worried about ruining my oven so I put the ice in a preheated ceramic dish. Mistake! Should have known before I did it, but just in case others were thinking the same thing. I will experiment with different methods. I also read that you can use a spray bottle to create the same effect, but it was more involved. Be careful if using ice!!! My loaves came out tasting great! They got a little dense at the bottom, which I think means I over-proofed? But still tastes deelicious and such an easy recipe for a beginner!!!!
This bread is amazing!! So simple and the flavour is delicious! Thank you for sharing this recipe.
Quick question! If I don’t have a dough hook for my mixer (I think I lost it :(. . ) is there something else I can do?
You can try mixing by hand – many commenters have reported back it works great!
My new French bread recipe!! Wonderful. Tastes like it was made by a professional baker—-ME!
The taste was OK but the appearance not so much. The reason To wanted to write this comment though, is to let you know that your advice on throwing ice cubes in the hot oven should NOT be given so lightly. I assumed you knew it was OK to do so, so I did what you said. At some point while the bread was still in the oven, I heard a horrible noise and when I looked in the manual I found out that under NO circumstances was I supposed to put any liquid on the bottom of the oven that was cold, much more in the form of ice cubes which are even colder… So, please, caution your followers to read their manual before they follow your advice.
Sorry that happened, Mary. I’ve used the ice cube trick countless times in several different ovens over the years with no problem, so yes, I probably did assume too much and I apologize. I’ve added a note to the recipe and in the post to encourage others to check their manual before using the ice cubes.
First time i made this. Best french bread ive had. Ill make it often thank you
I have a recipe that is similar to yours that I have used for years and it has an egg in it. What does that do to the recipe? Also I bake mine at 450 for 30 min. I use your #1 method.
I’m not entirely sure – probably adjusts the texture of the crumb.
I’ve done something like this many times and it’s really awesome. I guess I always just used salt, flour and water and yeast and it came out great. This way looks great too. Idk which is “French”, don’t really care but I do like keeping it really simple and doing it by hand so I can remember it and make it anytime, anywhere. This way works great too, comes out like a nice Italian loaf. In my experience having ice cubes over just using a pan with some water in it is all the same, and a pan of water has less chance of falling down somewhere or just not being enough to hydrate the inside and crisp the outside every time. Ice cubes sounds risky to me. Someone new to it should try both and see how it goes for them in their oven. Thank you! Great tips here!
delicious, I used the 2nd rise method.
Perfect.
Mel you are my hero. I have tried making bread in the past and it never worked out. My Mom tried teaching me (about that much & a little of this). Because of you I can now make bread and I can’t thank you enough. The tutorials with pictures is all that and then some. I have been making the bread and buns now for about a month and they turn out perfect every time. My Mom actually tried your recipe on her own today and she said to tell you she loves the dough and she even learned something after years of making her own bread!
Thank you!!!!!!!!
That meant so much to me. Thank you, Jennifer!
This came out beautifully! Thank you so much for your words of advice!
We made this bread and added Rosemary it’s delicious!
Can we cut this recipe in half?
Nancy
Yes!
I used a electric knife to cut into bread before baking and it worked great.
The results were great, but I’m confused about how the total time can be listed as “2 hours 5 minutes” when there are two “about an hour” rises. Total time was more like three hours and it threw off the timing of Thanksgiving dinner. (Luckily, we’re all pretty laid back so not a huge deal.)
Thanks for sharing, we’ll definitely be making it again!
Wrong place, sorry.
I’ve made this numerous times, even in loaf pans for sandwich bread, it’s perfect every time. Ice cube method works wonderfully, rise time is spot on bread is fantastic. Thank you
Thanks for the recipe! It came out tasty and perfect! 🙂 Will be making this again soon.
Ah just got it, I’m an idiot will let you know how it turns out!
Carmen
I’m making this bread right now – very excited! The dough is resting for an hour now.. but I’m not sure what happens at step 5..
Should I be rolling the dough up (like snail shape?) seems unlikely.. Or should I roll up, then un-roll..? And I’m confused about the “seams” too.. apologies, it’s probably really obvious, I’m just not getting it ☺️
Help!
Carmen, London
Making this right now. I have made all kinds of bread in my lifetime but never French. It’s in the oven now and it smells delightful.
Easy to make. Took me a bit longer then directed to but easy once I got the feel of the dough.
Can’t wait to tastewith our spaghetti diner.
Paul C.
West Sacramento, Ca w
o
Perfect! I’ve made this recipe about five times and the loaves come out soft on the I side and crusty on the outside. And the bit of butter brushed on the outside makes the perfect loaf. Thank you so much for the recipe!
Actually i’ve been making this recipe for over 20 years. Got it off the king Arthur flor site. But i did everything by hand. Going to try the mixer version. This really is a great recipe. Comes out perfect everytime.
I love this recipe! I would like to make it for a friend who is vegan. I always do an egg wash and sprinkle with sesame seeds. Could I brush with olive oil instead of egg wash? Or would that make crust burn?
I’m not sure, sorry! You could just leave off the egg wash completely.
Fabulous French bread
Why do you slash the top? What happens if you don’t slash?
It gives it a nice look on top – and it also helps with the rising while baking but you don’t need to cut the top; it’ll bake just fine.
This may be a dumb questikn but if I have an electric oven can I still do the ice cube trick? So excited about this recipe!
Yes!
Be careful not to drop the ice on the oven door glass window! Mine cracked
i noticed you dont knead 8-10 minutes like most recipes call for is that ok.your breads look beautiful and cant wait to try thm
My Go To recipe. It’s my birthday and a loaf is in the oven right now! Happy Birthday to me .
This bread is awesome. I’ve never been able to make good bread and gave up for years. Imagine my delight when I tried this and the first time, it came out beautifully and is seriously good. I’ve since made it several more times with great results everytime. My husband is Italian and loves homemade bread. This recipe has made me a rockstar to him. Lol Thank you so much!
Can you make this bread without an electric or stand mixer? Mixed by hand?
Yep!
My family was elated when they came to the table. All of them ooooh and ahhhhd when they saw this sitting next to mama’s spaghetti. Thank you for sharing.
Hi! Hoping to make it this weekend but am confusing by the rolling part. Should I be rolling in like a burrito? But with every roll I smash it down so it doesn’t become layered like a croissant?
Yes, you just want to press the seams together so there aren’t gappy pockets as it bakes.
I just made two loa
I just made this, followed the instructions exactly and WOW! Fluffy and light. I have a gas oven and made each one seperately as instructed
Thank you finally have found the perfect recipe
Do you have a sister by the name of Erin
No I don’t…but I have a sister-in-law named Erin. 🙂
Is her husband a doctor? If so I am almost positive I know her.
Yep, might be the same person! 🙂