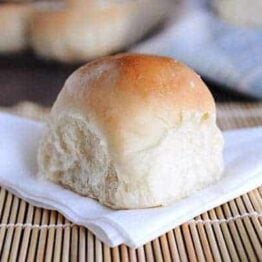
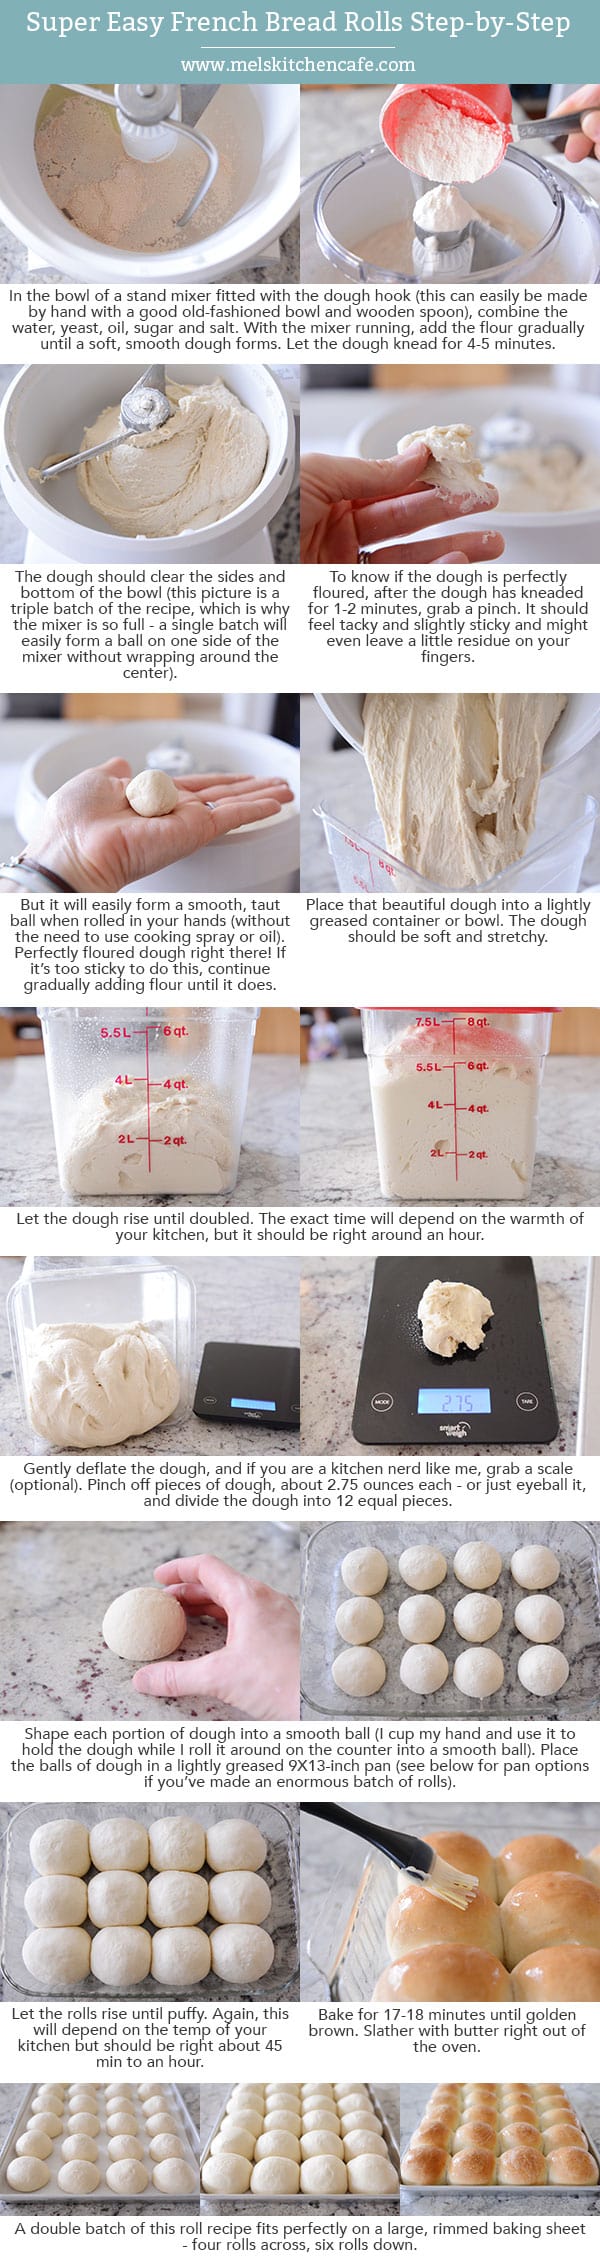
French Bread Rolls {Step-by-Step}
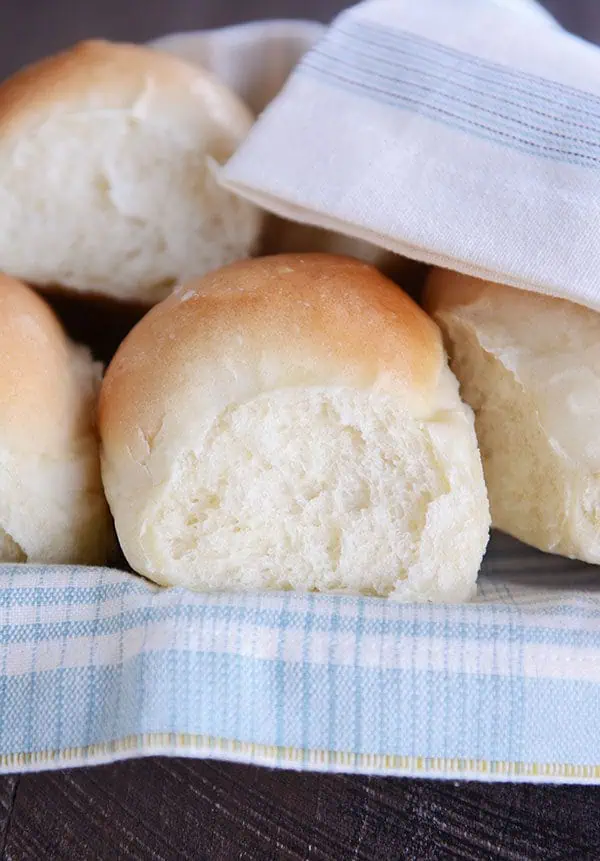
These French bread rolls make the best dinner rolls, hamburger buns, or sub buns. They are light, fluffy, and perfect for beginner (or expert) bakers. With over 1,000 5-star reviews, they are one of the most popular roll recipes on the internet.
⭐️⭐️⭐️⭐️⭐️ Thank you so much for the recipe. The rolls were wonderful. Made a double batch for Easter and froze some. They freeze excellently. Will be my go to rolls. -Jackie
Why So Many People Love This Recipe
The dough for these French bread rolls is straightforward and very forgiving. Here are many reasons why this is a foolproof, trusted recipe:
- A stand mixer fitted with the dough hook makes easy work of this recipe, however, the dough is so easy to make that it can also be mixed and kneaded by hand.
- The recipe doesn’t require scalding milk or any fussy steps. The ingredients are basic and dairy-free (other than brushing the tops of the baked rolls with butter).
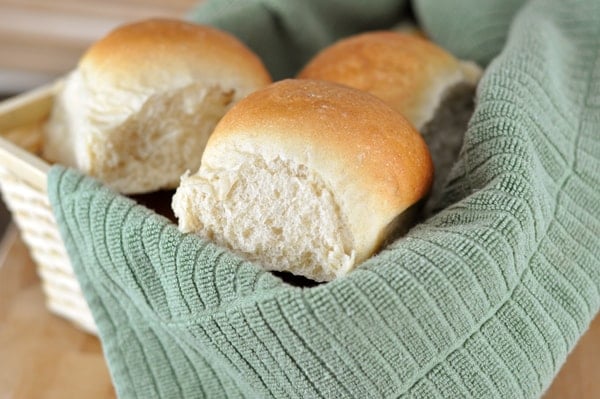
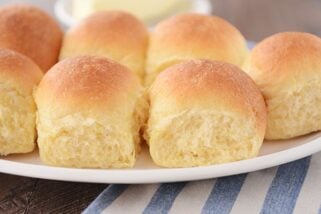
- The rolls are ultra-soft and fluffy.
- You can shape the dough into dinner rolls, sub buns, hamburger buns – and some reviewers even report using the dough for pizza crust.
- These French bread rolls are easy enough for simple dinners and delicious enough to serve at any holiday dinner.

Ingredients Notes
- Warm water: The temperature of the water should be between 105 and 110 degrees F.
- Yeast: Both instant yeast and active dry yeast work in this recipe.
- Sugar: The small amount of sugar in these rolls helps activate the yeast and assists in the rolls rising quickly. It isn’t enough sugar to make the rolls taste overly sweet. You can dial the sugar up or down depending on your taste preferences.
- Oil: A few tablespoons of oil gives the dough a supple, smooth texture and helps the rolls taste fresh even the day after baking.
- Salt: I use table salt for this recipe.
- Flour: All-purpose or bread flour can be used – or a combination of both. Bread flour will create a chewier, fluffier roll texture. You can sub in 50% whole wheat flour for part of the white flour; if doing so, I recommend using a white whole wheat variety, which helps the dough stay light and fluffy.

Tips for Making Yeast Dough at Home
Here is the biggest tip I can give for successfully making yeast dough at home:
Stop stressing about adding the exact amount of flour called for in a recipe. Many, many factors determine how much flour is needed (elevation, humidity, how we each measure flour, etc.) Add the flour gradually and judge the dough by how it looks and feels. If you need to add a bit more flour, that’s ok!
How to test this French bread roll dough:
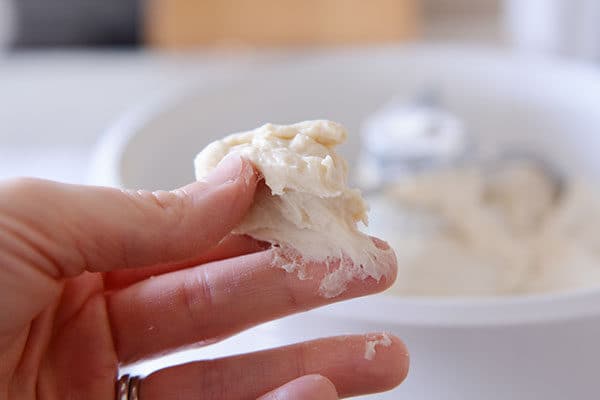
- After the flour has been added and has kneaded for a few minutes, grab a golf ball-size piece of dough.
- Initially, it might leave a little sticky residue on your fingers.
- Try rolling it into a ball without any oil or cooking spray on your hands.
- If it can form a ball shape without sticking to your hands in a shaggy, horror-movie mess, you are good to go. If not, add a bit more flour (a couple tablespoons), mix and try again.
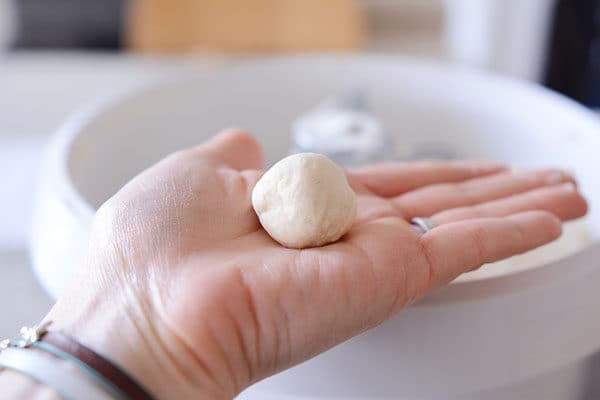
You can see from the pictures below that initially, the dough seems pretty sticky, however, it rolls just fine into a ball without a lot of sticky dough on the palm of my hand. Adding too much flour can lead to rolls that are dense and heavy, so take time to learn what a properly floured dough looks and feels like.
How to Shape French Bread Dinner Rolls
- Cut the dough into 12 equal pieces.
- I like to weigh each piece to make sure they are uniform. Each dough piece usually weighs right around 2.6 to 2.7 ounces.
- Cup your hand around the dough and roll the dough into a smooth ball, keeping the pinky side of your hand against the counter while you roll.
- Pinch the bottom to seal, if needed.
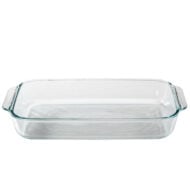
A single batch of roll dough (12 rolls) fits in a 9X13-inch pan. I almost always double this recipe and bake the rolls on a half sheet pan, which fits 24 rolls perfectly.


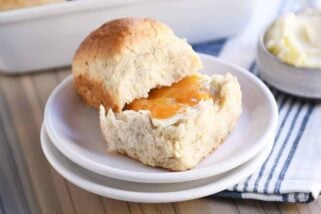
The Perfect Roll for Sandwiches or Subs
Over the years, these French bread rolls have become more than a dinner roll.
A quick scroll through the comments shows that many of you are using this roll dough for everything from sloppy joes to sub sandwiches.
Make-Ahead and Freezer Notes
Make-Ahead: The dough for these French bread rolls can be made and refrigerated overnight (either in bulk, or the rolls can be shaped, place on a pan, covered and refrigerated). Take the shaped rolls out of the fridge to rise fully before baking.
Freezing: The baked and cooled rolls freeze great. Place the rolls in a ziploc freezer bag, seal the bag, and place in the freezer for up to a month or so.
There is truly not an easier, more perfect roll recipe out there!
I often make these rolls for my holiday dinners – from Thanksgiving to Easter – because they are so easy, they work out every time, and they are always devoured. Plus, they make excellent leftovers!

Tools for Making French Bread Rolls at Home
*Affiliate links included below for products I’ve purchased from Amazon; feel free to shop around for the best price!*
- This is the kitchen scale I use to weigh each piece of dough.
- These containers are great for rising dough (the measurement marks make it easy to keep track of how much the dough has risen).
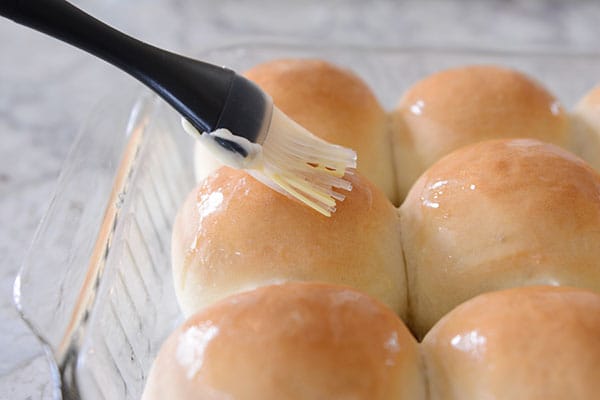
- Silicone pastry brush for brushing the rolls with butter after baking.
- My go-to OXO bench knife for portioning out the dough.
A quick note about mixers: I use a Bosch Universal stand mixer for all my bread making. Here is an older but helpful side-by-side (unsponsored) review I did between a Bosch stand mixer and a KitchenAid stand mixer.
French Bread Rolls
Ingredients
- 1 ½ cups warm water (105 to 110 degrees F)
- 1 tablespoon instant or active dry yeast (see note)
- 2 tablespoons granulated sugar or honey
- 2 tablespoons canola oil, vegetable oil, or olive oil
- 1 teaspoon table salt
- 3 ½ to 4 cups (497 to 569 g) all-purpose or bread flour, more or less (see note)
Instructions
- In the bowl of a stand mixer fitted with the dough hook or in a large bowl by hand, combine the warm water, instant yeast, sugar, oil, salt and 2 cups of the flour.
- Begin mixing, and continue to add remaining flour gradually until the dough has pulled away from the sides of the bowl.
- Knead the dough for 4 to 5 minutes in a stand mixer (7 to 9 minutes by hand). Add additionally flour a tablespoon or two at a time only if the dough starts to cling to the sides of the bowl and is really sticky to the touch (see note below for clarification).
- Place the dough in a lightly greased bowl and cover. Let the dough rise until doubled, 1 to 2 hours.
- Turn the dough out onto a lightly greased countertop.
- Divide the dough into 12 equal pieces (about 2.75 ounces each, more or less), and form the dough into round balls by cupping your hand around the dough and spinning into a round shape, pinching the bottom to seal any rough edges, if needed (video tutorial here right at minute marker 2:20).
- Place the rolls in a lightly greased 9X13-inch pan or on a lightly greased half sheet pan. Space the rolls about 1/2 to 1-inch apart.
- Cover the rolls loosely with a lightweight towel or greased plastic wrap and let the rolls rise until very puffy and nearly doubled, about 45 minutes to 1 hour.
- While the rolls rise, preheat the oven to 400 degrees F (if your oven bakes hot, preheat to 375 degrees F.) Bake for 17 to 20 minutes until golden and baked through.
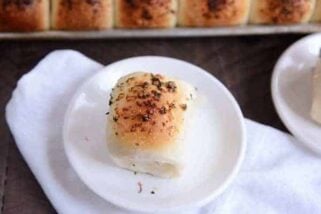
- Immediately out of the oven, brush with butter, if desired. Serve warm or at room temperature.
Notes
Recommended Products

Recipe Source: Mel’s Kitchen Cafe
Recipe originally published 12/2007; updated with new pictures, step-by-step tutorial, and recipe notes.
I would marry these rolls. Soft, delicious. I have to force myself to walk away once they’re out of the oven or I will be tempted to smother butter all over them and eat them all. MAKE THESE ROLLS! You won’t regret it.
Ps: I use them for everything: hamburger buns, sandwiches, dinner rolls. They are so versatile.
One of the top roll recipes in my rotation! So simple and so GOOD!
New to baking and another recipe I tried for my first attempt, didn’t turn out and not very good. Then I found this recipe and they turned out perfect and so delicious. Your instructions were easy to follow. I need a little practice for making the round balls, but so happy with this recipe. Thank you.
OK come on….now I MADE THESE with the SLOW COOKER ROASTED GARLIC BEEF for today’s playoff games and wait Chiefs and Jaguars we need a time out because kick my shoes off fabulous rolls soft, chewy and super yummy with th garlic beef no flags on this play as its a touchdown in our house (Even though I am waiting for my Eagles to fly tonight!). Perfect recipe for both items and thanks for this website I am so happy I found it.
I’m a beginner so tried this recipe. I’m not sure what I did wrong as everything matched the images until the end when I took the bread out of the oven and they were all very hard on the outside and doughy on the inside.
They were likely baked at too high of a temperature or too close to a heating element/convection vent
I am a beginner too and mine look amazing but are heavy to hold and doughy inside as well. My oven has a bread setting which is temp 170c which seemed low compared to the 200c stated. i cooked mine at 185 which i thought was in the middle. Should i have stuck to the 170c of my bread setting after all? Many thanks.
I’m not familiar with celsius temperatures, but if the rolls are heavy and doughy they likely need more rising time before baking and/or a longer baking time.
Yay!! I tried again today, after realising my oven had a dough rising function!! It is set at 20 mins. I used it for 2 x 20 mins for the dough and the same again for the buns before cooking on the bread setting of 170c (338F) for 21 mins and they were fantastic!! Hubby is impressed and i am thrilled! we have just had pulled pork, stuffing and apple buns and they were gorgeous! Thank you for your help and tips.
P.S for UK users i measured the cups at 5oz or 140 grams for the flour and 375 ml for 1 1/2 cups of water.
Is your oven fan assisted or standard electric? For fan assisted, you alsways need to drop the oven temperature by 20 c.
Made these for Christmas dinner this year and they were fantastic!
These buns were a hit at a party I attended last night. I was in a rush so I just added the full 4 cups of flour. I will definitely be making these again. Thank you very much for this recipe!
Haven’t baked buns forever and often have poor results. I followed your recipe exactly (thank you for the step-by-step) and the buns were beautiful, light and tasty!
I’ve made these a couple times since having them at my daughters. Her rolls came out so wonderful. My dough rises fine. But when I divide it into balls and then let them rise they don’t rise taller but spread out. What am I doing wrong? I’ve tried adding more flour and they still came out the same. Any suggestions?
Hi Melinda, you might try adding a bit more flour and/or placing the rolls closer together on the baking sheet.
Great recipe! Thankful for you!
These rolls are the bomb. Your step by step guide made making them so easy. I especially loved the suggestion of how many ounces of dough per roll. I doubled the batch and I’m so glad that I did.
These were very good and actually bigger than i expected. I was surprised that there was more of a “nothing” or “flour” taste than anything. is there something i can do to add more flavor (i did not add butter to the top)
Hi Chris, increase the salt by 1/4 to 1/2 teaspoon – that should help!
I love this recipe, and will make the rolls for T’giving. I always bake immediately after the second rise, when the rolls are shaped, but am wondering if I can leave the dough to rise, refrigerated or on the counter, over night, then bake on T’giving? Thanks,Mel,
Overnight would be too long on the counter, but you could let them rise in the refrigerator overnight and then take them out in time to rise fully (if they haven’t already in the fridge) and then bake.
Making these now to test out for Thanksgiving! Can they be refrigerated the day/night before then bake like your other recipe says?
Yes!
I’ve made this recipe a few times on holidays. Decided to make this for a work potluck. I double the recipe and reduced the individual roll size to 1.5 oz, so they’re ‘lunch rolls’ now! I 2 different combined butters- 1 herb, 1 hot honey cinnamon- to serve!
Question: I made the rolls, the dough was soft after the first rise, shaped beautifully and rose well in the baking pan. Everything looked perfect until baking. I did 15 minutes at 400 degrees and the tops were super pale and rock hard (though the insides stayed soft). I mean, hard like you can’t press it down – it’s like a shell. Is that normal? I tried Googling it to see if it’s just the nature of this type of bread, but everything I’m getting seems to indicate the bread should be soft on the top as well as the insides. Any ideas what could have happened?
Hi Monica, yes, the top should have a crust but still be soft, not rock hard. Usually if the rolls are hard like that they need less flour and/or more rising time.
Have made it 4 times now! So easy to follow. No mixer so knead by hand and always delicious! I used honey. Thank you for sharing my husband and I loved it. Have also made loaves instead of rolls for sandwich slices just as tasty!!!!
Could I do this without a mixer ?
Thanks!
Yes, the dough can be made and kneaded by hand.
These were awesome! They remind me of O’Charley’s’s (wow that’s grammatically correct) rolls! I’m definitely saving this recipe
Can I make these rolls, shape and freeze before second rise and when ready to use un-thaw, let rise and bake?
That should work fine.
Hi! Canadian thanksgiving coming up this Sunday! I was wanting to make the dough Saturday night and then bake them Sunday morning…would that work? Or is it best to just bake them Saturday night and they’ll still be ok for Sunday night?
Sorry for the delay in responding. Did you try this? It should work fine to make the dough the night before.
I had the same question! If you did this, I would love to know how it turned out. Otherwise, I may give it a practice try before Thanksgiving.
Love these rolls so so so much. Making them with your Best Sloppy Joe recipe for dinner tonight– i feel like a dinner rock star!
This worked amazingly!! First time we ever made buns from scratch as we aren’t really bakers In this house. Thank you so much. It really gave my daughter and I confidence to try this again.
I just wanted to say thanks for this lovely recipe. I’ve tried many dinner rolls recipes and each time it would be flat and dry but this recipe makes the best rolls fluffy and soft
Hi there,
Please could I ask you to post the recipe in grams please ?
We have different cup sizes in South Africa and it really is difficult to know if I’ve got the measurements correct.
Thanks so much
Hi I’m from South Africa and the trick I learned is to use the same cup for flour and liquid that way you have the correct measurements. Hope this helps.
I have made this recipe now 4 times and every time I feel surprised: “I made awesome rolls!” I don’t have a machine so I just mix by hand and kneed on the counter until I have a little less than the 4 couples of flour and my dough is smooth and shiny. Love it! Are there other ways to shape the rolls?
You could experiment with other shapes! I haven’t branched out with these rolls since rolling them into balls is so easy.
Hi Mel and friends,
I wondered if I might ask your advice please?
I have been making this recipe by hand for years – it’s wonderful!
But since I got a Kitchenaid last September (to save my wrist which got badly sprained), I haven’t been able to make any decent bread, this recipe included! 🙁
It’s a 4.8 litre Kitchenaid Heavy Duty mixer. The manual says it must be used only on Speed 2 with the dough hook (which seems a bit fast and violent to me), and with any other speed the machine could break, (otherwise I would have tried it out with Speed 1).
I’ve tried all sorts of timings for kneading, anywhere between 2 and 10 minutes. Even kneading in one-minute spurts with short rests to emulate hand-kneading.
But each time it turns out with a very ‘off’ texture. Small holes, like the gluten strands are really short and almost chopped-up-looking. Not fluffy and wispy like homemade, instead chewy and dense.
(Although funnily enough, my grandma commended it – but she likes dense German Abendbrot breads!)
I remembered that you prefer the Bosch for bread – but sadly I can’t get a Bosch Universal where I live! 🙁 .
It has been tempting to conclude that it’s impossible to get good results with my KA – although that would seem a bit odd, seeing as so many people online seem to be using Kitchenaid for bread.
Judging by my internet searches, I seem to be the only one having problems with it…
I wondered if you or any of your readers might have had any experiences like this with the Kitchenaid, or might know where I’m going wrong? May be it’s just a case of “a bad workman blames his tools” 🙂 ?
I would be very grateful for any thoughts?
Thank you!!!
Hi Savanna, I’m sorry about your sprained wrist! And I’m sorry the KitchenAid hasn’t been super easy to figure out with this recipe. I don’t use my KitchenAid for bread making so I don’t have a ton of experience troubleshooting, but it sounds to me like maybe it might be worth trying to slow down the kneading to speed 1? And then knead for 5-6 minutes continuously and see how that goes?
Thanks Mel for your kind reply! 🙂
I think you are probably right about Speed 1. I haven’t tried it yet though (as I can’t afford to take any risks with the ominous ‘engine failure risk’ warning in the manual – the mixer was too expensive, UK sales value £599!!).
Good news is, I have a little kneading helper (my younger sister). I’ve also been trialling different hand-kneading techniques this month with no more sprains 🙂
The KA’s still been in regular use for cookie dough and cakes – just a shame it doesn’t seem to be all it was cacked up to be for kneading.
Apparently the Bosch Universal has been listed on Amazon UK in the past years ago, so I’ll keep my eyes peeled!
Use speed 1! As you said, speed 2 is too fast. I’ve made hundreds of batches of Mels French Bread Rolls using my KitchenAid. I have found for this specific recipe it works better to double it- if there isn’t enough dough the dough hook doesn’t work properly.
This was my first time making this recipe and it was amazing! My family loved it. I will be making this again.
I want to make hamburger buns. How many ounces should my buns be
I use about 3.5 to 4 ounces for hamburger buns.
These are my new go-to recipe for bread rolls! They were SO easy to make and the result was incredibly soft and fluffy! I halved the batch for this first try but I will definitely be doubling it in future batches.
I used a mix of bread and all purpose flour (50/50), and brushed them with olive oil instead of butter as I didn’t have any, and they turned out beautifully.
These are amazing! Ever since I moved to Korea I have struggled with the amount of sugar in their bread. I bought a mini oven a month ago after 1 1/2 years living here so that I could make my own bread. This was my first time tackling yeast and making bread. I just made my second batch. They are perfect! So easy to make and delicious. Thank you for the recipe!
I have a Bosch mixer and whenever I try to add the additional flour, it won’t incorporate it. The dough hook just drags it around and won’t mix it in. Do you have any idea what I’m doing wrong?
Hi Lyndel, try adding all the flour at once instead of gradually; Bosch mixers have a harder time with smaller batches of dough, but adding the flour all at once can often help.
These are so good and easy to make!!
Simple recipe and came out so well and soft
Can I add an egg to this recipe?
You could try! I haven’t tried that so I can’t speak to results.
These are my go to. I’m an experienced bread maker, I’ve tried others, but always come back to yours because they are perfect. Tomorrow, I start working on about 7 dozen for Easter on Sunday. It’s a process, but everyone loves them and it’s worth it!
These are the most delicious bread rolls ever. I also made this recipe into a bread too. One loaf. I am hoping that you could put a bread recipe on. Or do you have one. The rolls were beautiful lovely texture
Mel does have a French bread recipe! https://www.melskitchencafe.com/french-bread/
It’s also delicious and easy! I go back and forth between the two recipes. If I don’t feel like rolling out a bunch of dough balls, then I’ll make the French bread loaves (the recipe makes 2 loaves). Or if I want rolls for “little sandwiches” for school lunches later in the week, I’ll make a double batch (which is what I’m doing later today).
Thank you for such a great recipe, they turned out great, even my youngest 16 year old son who has autism and is very selective (he only normally has seeded bread) tried and liked them. He took a couple to school with peanut butter and jam for lunch today. I’m about to bake the second batch now.
Thanks for absolutely awesome bun recipe. I had to make it two days in a row as it’s such a great hit with the family.
I knotted the dough and I also made garlic butter & coriander buns which turned out absolutely amazing.
Greetings from
Cape Town
South Africa
I have made these buns twice this week. Oh boy are they ever good.
If one overshot the flour can u dribble in a little warm water while kneading?
It kind of depends on how much the dough is over floured, but I’ve done that before if it’s just a tad bit over floured.
These buns are INCREDIBLE! But when I took them out of the oven and put butter on them, the tops lost their smooth finish and got kinda bumpy. Thoughts?
Did the dough form bumps or were the bumps little bubbles from the butter?
These turned out sooo soft, moist and absolutely delicious! I used 2 1/4 tsp of yeast (instead of 1 tbs) and let it rise over a couple of hours. I definitely use this recipe again!!!!
I think I did everything right (texture ended up really nice), but I was left with a somewhat bitter aftertaste. I used all purpose flour (not rancid). Any idea where I might’ve gone wrong?
What brand of flour did you use, James?
when you double or triple the recipe do you double or triple every ingredient exactly as its shown in the original recipe?
If I double, I double everything. If I triple, I triple everything except the yeast (I use the double yeast amount for a triple recipe).
These are the easiest and best dinner rolls I have ever made. I served them at dinner this evening and no one could stop eating them! This will be on frequent repeat in my kitchen…thanks Mel!
I love this recipe!!!!!!
These are phenomenal! I divided the dough into 5 equal parts to use as submarine rolls and otherwise followed the exactly. My family was blown away with the flavor and lightness of these rolls. I highly recommend this recipe!
My daughter in law wanted to start making home made breads, so we started with this recipe. They came out ok. We followed the instructions to the letter and didn’t get a double-the-size rise on the first round, very little on the second. The end bake resulted in a medium-dense crumb, good for a bread bowl if made larger. Not sure what we did wrong, other than we didn’t have a mixer and had to knead by hand. We’ll try again and see how it goes. The recipe is very easy to follow.
I also knead by hand, around 7/8 mins (its a good workout!) and haven’t had an issue. I use warm milk rather than water, same quantity, and mix it with the yeast and leave 10 mins until its gone cloudy and a bit frothy. Came out perfectly hope that helps!
These rolls are wonderful and will become my go-to! So easy and yummy!
These are the best rolls I’ve ever had. Serious. And I was surprised when I got around to baking them myself that it turned out just the same. I found that using a 9×13″ pan with more vertical sides did better than the one with slanted sides which crowded them a bit. My first attempt was with a disposable aluminum pan and I preferred those! Thanks so much for sharing this recipe!!