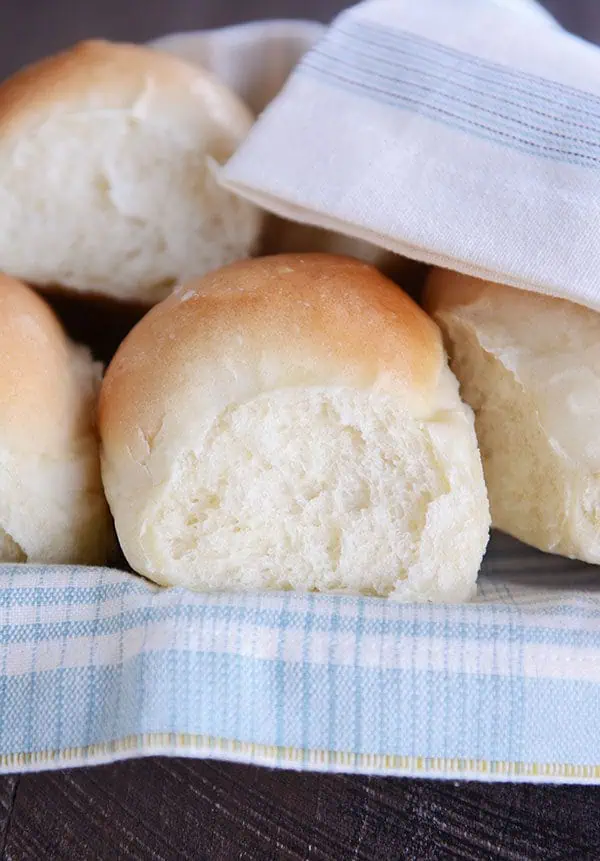
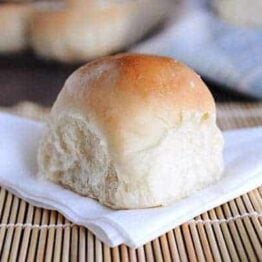
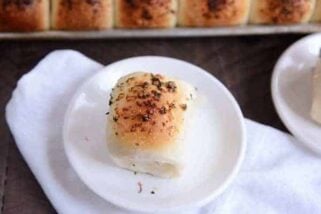
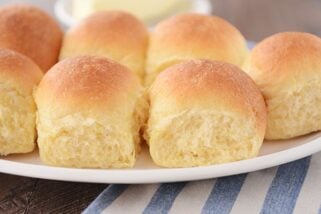
French Bread Rolls {Step-by-Step}
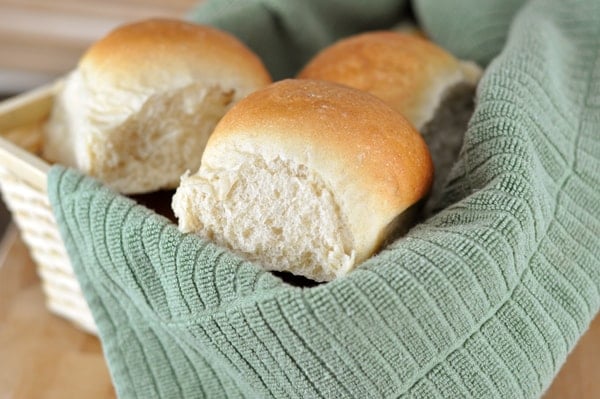
These French bread rolls make the best dinner rolls, hamburger buns, or sub buns. They are light, fluffy, and perfect for beginner (or expert) bakers. With over 1,000 5-star reviews, they are one of the most popular roll recipes on the internet.
⭐️⭐️⭐️⭐️⭐️ Thank you so much for the recipe. The rolls were wonderful. Made a double batch for Easter and froze some. They freeze excellently. Will be my go to rolls. -Jackie
Why So Many People Love This Recipe
The dough for these French bread rolls is straightforward and very forgiving. Here are many reasons why this is a foolproof, trusted recipe:
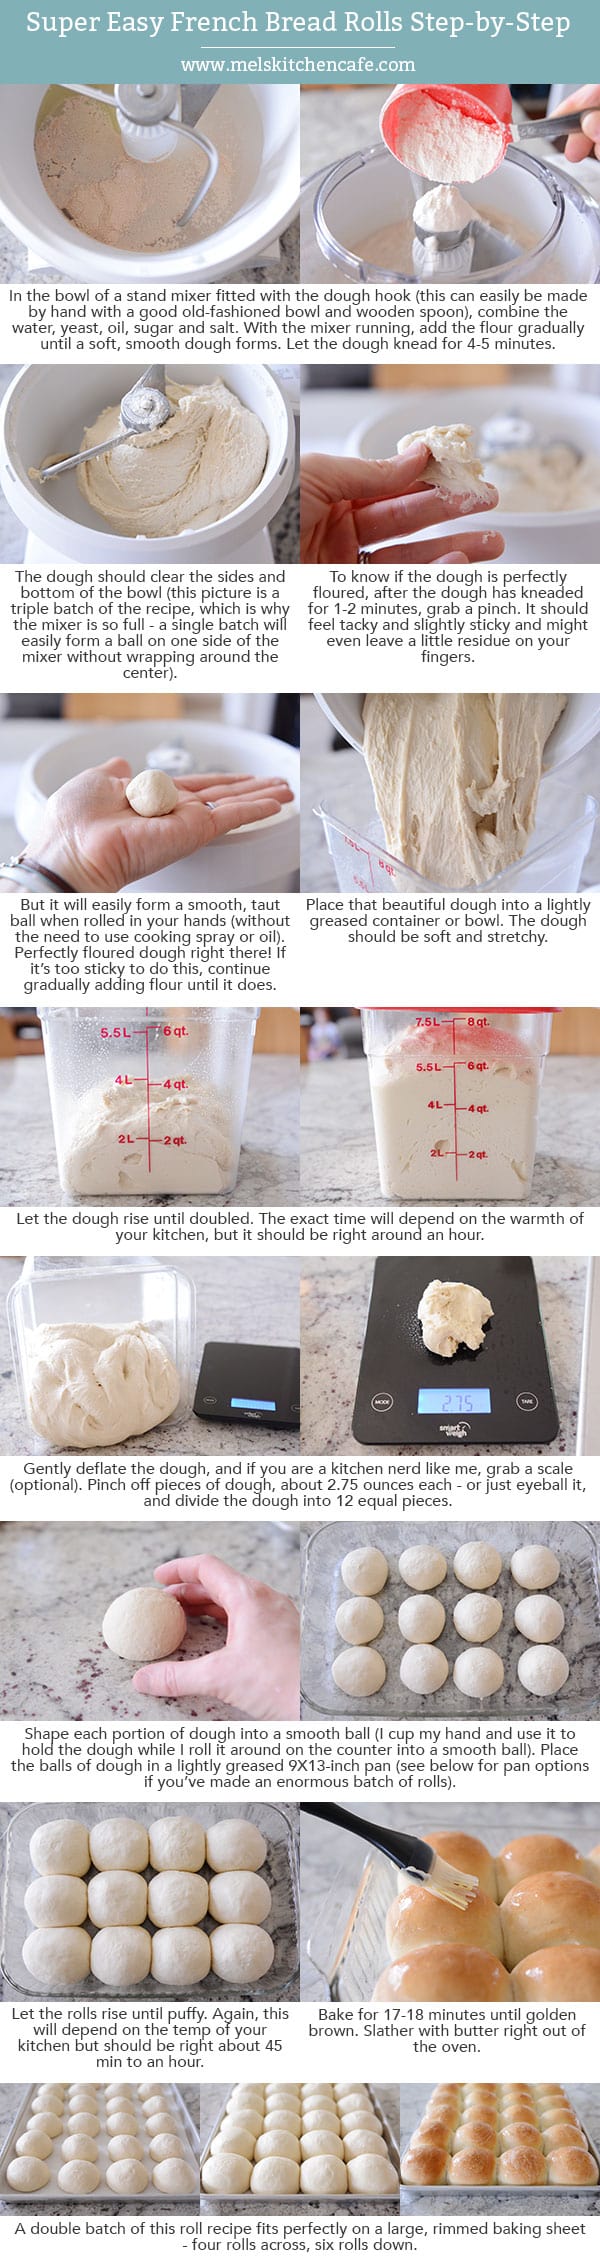
- A stand mixer fitted with the dough hook makes easy work of this recipe, however, the dough is so easy to make that it can also be mixed and kneaded by hand.
- The recipe doesn’t require scalding milk or any fussy steps. The ingredients are basic and dairy-free (other than brushing the tops of the baked rolls with butter).
- The rolls are ultra-soft and fluffy.
- You can shape the dough into dinner rolls, sub buns, hamburger buns – and some reviewers even report using the dough for pizza crust.
- These French bread rolls are easy enough for simple dinners and delicious enough to serve at any holiday dinner.

Ingredients Notes
- Warm water: The temperature of the water should be between 105 and 110 degrees F.
- Yeast: Both instant yeast and active dry yeast work in this recipe.
- Sugar: The small amount of sugar in these rolls helps activate the yeast and assists in the rolls rising quickly. It isn’t enough sugar to make the rolls taste overly sweet. You can dial the sugar up or down depending on your taste preferences.
- Oil: A few tablespoons of oil gives the dough a supple, smooth texture and helps the rolls taste fresh even the day after baking.
- Salt: I use table salt for this recipe.
- Flour: All-purpose or bread flour can be used – or a combination of both. Bread flour will create a chewier, fluffier roll texture. You can sub in 50% whole wheat flour for part of the white flour; if doing so, I recommend using a white whole wheat variety, which helps the dough stay light and fluffy.

Tips for Making Yeast Dough at Home
Here is the biggest tip I can give for successfully making yeast dough at home:
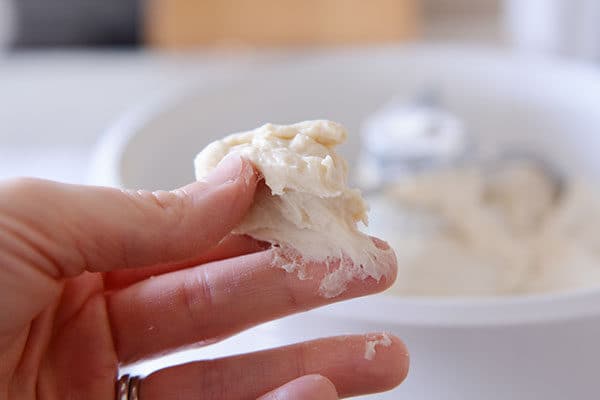
Stop stressing about adding the exact amount of flour called for in a recipe. Many, many factors determine how much flour is needed (elevation, humidity, how we each measure flour, etc.) Add the flour gradually and judge the dough by how it looks and feels. If you need to add a bit more flour, that’s ok!
How to test this French bread roll dough:
- After the flour has been added and has kneaded for a few minutes, grab a golf ball-size piece of dough.
- Initially, it might leave a little sticky residue on your fingers.
- Try rolling it into a ball without any oil or cooking spray on your hands.
- If it can form a ball shape without sticking to your hands in a shaggy, horror-movie mess, you are good to go. If not, add a bit more flour (a couple tablespoons), mix and try again.
You can see from the pictures below that initially, the dough seems pretty sticky, however, it rolls just fine into a ball without a lot of sticky dough on the palm of my hand. Adding too much flour can lead to rolls that are dense and heavy, so take time to learn what a properly floured dough looks and feels like.
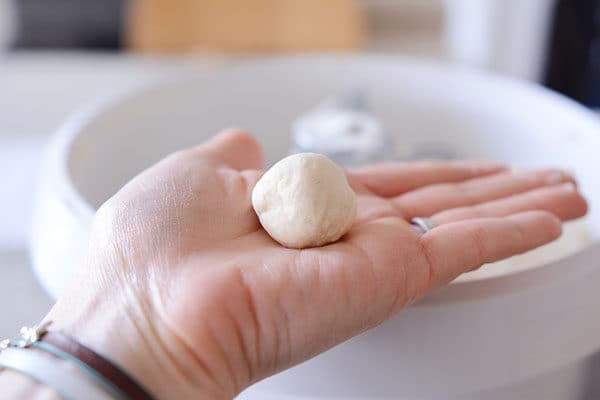
How to Shape French Bread Dinner Rolls
- Cut the dough into 12 equal pieces.
- I like to weigh each piece to make sure they are uniform. Each dough piece usually weighs right around 2.6 to 2.7 ounces.
- Cup your hand around the dough and roll the dough into a smooth ball, keeping the pinky side of your hand against the counter while you roll.
- Pinch the bottom to seal, if needed.
A single batch of roll dough (12 rolls) fits in a 9X13-inch pan. I almost always double this recipe and bake the rolls on a half sheet pan, which fits 24 rolls perfectly.


The Perfect Roll for Sandwiches or Subs
Over the years, these French bread rolls have become more than a dinner roll.
A quick scroll through the comments shows that many of you are using this roll dough for everything from sloppy joes to sub sandwiches.
Make-Ahead and Freezer Notes
Make-Ahead: The dough for these French bread rolls can be made and refrigerated overnight (either in bulk, or the rolls can be shaped, place on a pan, covered and refrigerated). Take the shaped rolls out of the fridge to rise fully before baking.
Freezing: The baked and cooled rolls freeze great. Place the rolls in a ziploc freezer bag, seal the bag, and place in the freezer for up to a month or so.
There is truly not an easier, more perfect roll recipe out there!
I often make these rolls for my holiday dinners – from Thanksgiving to Easter – because they are so easy, they work out every time, and they are always devoured. Plus, they make excellent leftovers!

Tools for Making French Bread Rolls at Home
*Affiliate links included below for products I’ve purchased from Amazon; feel free to shop around for the best price!*
- This is the kitchen scale I use to weigh each piece of dough.
- These containers are great for rising dough (the measurement marks make it easy to keep track of how much the dough has risen).
- Silicone pastry brush for brushing the rolls with butter after baking.
- My go-to OXO bench knife for portioning out the dough.
A quick note about mixers: I use a Bosch Universal stand mixer for all my bread making. Here is an older but helpful side-by-side (unsponsored) review I did between a Bosch stand mixer and a KitchenAid stand mixer.
French Bread Rolls
Ingredients
- 1 ½ cups warm water (105 to 110 degrees F)
- 1 tablespoon instant or active dry yeast (see note)
- 2 tablespoons granulated sugar or honey
- 2 tablespoons canola oil, vegetable oil, or olive oil
- 1 teaspoon table salt
- 3 ½ to 4 cups (497 to 569 g) all-purpose or bread flour, more or less (see note)
Instructions
- In the bowl of a stand mixer fitted with the dough hook or in a large bowl by hand, combine the warm water, instant yeast, sugar, oil, salt and 2 cups of the flour.
- Begin mixing, and continue to add remaining flour gradually until the dough has pulled away from the sides of the bowl.
- Knead the dough for 4 to 5 minutes in a stand mixer (7 to 9 minutes by hand). Add additionally flour a tablespoon or two at a time only if the dough starts to cling to the sides of the bowl and is really sticky to the touch (see note below for clarification).
- Place the dough in a lightly greased bowl and cover. Let the dough rise until doubled, 1 to 2 hours.
- Turn the dough out onto a lightly greased countertop.
- Divide the dough into 12 equal pieces (about 2.75 ounces each, more or less), and form the dough into round balls by cupping your hand around the dough and spinning into a round shape, pinching the bottom to seal any rough edges, if needed (video tutorial here right at minute marker 2:20).
- Place the rolls in a lightly greased 9X13-inch pan or on a lightly greased half sheet pan. Space the rolls about 1/2 to 1-inch apart.
- Cover the rolls loosely with a lightweight towel or greased plastic wrap and let the rolls rise until very puffy and nearly doubled, about 45 minutes to 1 hour.
- While the rolls rise, preheat the oven to 400 degrees F (if your oven bakes hot, preheat to 375 degrees F.) Bake for 17 to 20 minutes until golden and baked through.
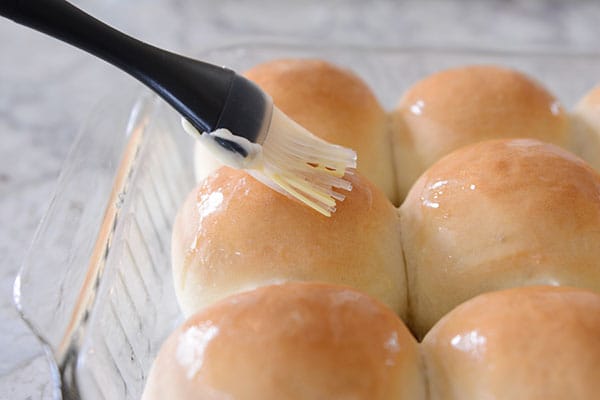
- Immediately out of the oven, brush with butter, if desired. Serve warm or at room temperature.
Notes
Recommended Products

Recipe Source: Mel’s Kitchen Cafe
Recipe originally published 12/2007; updated with new pictures, step-by-step tutorial, and recipe notes.
I made it yesterday and I tried to shape them as hoagie rolls and attempted to score them only to have them deflate and not being able to do so. I used 3 1/2 cups + 1 tbsp of all-purpose flour. First proof was 1 hr and 30 min and second one was 50 min. I looked it on google and it says it was over proofed. Any guidance as to how much time I need to cut back in order to be able to score the dough? Thank you.
Hi Cecilia, try scoring the dough before the rolls rise – that can help. You could also try adding a bit more flour to help add structure to the dough.
It would be nice to have the quantities also in grams.
I think volumetric measures restrict your audience.
My favorite roll recipe!! I don’t know if this has been answered in the comments, but can you please tell me how many ounces to use to make a sub/hoagie roll? I making these and your meatballs for the Superbowl!
Stuck inside due to a snow storm so decided to do some baking. Rolls turned out delicious and super fluffy. I used honey and olive oil for my sugar and oil to give them a richer flavour.
Bread turned out but needed to bake more than 17 minutes as listed. Dough was not cooked fully.
Bland but yes fluffy and soft. The texture was perfect
Best bun recipe.
Great bread. I used whole wheat flour and in the second rise, they doubled up right but not vertically.. the bread spread like cookies,not as flat though. Why was that ? The crumb was still very soft and all
If the rolls are rising out instead of up, it’s likely that you need to add a bit more flour to the dough for structure to help the rolls hold their shape.
Absolutely our go to buns recipe! They turn out every time! Delicious, soft and fluffy! Yum
Should have had 5 stars not 4!!!
Absolutely fabulous recipe!!!
They turned out Excellent! The video tutorial on how to shape and roll the dough was very helpful.
Thank you!
I’ve been making these for the past five years all thanks to your recipe. They’ve become a staple for me as they’re so easy to make. Around the holidays, I multiply the batch to make huuuuge rolls that are a real crowd pleaser. I’ve even used them as boules for my potato soup. I thank you now, albeit late, for posting this. You’ve helped someone who typically makes boulders for bread adept at making some of the best rolls I’ve ever had they pleasure of having.
I turned them into pizza pockets very delicious and also as a loaf of bread
These came out perfectly!
If I wanted more of a tang, what would you suggest? I don’t maintain a starter.
Hi Glen, you could try refrigerating the dough for a couple of days prior to shaping and baking.
How do YOU store these rolls? I’m guessing I’ve made nearly 500 in the time I discovered this recipe (everywhere I go people request I bring them!). I’ve only ever cooled, cut, and immediately frozen (even if I need them a day later). I’m wondering how long you keep them at room temperature and what type of bag/container you store them in when you want to eat them within a day or so.
I cool them completely and keep them in a ziploc bag at room temperature for a day or two. They are best the day of, but we enjoy them the next day, too. I also freeze them (after they have cooled completely).
Our friend denise showed me this recipe, she loves it, we tried it, didn’t have enough flour, but still made my 1st ever loaf of bread. Delicious.
This is the best dinner roll recipe I’ve found so far! I’ll be keeping this recipe for sure!! Thank you so much, I even followed the advice about the active yeast.
Pretty easy to make and came out super fluffy. I will make them again
Delicious and easy!
Have you ever frozen the formed dough before the second rise? I’d love to have a little supply in the freezer to pull out when I don’t have the time to make them from scratch.
Yes, it works great!
This recipe sounds great! But i would like to know how much is the 1 cup you use would equal to ml? Is it 200 or 250 ml? Thanks!
One cup water is right around 236 ml.
Hello,
I was curious if I could make this dough ahead of time, and then refrigerate it. I would then take the dough out of the fridge the next day for use, but how long ahead of time should I take the dough out of the fridge?
Thanks!
Yes, that should work great. I would take it out of the fridge 2 hours before you want to shape, rise and bake.
Oh. My. Goodness. Heavenly! My first attempt at homemade dinner rolls and even my picky husband absolutely loved them. I will never even consider trying another recipe. I give this 100 stars
I made these and although they were soft on the inside and tasted good they were hard on the outside and I couldn’t for the life of me get them to be smooth when I shaped them into rolls.
I made these today as an experiment for Thanksgiving day. This was only my second time using yeast ever and these turned out AMAZING. They are the perfect dinner roll! I can’t have sesame or dairy. Most bread products at stores typically have sesame in them, and most dinner roll recipes have milk in them. Making my own dinner rolls was my around buying them and this recipe is now going to be a favorite! No dairy or sesame for the win!
This recipe sounds perfect, and I want to try it. I’m new to bread-making. What temperature should the warm water be? 110 degrees or more or less? Thanks!
Yes, right around 105-110 degrees F
Hi I’m wondering about how to shape for a sub roll? Thank you Anita
I make a mini log and roll and pinch the seam until smooth.
I am making these tomorrow, the recipe is just what I was looking for, thank you for posting. Can I ask in ml what 1 ½ cups warm water would equal to?
Also, my hubby prefers rolls without the sweetness, could we adjust the sugar if necessary or would this effect the softness?
It’s about 355 ml. You can definitely experiment adjusting the sugar.
These turned out so pretty. I’m going to double the recipe next time. Thank u.
I made these rolls, and they taste good, but they have a sour dough taste. I’m just curious if you’d know why? I used honey instead of sugar and I used bread flour (I normally use all purpose flour in my rolls/bread).
I’m honestly not sure! Did they rise overnight in the refrigerator? A longer rise can give them a stronger flavor.
No, they just had the normal time to rise. Maybe I need to try again. My brain won’t let it rest. Haha!
BEST EVER!!! So easy and they turned out fantastic! They fell apart from each other easily and were so soft with a delightful, light crust. So good! So easy! And my whole house smells of fresh, homemade bread, which is ALWAYS a win! Thanks for the great recipe and all the pictures and tips, etc! You can tell you love what you do!
Loved the recipe. I doubled it and it over ran my Kitchen Aid Mixer so be advised. Flour spurting everywhere and the dough crawling up the beaters onto the drive shaft. I haven’t had a mess like that in my kitchen since I was young But the recipe is terrific! This is the homemade burger roll recipe I’ve longed for. Now to experiment with getting some whole wheat in there. Your whole wheat recipe is our staple bread in my breadbox so I’m excited to see how much whole wheat I can use and still keep these soft and billowy. Thanks Mel.
Start with 7 cups of flour on low speed until it’s nearly completely incorporated and then add the eighth cup (and then a few tablespoons at a time until you get the two signature amoeba-like arms that only kitchen aid is known for). This way you wont have flour everywhere and it won’t crawl up the dough hook!
Accidentally forgot to rate it. 5 star recipe, spot on!
This was an amazing recipe. I believe it will become part of my holiday menu!
I was thinking the same thing! Holiday rotation rolls!
I am not a bread maker and these are so easy and straight forward (by hand without a mixer) and beyond delicious!!! Make them again and again!
Really good and easy.
Great recipe, I found it easy to make and they tasted fabulous. Just found the wait around the rising a little frustrating but that was because we were under the clock to get our little man to bed.
I would love to make these rolls, but my daughter has celiac disease. Has this recipe been tested with 1:1 gluten free flour?
I have not tested it that way – I’m sorry! Generally speaking yeast bread recipes don’t work with a 1:1 flour sub with gluten free flour. It often takes a lot of other adjustments.
No worries at all! I had scrolled through quite a few comments to see if anyone else had tried it but didn’t see anything. Thank you for letting me know!
I love this recipe! My family constantly ask for these buns! But I dont know how to double this recipe
How do I double the recipe? Do I double every ingredient?
Yes, double everything straight across.
Our daughter made these and they are awesome! I will be making these!
Easy to follow and excellent results! I made mine with honey and avocado oil. Very fluffy!
So easy and delicious!! My family loves these rolls and now this is the only recipe I use!! My husband likes to eat them warm. Can I reheat the leftover rolls without losing the softness?
They really are best on the same day, but they can be reheated in a warm oven or for a few seconds in the microwave, if needed.
Where have these rolls been all my life! I just made them and they are absolutely delicious.
We’ve loved these French bread rolls, both as a vehicle for butter and for burger or sandwich buns. One note for bakers – these will be pretty big after shaping and rising, and VERY large after baking. They won’t be small like a store bought Hawaiian roll or dinner roll.
Can I make this and roll them out and put them in the fridge overnight n bake them the next day
Yes, that works great.
Can I use equal amount melted butter for the oil?
I think so!
This recipe was fantastic. It was so easy. Turned out great . I made meat buns ,put the temp at350 for 20 min. .
This recipe is great, easy to follow. Only way I messed up was greasing the tray too much so my rolls ended up with slightly soggy bottoms. Having said that they were edible still and a bit hit with the family.
Just a qick question… Is the oven temperature for a fan assissted oven?
No, it is for a standard oven (not convection).
I have a fan oven and use the recipe as is and turns out great
My three boys were craving cinnamon rolls for breakfast but I didn’t have eggs or butter to make the dough. I searched for a recipe without those two ingredients and found your recipe.
I made nine rolls of the dough. The rolls were gigantic after they’ve risen the second time. I poured about 1/2 cup of warm half & half before baking.
Boys are happy and satisfied. Father approved.
Thank you
These were so easy to make ! I was looking for a dinner roll that didn’t require butter in the dough (as I don’t have much on hand right now). I’m so glad I decided to try these . The dough was easy to work with and rose beautifully. They were easy to shape (most of the time my rolls are weird shaped lol). I did end of blooming my yeast with the warm water and sugar in the mixer for 10 minutes then followed everything to the t. I’m going to brush honey butter on the next batch for a Texas Roadhouse feel !