Easy Homemade French Bread
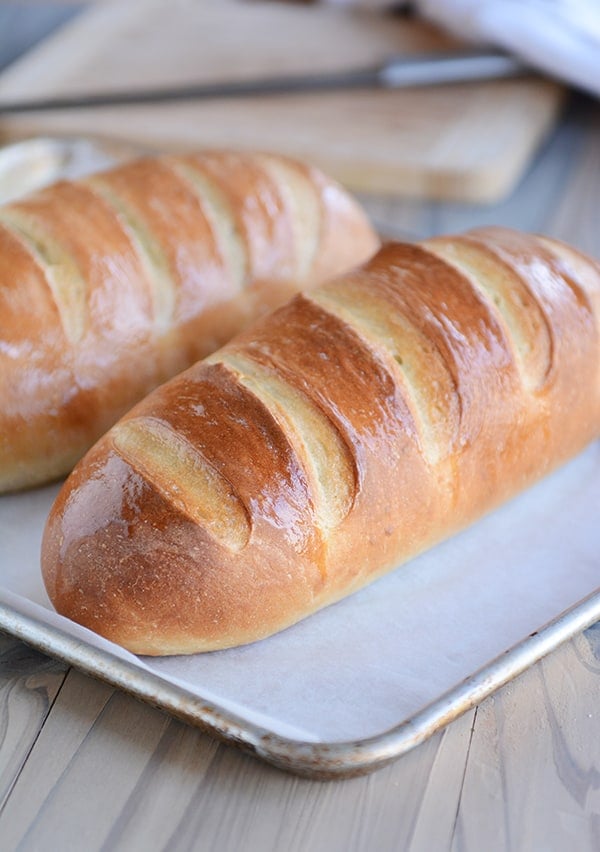
Homemade French bread has never been easier! This simple recipe produces a light and fluffy loaf of French bread that will rival any bakery!
This easy homemade French bread is so simple and perfect for a bread making beginner.
But as you can see from all the comments below, it’s just as valued by expert bread makers, too!
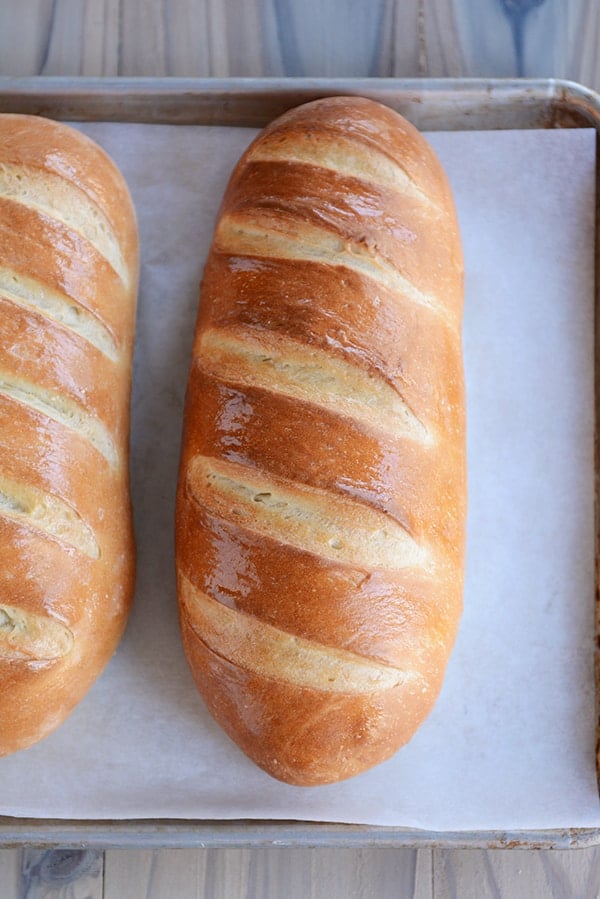
Making French Bread Dough
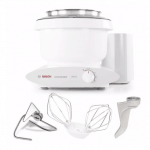
This straightforward bread dough can be made in a stand mixer or by hand.
- Warm water
- Yeast (instant or active dry yeast)
- Bit of sugar and oil
- Salt
- Flour (all-purpose or bread flour)
At the start, the dough will look shaggy and rough.
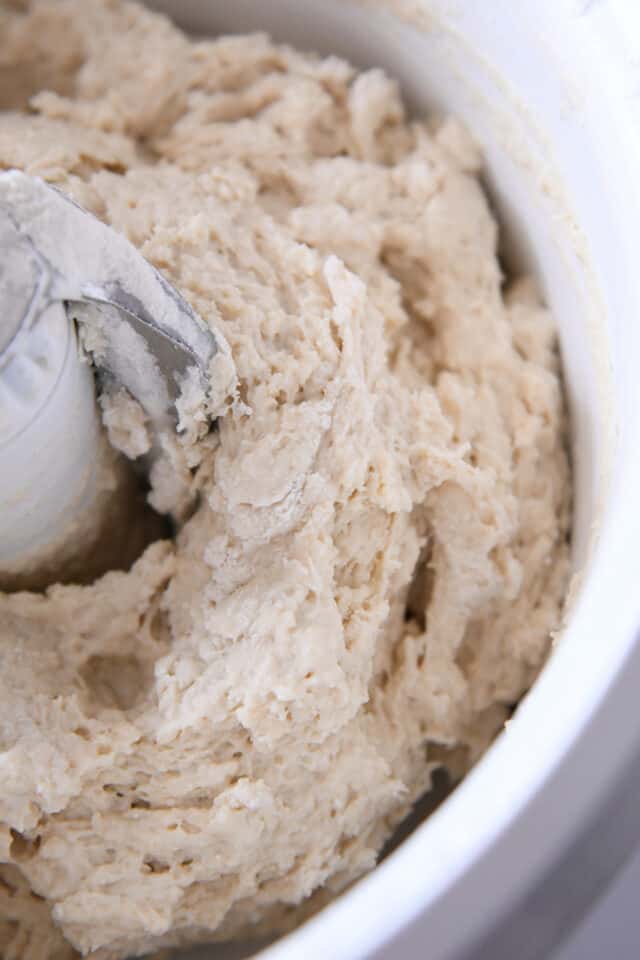
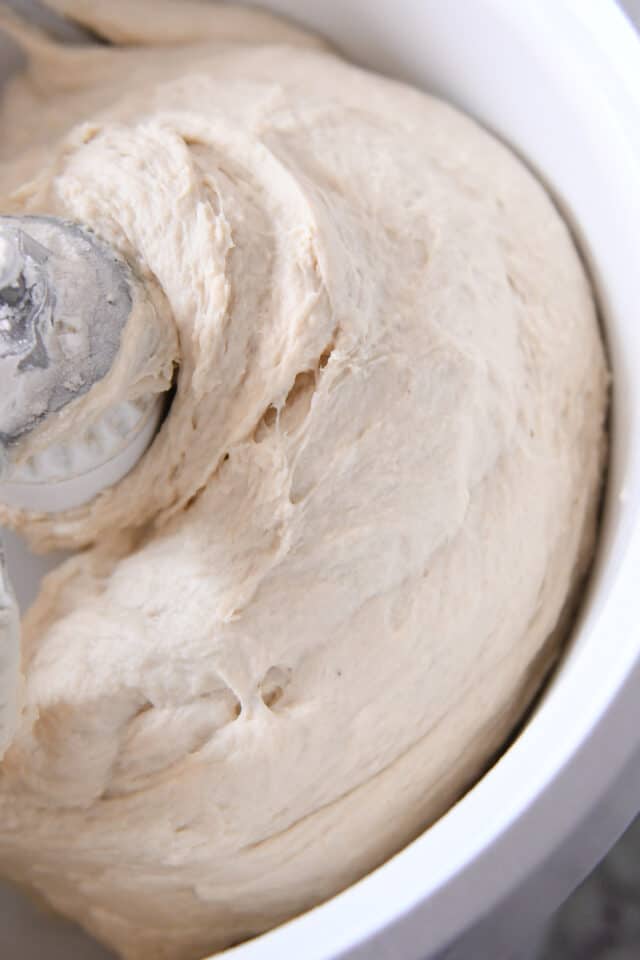
But as it kneads, it will become soft and smooth.
The most important part of this dough (and other yeast doughs) is to judge the amount of flour by the look and feel of the dough rather than the exact amount of flour called for in the recipe.
Factors such as humidity, elevation, room temperature, how we each measure flour, and more can affect the amount of flour added. So don’t stress about precise flour measurements and continuously feel the dough to achieve a soft dough that is slightly tacky but doesn’t leave a lot of residue on your fingers.
Too little flour and the dough will be a mess to handle. Additionally, the bread won’t hold its shape as it rises and bakes.
Too much flour and the dough won’t rise well and the bread will be tough and dense.
Two Methods for Dough Rising
In the recipe, there are two methods to letting the dough rise:
- Leave the dough in the mixer, cover with a lid or towel, and let the dough rest for 10 minutes. Stir it down by turning on the mixer for 10 seconds or so. Repeat the “rest and stir down” cycle five more times.
- Transfer the dough to a lightly greased bowl and cover with a towel or greased plastic wrap. Let the dough rise until doubled, about an hour or so, depending on the warmth of your kitchen.
I alternate between the two methods depending on my mood. The 10-minute increment rising method is unique to this original French bread recipe. The idea is that allowing the dough to rise this way produces a lighter crumb.
But the more traditional rising method also results in a delicious, fluffy loaf.
How to Shape French Bread Loaves
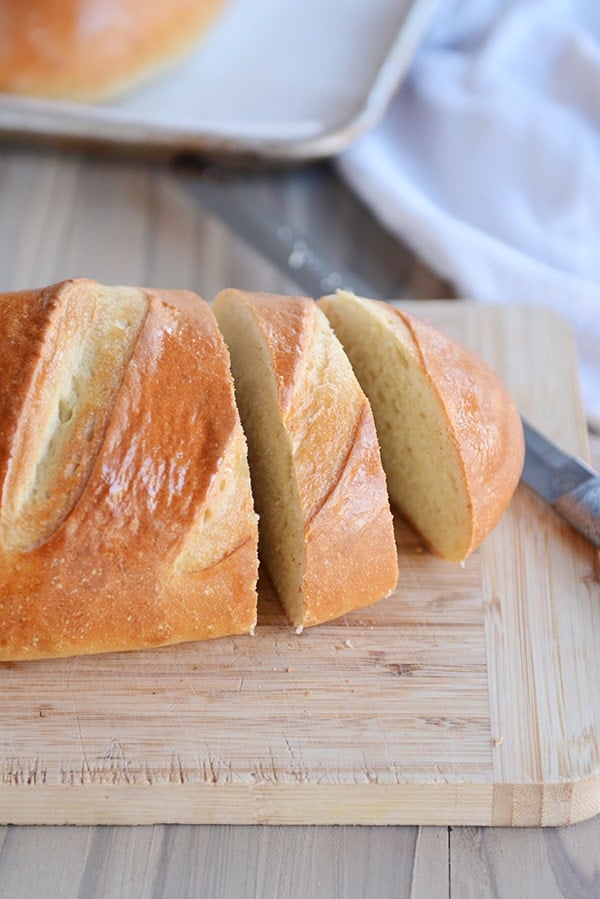
The question I get asked the most about this easy homemade French bread is how to shape the loaves.
The loaves can really be made any size or shape; I usually end up making 12-inch loaves, but if they end up being a bit thinner or chubbier, it’s no big deal!
Press each portion of dough into a flat rectangle and fold the bottom edge up and over the dough, pressing the seam flat with your hand.
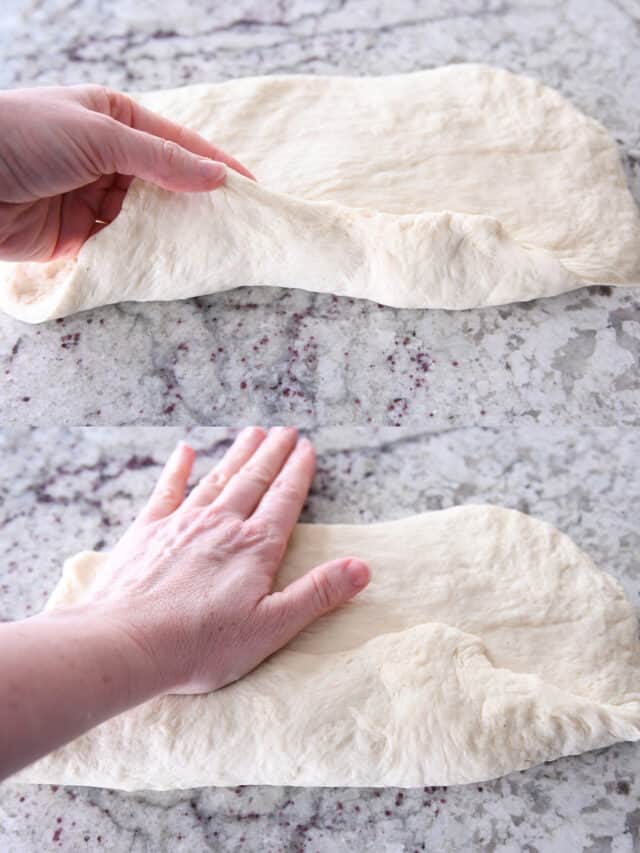
Then, roll the dough up again to meet the top edge.
Fold the top edge over and press or pinch lightly.
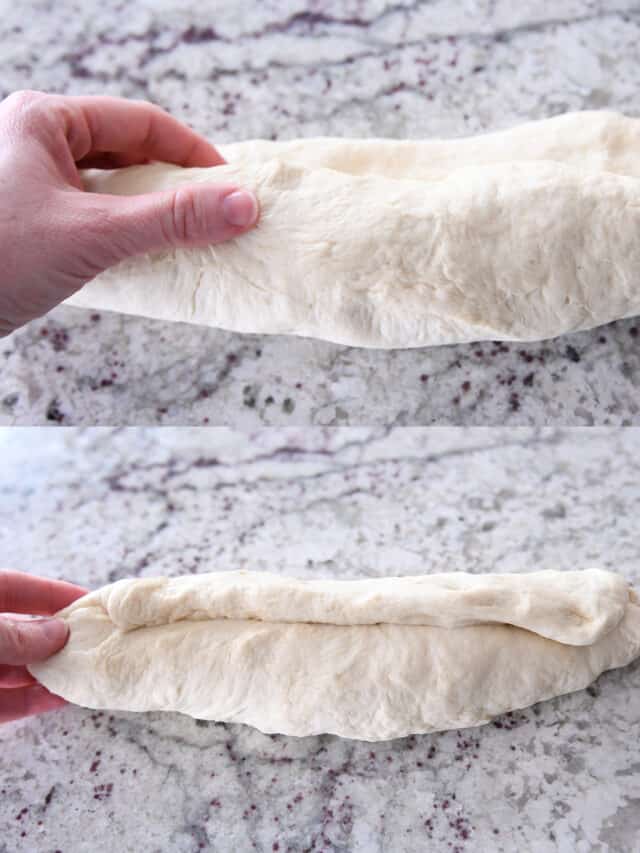
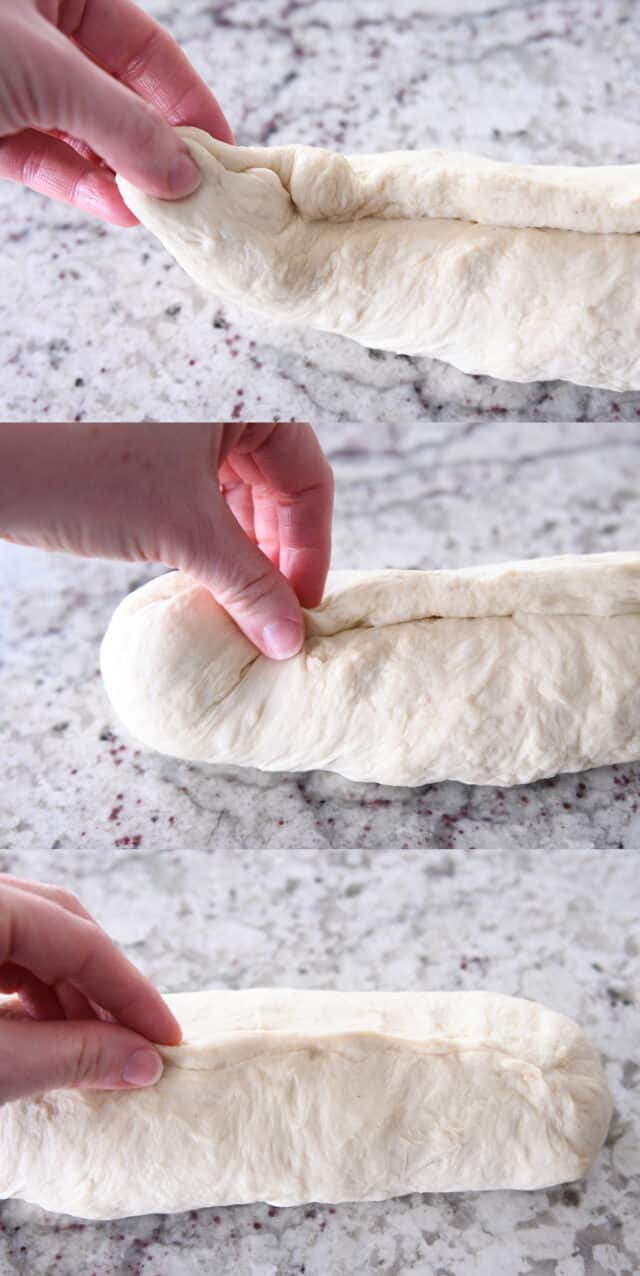
Take the end of the bread dough and fold it up and over an inch or two to give an even thickness all the way down the loaf.
Pinch to seal the end. Repeat on the other end of the dough.
Then, deliberately and thoroughly pinch and seal the entire length of the loaf.
How to Score the French Bread Dough
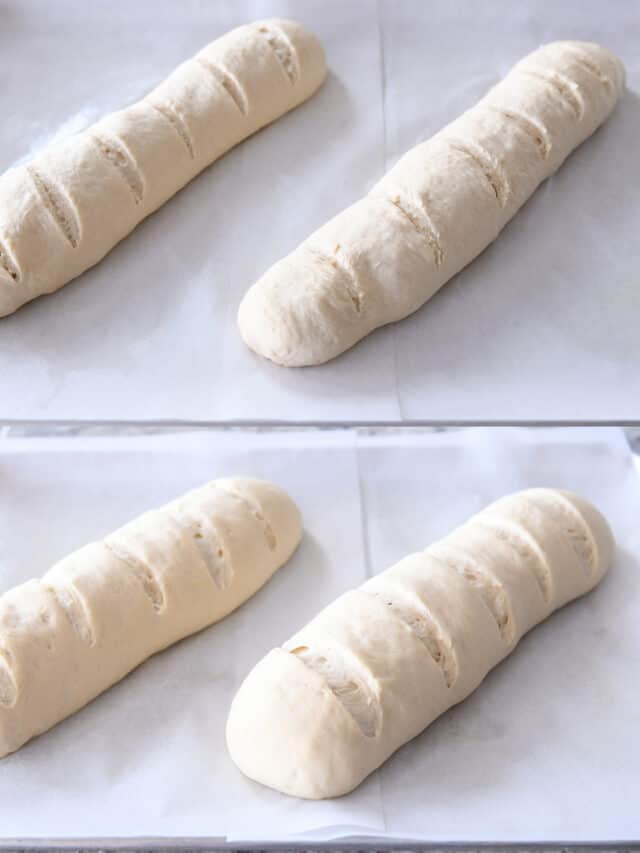
Scoring the bread dough (in my house, also called: slashing or gashing) helps the dough rise better AND prevents it from cracking in unexpected places while baking.
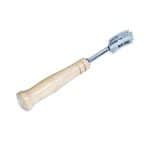
Using a bread lame for this task is extremely helpful. A bread lame is a long stick or utensil with a razor blade on the end. The razor is used to make thin cuts in the dough.
If you don’t have a bread lame, using a clean, sharp razor blade or an extremely sharp kitchen knife can work. Be aware that if the knife isn’t sharp enough, it’ll likely deflate the dough.
The bread loaves can be scored before or after the final rise. I prefer to do the slashing and gashing before they rise as I’ve had one too many loaves of risen bread deflate at the first touch of the razor, and there is nothing so soul crushing as when that happens.
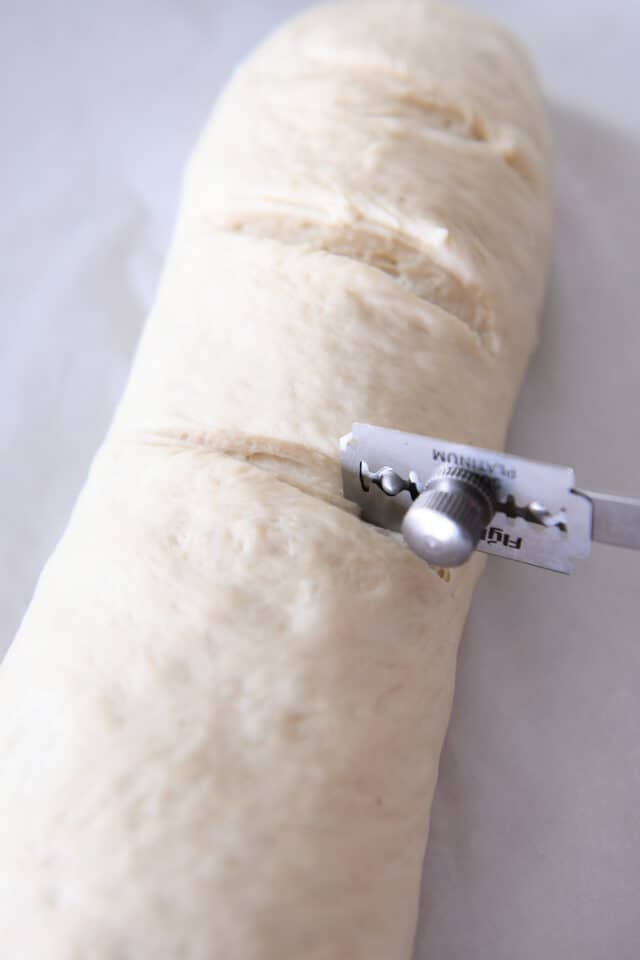
Let the bread loaves rise until noticeably puffy before baking.
Easy Hack for Crusty French Bread
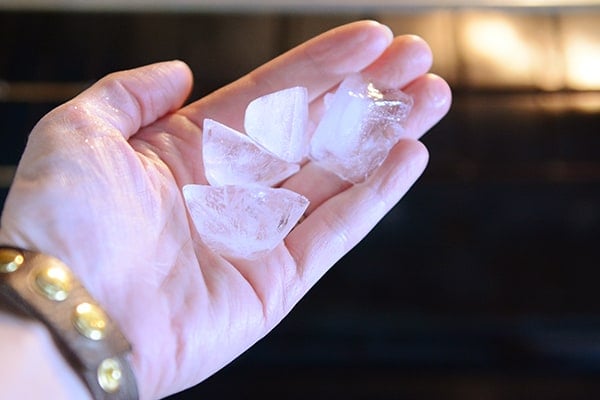
For a delicious golden crust, immediately before putting the bread in the oven, toss 3-4 ice cubes onto the bottom of the oven. Add the bread and quickly (but gently!) close the oven door.
The steam as the ice cubes hit the toasty bottom of the oven will lightly crisp up the outer crust as the bread bakes.
Important Note! Please consult your oven’s manual for details or caution on putting ice/water on the bottom of the oven floor – I’ve never had a problem, but everyone should do their own research and use their own best judgment (also take care not to toss the ice cubes on the glass oven door as it could crack).
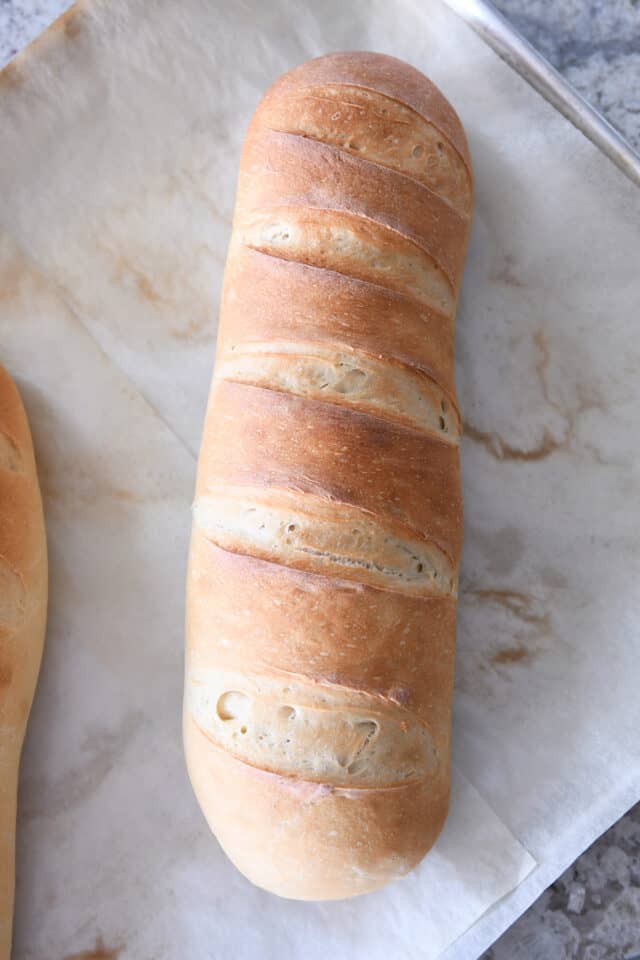
If you are struggling to get a deeper golden crust on the French bread, try:
- Increasing the oven temperature by 25 degrees and/or
- Moving the oven rack up one position (I find my bread browns the best in the middle or upper middle area of my oven)
Whole Wheat French Bread
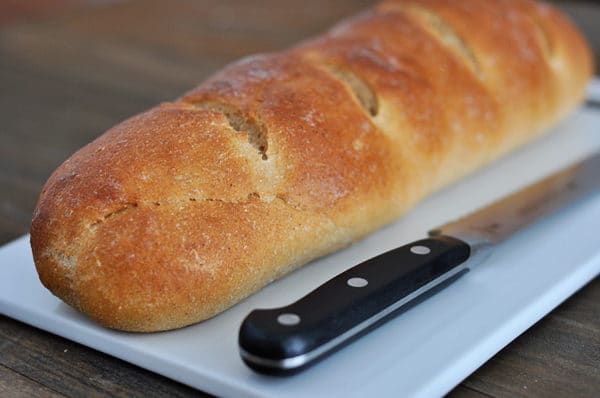
As noted in the recipe, French bread works quite well using whole wheat flour. I’ve found the best results are when using white whole wheat flour (red whole wheat flour makes a denser, heavier loaf).
I recommend subbing in half whole wheat flour to start and then adding more whole wheat flour as you continue to make subsequent batches of bread.
If using whole wheat flour, add a 2-3 minutes to the kneading time to help develop the gluten (also, adding a couple tablespoons of vital wheat gluten/gluten flour can also help the whole wheat bread bake up light and fluffy).
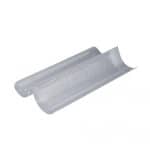
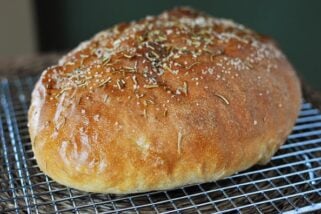
Helpful Tip: If you’ve struggled with your bread flattening out while baking instead of holding the perfect shape, you might try these French bread pans {aff. link}. I have them and LOVE them. I don’t use them every time I make this bread, but I do pull them out quite often (I also use them for this rosemary bread).
Perfect Homemade French Bread
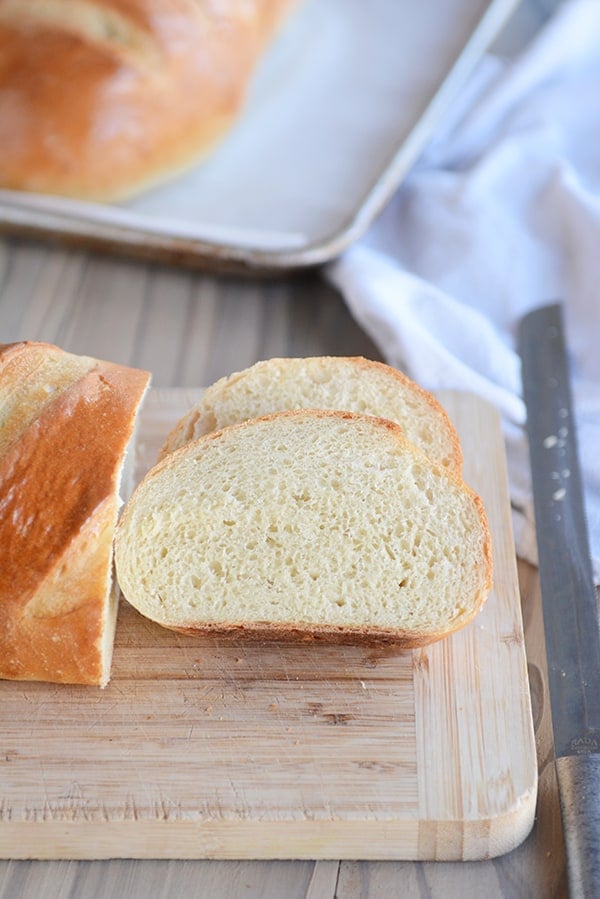
With over 2,500 5-star reviews, this homemade French bread has become a favorite for so many of you.
Hundreds of you have let me know that you have been intimidated by homemade bread until you found this recipe! It is easy, foolproof, and will make you feel like a bread making rock star.
Helena says: Finally, after 5 failed bread attempts using other places recipes, this is THE recipe to use! Happy dance! Thank you for sharing this awesome recipe! Delicious bread!
Valerie writes: Such a fantastic, easy recipe. The “hands on” time is minimal and it comes out perfect every time. Thanks for sharing a recipe that’s become my “to do” dinner bread!
Nichole says: Followed instructions exactly! First time making any sort of bread ever. The bread turned out perfect!!!!
Pia commented: Hands down my go-to bread recipe. Today’s edition is 1/3 dark rye flour, with Italian herbs and caraway seeds mixed in and sprinkled with everything bagel topping. Yum! Best bread recipe ever, and so easily customizable!
FAQs for Homemade French Bread
Yes! Halve all the ingredients straight across – just keep an eye on the amount of flour and judge the final amount by the look and feel of the dough.
Yes, it freezes great (after baking and cooling).
Moving an oven rack up or down can help. In my oven, the bread browns best in the upper half of the oven. Also, you can try increasing the oven temp by 25 degrees.
Absolutely! You can mix the ingredients in a bowl with a spatula or spoon and knead by hand.
I always use the same amount interchangeably. Recently, I’ve heard that active dry yeast doesn’t need to be proofed in liquid first, but I always still do when using active dry yeast (no need to proof with instant yeast).
Yes, just keep an eye on baking time – smaller loaves may need less baking time.
One Year Ago: Harvest Pasta Sauce {Trader Joe’s Copycat}
Two Years Ago: Peanut Butter Cup Cheesecake with Chocolate Cookie Crust
Three Years Ago: Easy Homemade Egg Noodles {Step-by-Step Pictures Include Food Processor Method or By Hand}
Four Years Ago: Black Bean and Butternut Enchilada Skillet
Five Years Ago: Chocolate Chip Peanut Butter and Oatmeal Cookies

Easy Homemade French Bread
Ingredients
- 2 ¼ cups warm water, 110-115 degrees F
- 2 tablespoons granulated sugar
- 1 tablespoon instant or active dry yeast
- 2 ¼ teaspoons salt (see note)
- 2 tablespoons olive oil, canola oil, vegetable oil or avocado oil
- 5 ½ – 6 cups (781 – 852 g) all-purpose flour or bread flour (see note)
Instructions
- In the bowl of an electric stand mixer fitted with the dough hook, combine the water sugar and yeast. If using active dry yeast, let the mixture bubble and foam before proceeding (this can take 3-5 minutes). If using instant yeast, proceed with the recipe (no need to let the yeast activate).
- Add the salt, oil and 3 cups of flour and mix. Add in 2 1/2 to 3 more cups of flour gradually. The dough should clear the sides of the bowl and form a soft ball that doesn't leave a lot of dough residue on your fingers.
- Knead for 2-3 minutes until the dough is smooth. If the dough starts to cling to the sides of the bowl (or the center column if using a Bosch or other mixer with a center), add 1/4 cup of flour at a time until a sturdy but soft ball of dough forms.
- Rising Method 1: Leave the dough in the mixer, cover with a lid or towel, and let the dough rest for 10 minutes. Stir it down by turning on the mixer for 10 seconds or so. Repeat the "rest and stir down" cycle five more times.
- Rising Method 2: Instead of letting the dough rest for 10 minute spurts and then stirring it down, transfer the dough to a lightly greased bowl and cover with a towel or greased plastic wrap. Let the dough rise until doubled, about an hour or so, depending on the warmth of your kitchen.
- Turn the dough onto a lightly greased surface and divide in half. Pat each section into a thick rectangle, 9X13-inches or thereabouts (doesn't have to be exact). Roll the dough up starting from the long edge, pressing out any air bubbles or seams with the heel of your hand, and pinch the edge to seal. Arrange seam side down on a large baking sheet lined with parchment paper (I use separate baking sheets for each loaf).
- With a bread lame, razor blade or VERY sharp knife, cut several gashes at an angle on the top each loaf (you can wait to score the bread until after it rises, but it can easily deflate if the razor/knife isn't sharp enough).
- Cover the loaves with greased plastic wrap or a kitchen towel, and let rise until noticeably puffy and nearly doubled in size, about an hour.
- Preheat the oven to 375 degrees F and make sure an oven rack is in the center position. If you find your bread isn't browning as much as you like, preheat the oven to 400 or 425 degrees and/or move the oven rack up one position (watch carefully so the bread, especially the bottom, doesn't burn).
- Optional: for an extra golden, crisp crust, place the loaves in the preheated oven and immediately toss 3-4 ice cubes on the bottom of the oven. Close the oven door quickly but gently. (See note below!)
- Bake the loaves for 25-30 minutes until golden and baked through.
- If desired, brush melted butter over the hot loaves (this softens the crust a bit, so if you want a crispier crust, don't butter the top).
Notes
Recipe Source: adapted slightly from The Sister’s Cafe


Hmmmm I baked brad maybe 4 time before I found you! And I can tell you even seem all the recepis I did was same ingridians but brad didn’t come out as good! But this one came out perfect to me and my husband approves it too well he is the only one who eats the brad lol I need to watch my figure hahaha life! Good luck guys hope u be happy with this brad as we are!❤️❤️❤️
The recipe came out delicious. The only thing is that it is not browned on the top as shown in the pictures, although it did Brown a bit. The smell of fresh-baked bread was just awesome. Now I can make smaller rolls for sandwiches.
Just a quick side note to help with Browning process brush egg wash onto the dough before placing in oven. I found out why it didn’t brown a whole lot. Other than that he recipe is wonderful.
I’ve been searching for the perfect French bread recipe, and I’m done looking. Follow this recipe to the tee and you won’t be disappointed!
This makes beautiful, soft, perfect bread. Way better than what you buy in the store. And you know exactly what’s in it! Very easy to make. Now everyone thinks I’m a baking genius and is requesting bread! Hmmm… maybe it’s too good.
Thank you for posting such a delicious recipe! We made the bread for extended family the other night, and now we have been asked to make more of it for Thanksgiving day. There will be 50 or more people at Thanksgiving dinner. Is it possible to make the dough or the bread in advance and freeze it? If not, how long does the bread last after it has been baked? We did not have any left over after we made it!
Ack! Please disregard my question. Just saw an identical post and your response below! Thanks again for the great recipe!
I made this for friends yesterday that came for dinner. This was delicious and so easy to make. I actually did option 2 and let it rise in an oiled bowl for about 3 hours because I started it too early!! On the 2nd rise I made the slits after placing the dough on my baking pan and then let those rise for another nearly 2 hrs. They baked up beautifully and a whole loaf was gone after dinner. Thanks for sharing this!
Wow! I can’t believe I made this. They were so pretty. LOL! I don’t like mine so crunchy on the outside, so I cover them with a towel for about 10 minutes when they come out of the oven. I wouldn’t change anything about this recipe. Delicious.
just took it out of the oven…omg it looks beautiful, smells even better
In the oven right now! I hope I got the rolled up part correct
I am a complete bread making newbie. I like to bake, but I usually stick to muffins and cookies. I’ve made this twice now and all I can say is VIVA LA FRANCE! This is beautiful bread. Merci!!!
Couldn’t wait! I had to eat the fisrt loaf hot while the second one is baking. It is the most delicious, fluffy and crusty bread I’ve ever made. I did all the mixing and kneading by hand. Thanks Mel.
Tried the egg white, good results
So this bread is very good, but I need help. I followed the recipe exactly, used rising method number 2, and all was well. I put the ice cubes on the bottom of the oven and shut the door quickly, but in 20 minutes my kitchen was filled with smoke and the bottoms were burned while the tops remained pale. They were barely done, but still edible and tasted nice minus the burnt bottoms and halfway crusty top.
Anyone know what I did wrong?
Where was the oven rack in your oven? Close to the middle or close to the bottom? You might try decreasing the oven temperature – sounds like your oven may cook on the hot side.
This is a great recipe. The bread turned out amazing! It was very easy to make using my mixer. I made the slits in the loaves before the final rise and that worked out perfectly. The bread was delicious!
I meant to give this 5 stars!!
Has anyone ever halved this recipe and made it in a Lekue breadmaker?
Oh man i am amazing.. Thank you for the recipe. I did a broccoli cheddar with chicken to go with it and rediscovered why i love myself 🙂 i used the half wheat/half white flour recommendation above and just poured some water in the bottom of the oven as i am out of ice for some ungodly reason.. I actually use that method for a good majority of my baking.. Baked goods like steam rooms vs dry saunas!
It’s in the oven now and I can’t wait!!!
Mel,
Great recipe! Daughter and I did pretzels last week and now French Bread. The bread turned out awesome by the way 🙂
Hi, I was wondering if you have tried this bread with gluten free flour? If so would it be a 1:1 swap?
I haven’t…it usually doesn’t work very well to sub in gluten-free flour for all-purpose flour in yeast bread recipes. You might have better luck finding a French bread recipe already developed to be gluten free.
I used this recipe as directed. It needs to have more salt in my opinion. I guess it’s okay if you are eating it with salted butter or another spread. I like my bread plain and I’ll have to add more salt next time to enjoy it that way. Other than that, it’s a good straight forward recipe. I’m using the bread I made tonight for garlic bread.
This recipe is so quick and easy! Our family loves it and I especially love that my kiddos can bake it up in their own!
Any videos available? I need a visual guide, lol.
This recipe is awesome. I combined the sugar, yeast and water then I placed the flour and salt in my bread machine. Once the yeast mixture was bubbly I added the oil and poured it into my bread machine on the dough cycle. I watched it for texture and added flour until the dough wasn’t too sticky. After the machine did the first rise I rolled it out into a rectangle and treated it like cinnamon rolls by spreading a light coat of butter, sprinkled grated cheddar, romano and parmesan cheese then I rolled it up and cut it into 12 rolls. (I think I could have even pulled of two trays of 12). I let it rise an hour, sprinkled the top with garlic powder, then baked it at 375 for 25 minutes. I did the ice cube trick too and the crust was nice. These were a huge hit and they remain moist the following day when completely cooled also. Thanks for the awesome recipe!
This bread deserves more than 5 stars!! Dont know what happened in my review. I clearly meant 5 stars!!!
I can fix that, Stacy – thanks!
Outstanding! Super easy instructions turns out perfectly every time. I gave up my old french bread that only made one loaf for this and wont go back! I have made using all purpose as well as bread flour. Both with excellnt results.. thankyou Mel!! I have a batch rising now !
This looks more like ciabatta than French bread (i.e. a baguette).
This is the easiest recipe and the bread is delicious. I typically use the recipe as written, but today I added a teaspoon of garlic powder and used 1 1/2 tsp of salt. The result was perfection. The hint of garlic is mmm mmm good. Thank you for sharing the recipe and helpful suggestions.
This was amazing. I did the method 1 rising and also used the ice idea for the bread. This is easily the best bread I have ever made. Thanks for sharing!
Mmm mmm! Wonderful flavor. I could eat the whole loaf!
Making it today will let you know
Best bread recipe ever! Before I put my lobes in the oven I brushed with an egg wash and sprinkled with sesame seeds. Delicious! Thank you for sharing a recipe I feel like I’ve been looking for my whole life.
My best bread making experience. Thankyou
I haven’t made homemade bread in a few years and wanted to attempt to make some again. it turned out wonderful and delicious, just can’t stop having a slice. I will make your recipe over and over. Thank you.
Can you use garlic powder on the initial mix?
Sure!
I only started making bread a few months ago so I’m still learning. Right now my ‘accomplishments’ are Basic White Bread and my own recipe of Jalapeno Cheesy Bread which keeps being baked at the request of several neighbors. Lol.
(For anyone who loves really spicy hot Jalapeno Cheesy Bread, try this:
I use a Basic 2 lb White Bread recipe. Then, after the first rising is done, I add 8 to 10 diced-up Jalapenos WITH seeds, 2 cups of my favorite shredded 3-cheese blend, 10 heaping tablespoons of grated Parmesan Cheese, and enough extra flour to decrease the dough wetness so it’s just slightly tacky but still soft. Then, after hand-kneading for about 15 minutes, this dough is placed into a greased 9 x 13-inch baking pan and allowed to rise for the 2nd time until almost doubled. After that, it is placed into a preheated 350 F oven for 30 minutes or until the baked bread sounds hollow when tapped on.)
I came across your Easy Homemade French Bread recipe yesterday morning…thought “Wow, something different AND easy enough to do!”…printed out the recipe…and then started making it.
Once the two loaves were rolled up and placed on non-stick foil, I used a sharp knife and gently ‘sawed’ 1-inch deep cuts into the loaves’ tops BEFORE allowing each dough to rise for the 2nd time. This way, I wouldn’t accidentally deflate the dough, and the cuts would fill in while still showing up as a decoration.
Since my oven seems to run a bit hot, I baked each loaf separately at 350 F for 30 minutes instead of at 375 F.
THE BREAD CAME OUT GREAT!!!
After removing each loaf from the oven, I rubbed half a stick of softened butter over the top so the crust would soften up a bit…then let the loaf cool for about 30 minutes…and then wrapped it up in non-stick aluminum foil.
One loaf was given to a friend to try and we kept the other loaf.
It’s soooooooo good!!! My hubby and I had it with some ready-made lasagna last night for supper, and we both had more warmed up bread for breakfast. Lol. It’s delicious!
I’m so glad you posted this recipe! This Easy Homemade French Bread will definitely be a staple in our home…and in others’ once our neighbors find out about it! 🙂
Can you freeze the dough and bake at a later time? I’m always wishing I had a good loaf of bread, but no time to make it.
I think it is best fresh and if I freeze bread, I prefer to freeze it after it’s been baked, but you could certainly experiment!
This is the recipe I’ve been searching for. I should have known you would have it!
Can you use the ice cube trick in a gas oven? They have those open slats on the bottom for the flame. Just wondering. Thanks
Hey Marie. I’m not sure about that? I will have Mel respond when she gets back from her vacation next week!
Sure put ice in a aluminum baking pan that’s how I do it
That’s a great question, Marie – I probably wouldn’t recommend it based on that.
I do it all the time! The slats are so far off to the side and the ice cube almost are immediately turned to steam. If your nervous about your particular oven, maybe try 1 or 2 cubes at 1st.
Put a baking pan on the very bottom shelf in the oven. Preheat the oven and the pan. Drop the ice onto the heated pan instead of the bottom of the oven and this should give you similar results.
You absolutely can! While you’re preheating your oven, set your bottom rack to the lowest setting in the oven, and put a 9×13 metal baking dish on that rack..when you’re ready to put your bread in, just throw those ice cubes in the baking dish and close that oven quickly( and carefully so as not to deflate that beautiful loaf!) and the steam will create that wonderful crunchy crust you’re looking for!
Love this recipe! Found it a couple of weeks ago when I wanted to give making homemade bread a try. It’s a no fail and turns out perfect every time. My question is if I want to make smaller loaves for sandwiches, what do I adjust the baking time to? Thanks!
It really depends on how small the loaves are, but I’d probably suggest checking on the bread 5 minutes earlier than the time stated in the recipe and add additional minutes if needed.
I made 1/2 of the recipe (you cut the dough in half) French Bread style and the other 1/2 I put in a loaf pan. Both turned out great. The loaf I plan on using it for sanwiches.
LOVE LOVE LOVE this bread! Super easy and super tasty!
Absolutely AMAZING!!! I just made this recipe today and the bread came out great and my whole family loved it. Thank u for the wonderful recipe!
Hi, I made this today.. all was well but the bread became flat and hard.. Y do u think this happened.. I really want a nice french bread. please help
Try adding a bit more flour and not letting the bread overrise.
I’ve made this French bread three times now.
It’s over the top good. I followed all the directions exactly, used bread flour (don’t know if that made any difference), got a lame to score the bread. I baked it in a jelly roll pan lined with parchment the first time and that made the dough spread out and it had a really brown bottom so I went one step further and bought the two loaf bread pan that’s linked in the recipe. That pan made all the difference. I got mine at Bed Bath and Beyond for $25.
This bread is better than any I’ve eaten in the best Italian restaurants.
Thank you for posting this recipe.
I’ll never buy French bread again!
I made this bread yesterday and it is so delicious! I used one loaf for garlic bread with dinner, and cut the second loaf for sandwiches this afternoon. I will definitely be making this again! Next time I’m going to make several much smaller loaves to use for sandwiches, instead of the 2 larger loaves. *Bonus: I didn’t have to make any high altitude adjustments!
I am going to use this to make my beerocks. My family loves mine. This will be cheaper than using canned dough, and I can use healthier flour
Recipe was so easy i mixed by hand and the bread came out perfect.
I made this french bread and it came out delicious, I’m very happy that I choosed this recipe, because it turned out so good and my husband loves it. The only change I will make next time is add a little more salt, that’s all that this recipe is lacking. Other than that it’s perfect!!!
I must be reading wrong or something but I scored the bread after the second rise with slits in the top and DISASTER. My whole beautiful load just deflated. They were so nice and round and perfect and then BOOM. I should’ve stopped but I continued I figured they would rise while baking…..NOPE. So next time I will scors BRFORE the second rise!
Mel, this French bread looks so good, thanks for the recipe and for the detailed instructions!
I didn’t know about the trick with the ice cubes but it sounds so practical, thanks, I’ll keep it mind!
Will try to follow this as I had tried & tried & had not been very successful. Hoping that this time it will be a success.