Triple Berry Pie
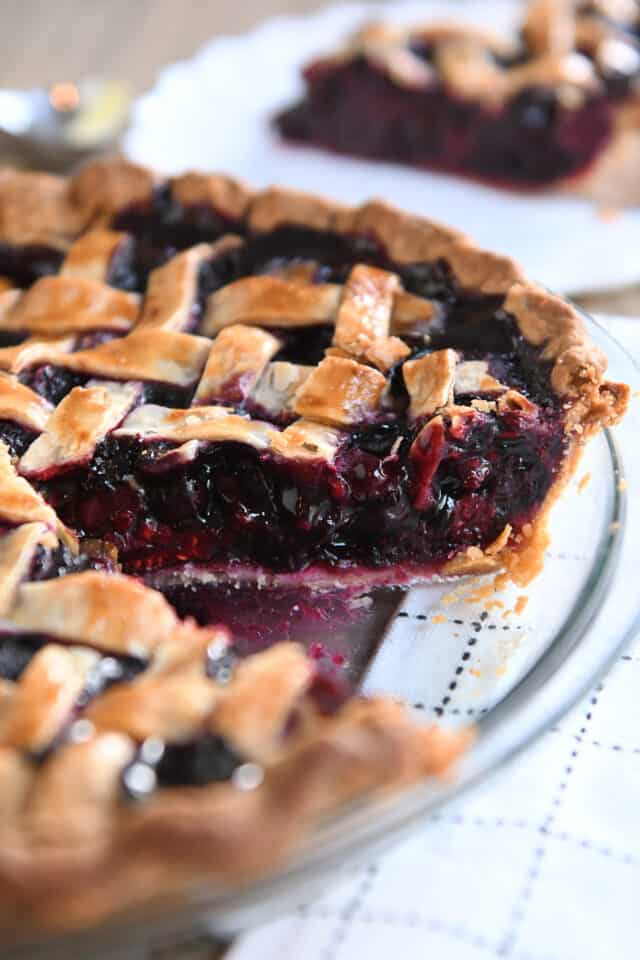
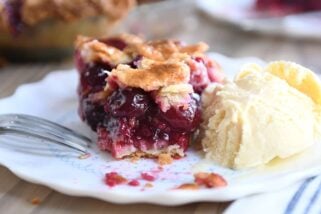
This triple berry pie is absolutely incredible! Flaky pie crust is filled with a perfectly thickened filling of sweet and tart berries.
Triple berry pie is the pie recipe you never knew you needed! It is the perfect pie to compliment a dessert spread of richer, heavier pies or desserts.
It is refreshingly sweet and tart, AND it can be made with fresh or frozen berries!
Triple Berry Pie Filling
The trickiest part of homemade pie is getting the filling to thicken up without being a soupy mess when the pie is cut and served!
This triple berry pie filling thickens beautifully while baking without the need to precook the filling!
Triple berry pie filling:
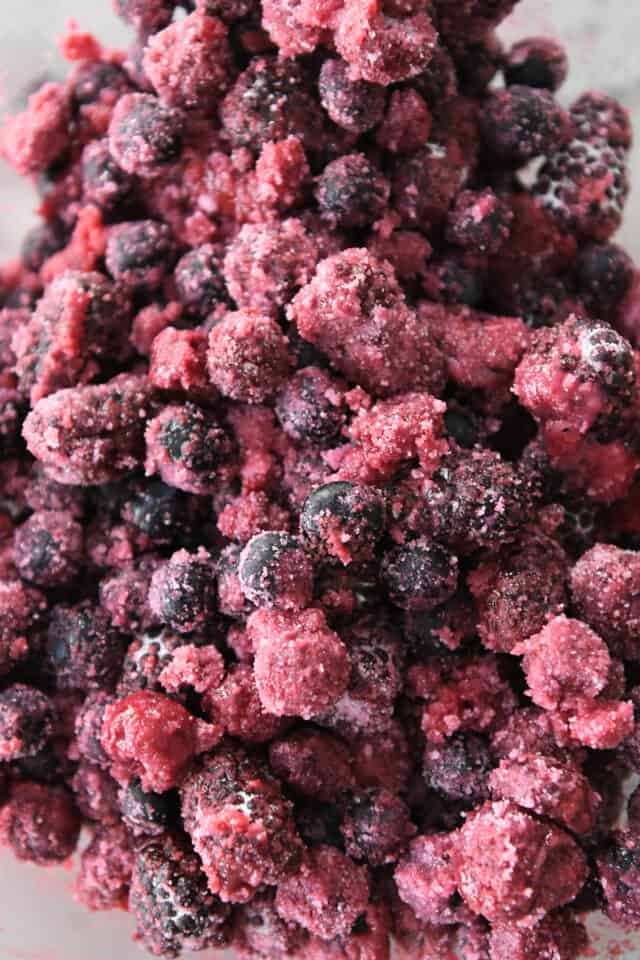
- 5 1/2 cups fresh or frozen mixed berries (I use a frozen triple berry blend with raspberries, blackberries and blueberries)
- 1 cup granulated sugar
- 1/4 cup cornstarch*
- 1 tablespoon lemon juice
*With this amount of cornstarch, the pie filling thickens perfectly if the pie is cooled completely! If you plan to serve the pie slightly warm, increase the cornstarch to 5 tablespoons. But make sure to bake the pie long enough (longer than you might think!) or else the filling will have a starchy taste and might be runny.
How to Make a Lattice Top for a Pie
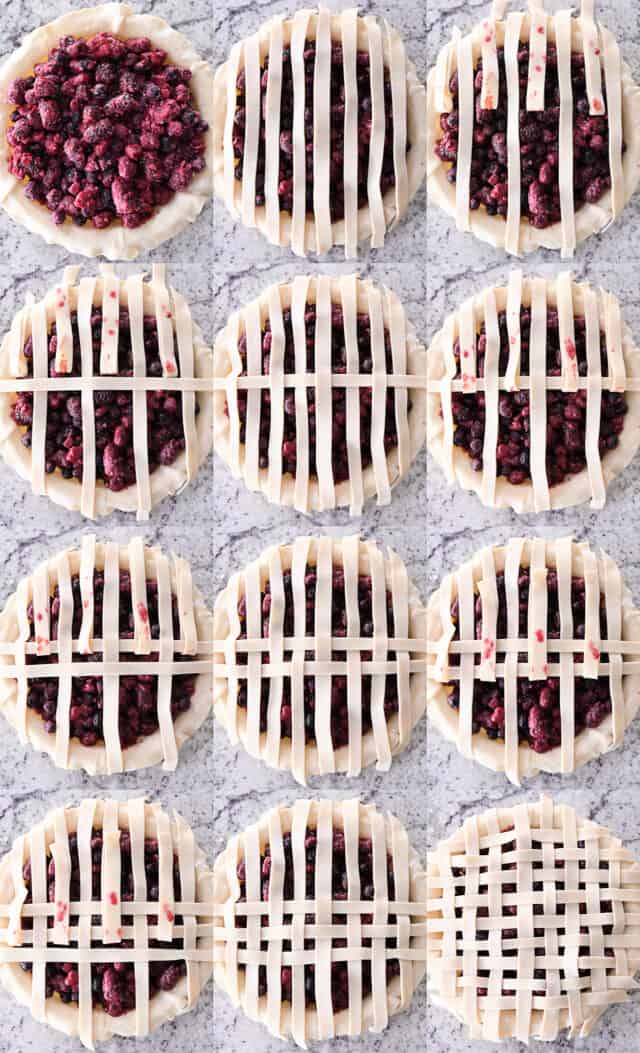
A lattice top is so pretty on this triple berry pie. You can opt for a fully covered top crust – just make sure to cut a few vents in the crust if you do.
For a lattice top crust:
- Roll out the pie dough and cut 1/4- to 1/2-inch strips
- Lay strips vertically across the pie, leaving space in between.
- Fold up every other strip and place another pie crust strip perpendicular.
- Fold down the strips.
- Lift up all the strips underneath the perpendicular strip and place another strip perpendicular.
- Fold down the strips.
- Repeat that pattern until the lattice top is complete.
Lattice Crust Pro Tip: the biggest tip for a perfect lattice top is to always lift and fold up the strips underneath the perpendicular strip.
Trim the edges of the pie to about 1/2-inch and fold up the bottom crust over the top of the strips and press gently all around the pie.
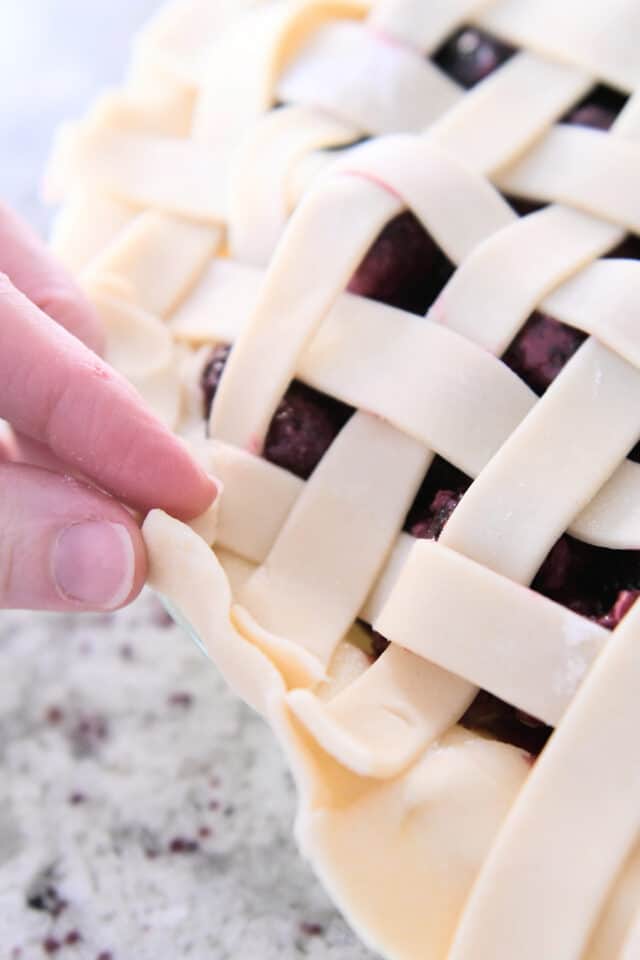
Flute the edges.
Stand back.
And admire your gorgeous unbaked pie. My goodness! 😍
At this point, you can brush the top with an egg wash for a shinier, more golden top crust.
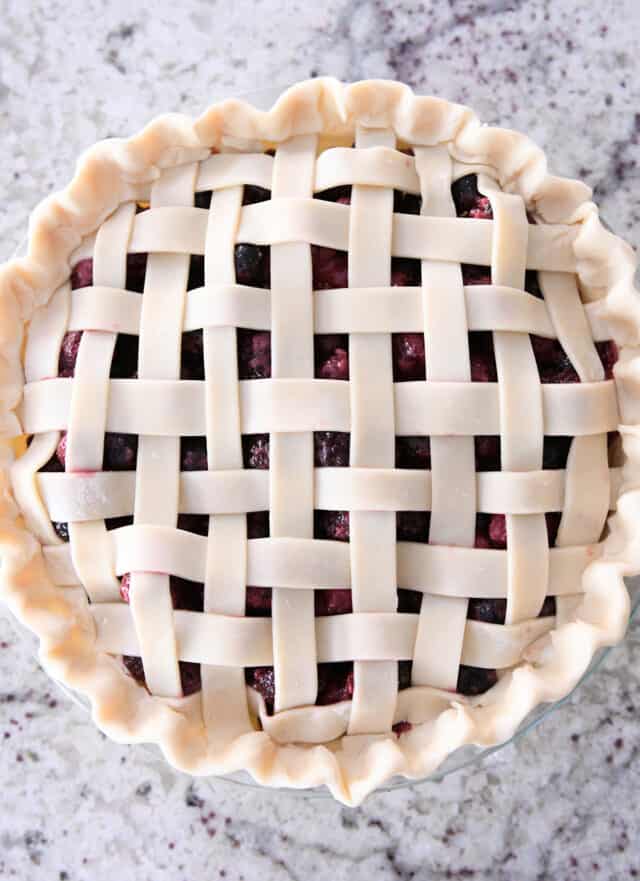
Baking This Pie Long Enough is Critical
I can’t state this strongly enough: it is very important to bake this triple berry pie long enough!
In fact, just plan on baking it for longer than you think.
Check the pie after 45-60 minutes; if the edges and/or top are browning too quickly, tent with foil or use a pie crust shield to protect the crust while it continues to bake.
In my oven, the pie needs 75-80 minutes to bake fully so the filling is thick and syrupy. If the filling is bubbling but is still thin and runny, it needs more time in the oven.
Depending on your oven, you may need more or less time. Watch carefully and check often (preferably through the oven window so the heat doesn’t escape with every open door check).
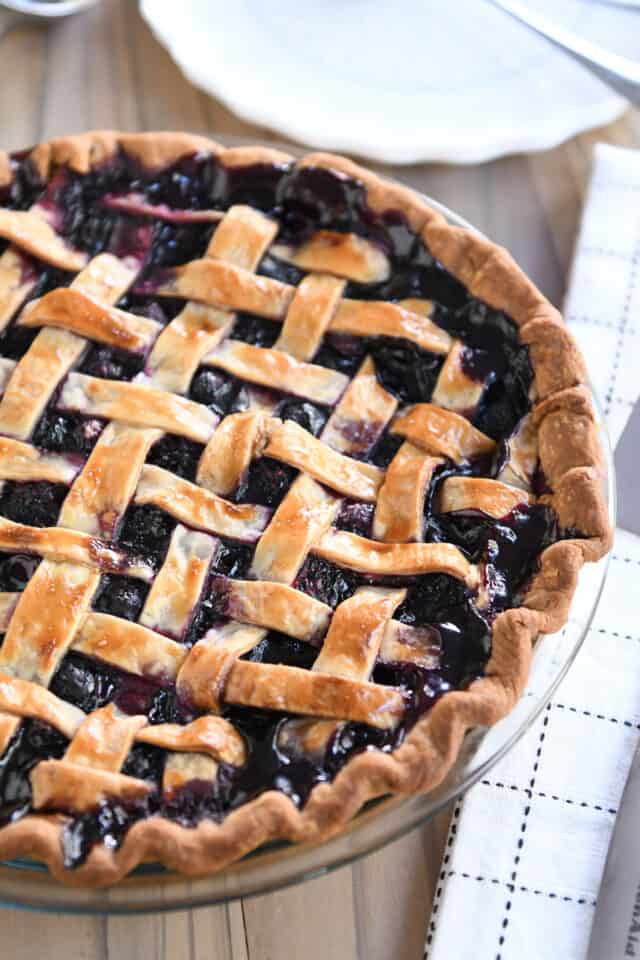
To Cool or Not to Cool
I know that warm berry and apple pie is highly valued among pie lovers across the world. I get it. I like warm pie, too.
But this pie benefits greatly from cooling completely so the filling can thicken perfectly and properly. Slices of pie can be warmed for a few seconds in the microwave if you want that warm pie vibe.
If you just can’t resist serving the pie while slightly warm, be sure to adjust the cornstarch amount in the recipe notes.
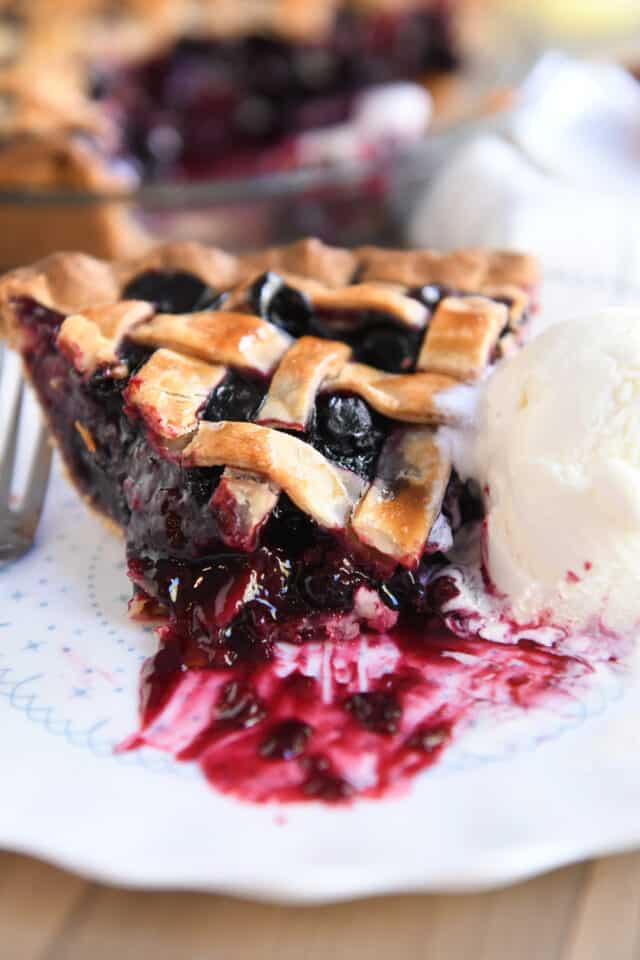
If your pie filling is runny when serving the pie, it’s very likely due to needing more time to bake, more time to cool, or a bit more cornstarch in the filling.
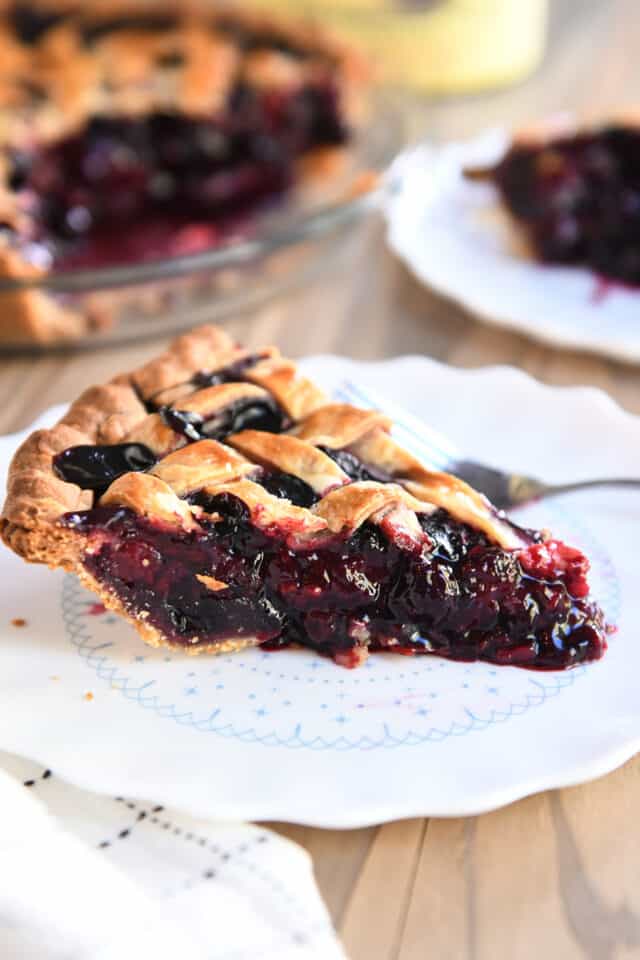
A Perfect Pie
This triple berry pie is perfection.
Not only is it so simple to make (no pre-baking pie crusts or pre-cooking pie filing!), but it is a stunner. Both in looks and in taste.
(For all you huckleberriers out there, I’ll often throw in just a small handful of precious huckleberries with the other berries for a little wow factor!)
Happy pie baking! I hope you love this one. 💗
One Year Ago: Easy No-Knead Peasant Bread
Two Years Ago: A Lazy Girl’s Guide to Sourdough
Three Years Ago: Perfect Homemade Caramel Apples
Four Years Ago: Perfect Small Batch Cinnamon Rolls
Five Years Ago: Easy Homemade French Bread
Six Years Ago: Harvest Pasta Sauce {Trader Joe’s Copycat}
Seven Years Ago: Peanut Butter Cup Cheesecake with Chocolate Cookie Crust
Eight Years Ago: Easy Homemade Egg Noodles
Nine Years Ago: Black Bean and Butternut Enchilada Skillet
Ten Years Ago: Peanut Butter Oatmeal Chocolate Chip Cookies
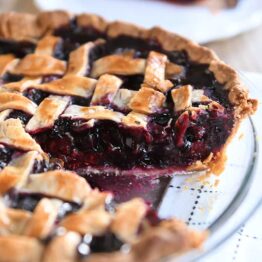
Triple Berry Pie
Ingredients
- 2 unbaked pie crusts (see note)
- 5 ½ cups (780 g) fresh or frozen triple berry blend (raspberries, blackberries, blueberries)
- 1 cup (212 g) granulated sugar
- 4 tablespoons (37 g) cornstarch (see note!)
- 1 tablespoon lemon juice
- Pinch of salt
- 1 large egg, for egg wash (optional)
Instructions
- Preheat oven to 375 degrees F.
- Roll out bottom pie crust and place in pie pan, easing the pie crust into the edges of the pie plate without stretching. Trim edge, leaving a 1/2-inch overhang.
- In a large bowl, add the berries. If frozen, let them sit at room temperature for 5-10 minutes so they begin to thaw just slightly (this helps to better combine the sugar and cornstarch with the berries so it thickens properly while baking).
- Add the sugar, cornstarch, lemon juice and salt to the berries and stir gently (so the berries don't get crushed) until the berries are evenly coated and there aren't any pockets of dry, loose ingredients.
- Scrape the filling into the pie plate and spread evenly.
- Roll out the top crust and cut into strips for the lattice top. Lay strips vertically across the pie, leaving space in between. Fold up every other strip and place another pie crust strip perpendicular. Fold down the strips. Lift up all the strips underneath the perpendicular strip and place another strip perpendicular. Fold down the strips. Repeat that pattern until the lattice top is complete (see pictures in the post).
- Trim the strips even with the bottom pie crust. Fold and press the bottom crust over the top of the strips around the edge of the pie. Flute the edge.
- Place the pie on a foil-lined baking sheet and bake for 75-90 minutes until the pie is bubbling throughout. Check the pie around 60-65 minutes and tent the top very loosely with foil if it is browning too quickly. It's very important to cook the pie long enough or the filling won't thicken properly. The bubbles of filling you can see under the lattice crust should be thick and syrupy, not thin and runny.
- Remove the pie from the oven and let cool for at least 2-3 hours. To ensure the most set up filling, let the pie cool completely. (Slices of pie can be reheated for just a few seconds in the microwave.)



This was soooo delicious. I made it exactly as instructed and we loved it. My lattice was not as beautiful as yours but it was my first one so maybe I’ll try again. Thanks so much for this delicious and simple pie!
This was soooo delicious. I made it exactly as instructed and we loved it. My lattice was not as beautiful as yours but it was my first one so maybe I’ll try again. Thanks so much for this delicious and simple pie!
Oh my goodness. I used your flakey pie crust recipe and this pie is gorgeous!! So easy and insanely delicious!!! Mel, you nailed this one!!
So, so happy you loved this one, Sara – thank you for letting me know!
Will this fill a 9 inch deep dish pie plate or will I need to double or 1 1/2 times the recipe? Can’t wait to try this!!
I use a regular 9-inch pie plate, so if you want a deeper pie, you’d want to increase the filling by 1/4 to 1/2.
OMGEEE!! I’m a self-proclaimed and family agreed great cook, except for when it comes to PIES ! So I put my apron on and gave this one a try
I followed the recipe to A ‘T’ and the results were AMAZING ! This will be my GO TO recipe for All my Berry PIES from now on! Thanks Mel !
Such a delicious and easy pie – my family really enjoyed it last night. I used less than half a cup of sugar (recipe calls for a cup) and it was plenty sweet, especially as we ate it with vanilla ice cream. Next time I will try 3 tablespoons of cornstarch rather than the 4 I used this time, mine was plenty thickened after baking for 85 minutes and cooling for a couple of hours and I could slightly perceive a starchy taste so I’ll test using less cornstarch next time. I can tolerate slight runniness better than a starchy taste. Thank you, Mel, as always!
Followed the recipe. It was awful. Even added more cornstarch than suggested and it was still runny. Threw it away. Btw I’m not a pie baking novice either.
Super yummy and delicious
A very easy and tasty recipe
Made this for the second time and this time I waited overnight to cut into it – it’s perfect! I used the extra tablespoon of cornstarch and baked it for the full 90 minutes…I also weighed the frozen fruit to make sure I didn’t add too much. So yummy!!
Worked perfectly on my first try ever!
The is the BEST pie ever. I’ve made it 3 times since Thanksgiving. Each time I ask myself, “where has this been all my life?” Thanks for sharing and for providing such a wonderful blog. You’re my go to for all things food. Just love it!!
That made my day – thank you, Toni!!
I baked this pie for Thanksgiving, using your sour cream crust recipe, and it turned out fantastic. The cornstarch amounts were spot-on. I was a little worried at the end of backing because the filling still didn’t look thickened (I even added 5-10 minutes to the max time), but everything firmed up nicely as it cooled.
Very watery although we cooked it for 90 minutes. Taste is excellent. We used a double crust with 3 slits so don’t know what the issue was. We will try again adding a fifth tablespoon of cornstarch & lattice top.
I made this over the weekend (because we clearly needed more pie after thanksgiving!) and it was AMAZING. I will up the cornstarch to 5 TB next time as it was a little juicy. I ended up baking it about 75 minutes and I probably will add another 15 next time. It was super super delicious!!
I made this for Thanksgiving and it was such a beauty! Delicious too! I’d never made a lattice crust and it was so fun. Your detailed pictures were very helpful. Thank you for continually helping me reach rockstar status!
Thank you so much, Bree!!
Can you do this pie open meaning use only one pie crust on the bottom?
I haven’t tried that, but I think you probably could!
It was my first fruit pie and we loved it. Can it be baked a day ahead?
Yes! I’ve made it a day ahead before with great results.
My husband will love this pie! Can’t wait to try it! Thanks for sharing..
Hi Mel! I want to make this pie! But I was wondering do you think you could also add rhubarb in it? I have so much in my freezer!
Yes! Absolutely! I made a triple berry rhubarb pie this summer (just kind of threw it all together) and it was fantastic.
This looks beautiful! Does it freeze best baked or unbaked?
Most pies that aren’t cream-based freeze quite well baked or unbaked!
My husband has been begging for this pie for a very long time, I saw this email and had to try it. It not only looks beautiful, it’s delicious. Thank you as always Mel.
I’ve gotten off Instagram for awhile and miss your posts but thank heavens for email. I can still get your recipes off the blog too. Lots of love for you and your family this holiday season. ♥️
Thanks, Julie! I’m so happy this pie worked out well for you!
Have you ever tried tapioca as the thickener in berry pie? Curious what your thoughts are. My mom always uses that and it works great for her but I haven’t tried her.
Yes! I use it in my favorite cherry pie and it would work great here (the main reason I tested this recipe with cornstarch is that more people have cornstarch on hand rather than tapioca flour). If using tapioca flour, use 1/3 cup.
Augh! I was going to make your cherry pie this weekend, and now I don’t know what to do, this looks amazing!
Looks wonderful. Question…on what level in the oven to you bake the pie? Aldo don you ever use convection bake?
Thank you!
Hi Patricia, I use the middle or lower position in the oven. I usually don’t bake my pies on convection bake – just standard bake.