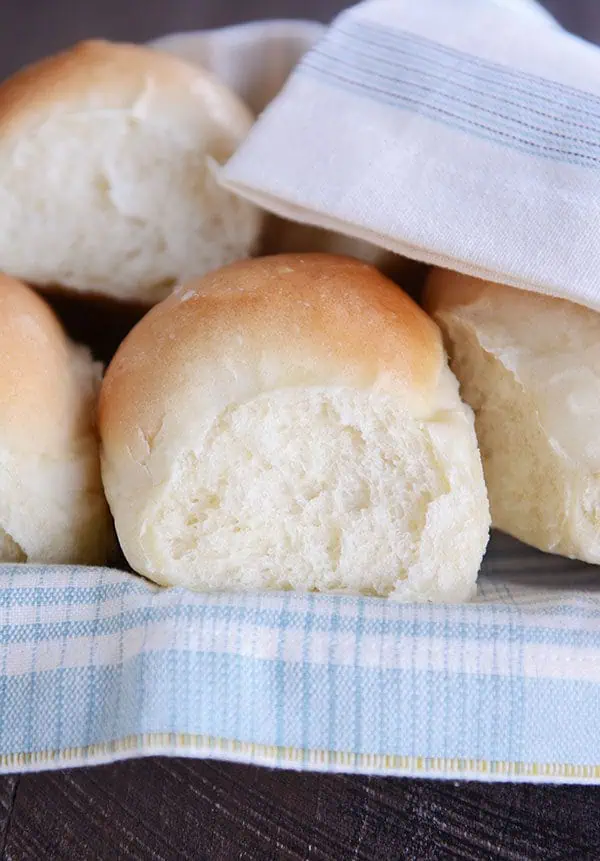
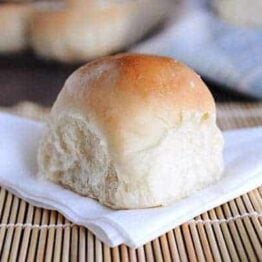
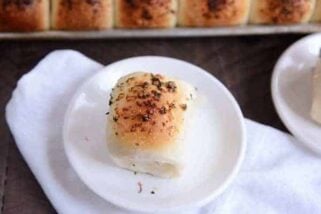
French Bread Rolls {Step-by-Step}
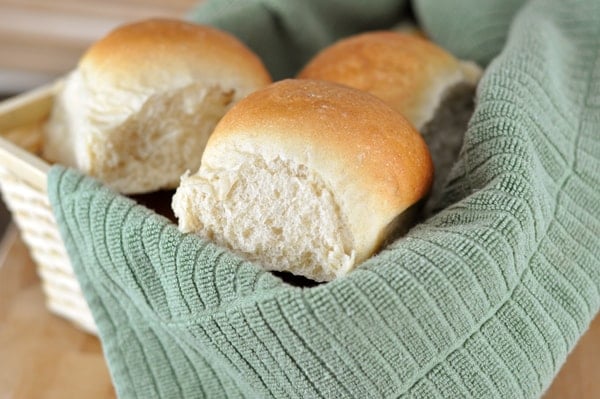
These French bread rolls make the best dinner rolls, hamburger buns, or sub buns. They are light, fluffy, and perfect for beginner (or expert) bakers. With over 1,000 5-star reviews, they are one of the most popular roll recipes on the internet.
⭐️⭐️⭐️⭐️⭐️ Thank you so much for the recipe. The rolls were wonderful. Made a double batch for Easter and froze some. They freeze excellently. Will be my go to rolls. -Jackie
Why So Many People Love This Recipe
The dough for these French bread rolls is straightforward and very forgiving. Here are many reasons why this is a foolproof, trusted recipe:
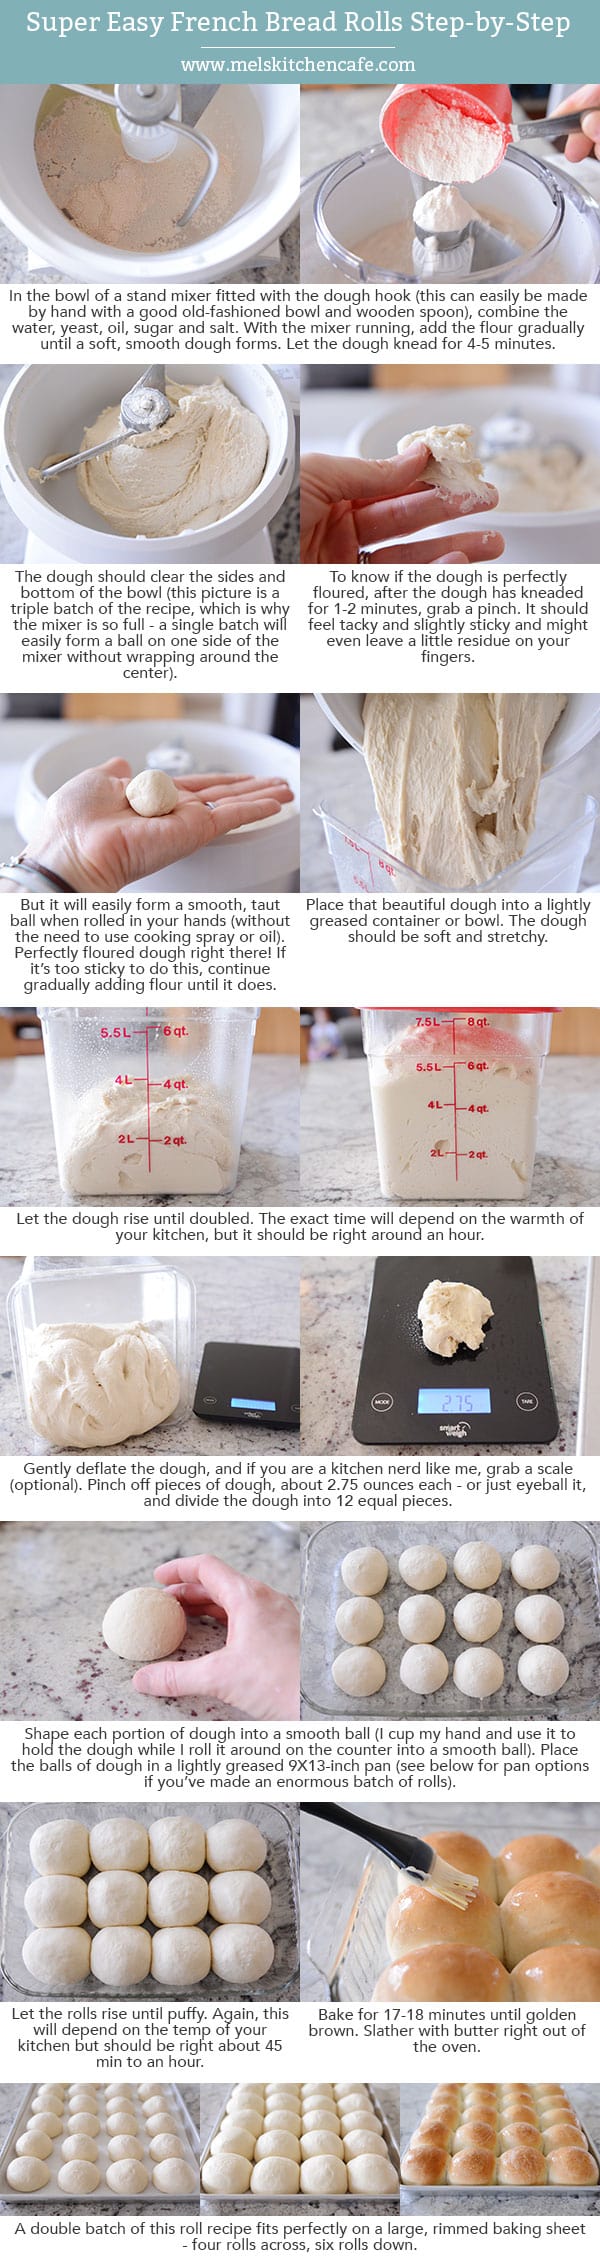
- A stand mixer fitted with the dough hook makes easy work of this recipe, however, the dough is so easy to make that it can also be mixed and kneaded by hand.
- The recipe doesn’t require scalding milk or any fussy steps. The ingredients are basic and dairy-free (other than brushing the tops of the baked rolls with butter).
- The rolls are ultra-soft and fluffy.
- You can shape the dough into dinner rolls, sub buns, hamburger buns – and some reviewers even report using the dough for pizza crust.
- These French bread rolls are easy enough for simple dinners and delicious enough to serve at any holiday dinner.

Ingredients Notes
- Warm water: The temperature of the water should be between 105 and 110 degrees F.
- Yeast: Both instant yeast and active dry yeast work in this recipe.
- Sugar: The small amount of sugar in these rolls helps activate the yeast and assists in the rolls rising quickly. It isn’t enough sugar to make the rolls taste overly sweet. You can dial the sugar up or down depending on your taste preferences.
- Oil: A few tablespoons of oil gives the dough a supple, smooth texture and helps the rolls taste fresh even the day after baking.
- Salt: I use table salt for this recipe.
- Flour: All-purpose or bread flour can be used – or a combination of both. Bread flour will create a chewier, fluffier roll texture. You can sub in 50% whole wheat flour for part of the white flour; if doing so, I recommend using a white whole wheat variety, which helps the dough stay light and fluffy.

Tips for Making Yeast Dough at Home
Here is the biggest tip I can give for successfully making yeast dough at home:
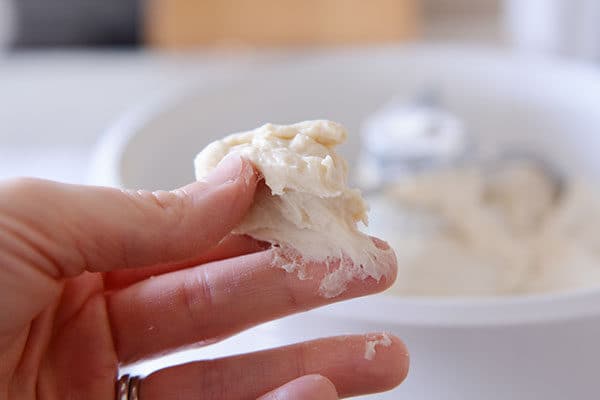
Stop stressing about adding the exact amount of flour called for in a recipe. Many, many factors determine how much flour is needed (elevation, humidity, how we each measure flour, etc.) Add the flour gradually and judge the dough by how it looks and feels. If you need to add a bit more flour, that’s ok!
How to test this French bread roll dough:
- After the flour has been added and has kneaded for a few minutes, grab a golf ball-size piece of dough.
- Initially, it might leave a little sticky residue on your fingers.
- Try rolling it into a ball without any oil or cooking spray on your hands.
- If it can form a ball shape without sticking to your hands in a shaggy, horror-movie mess, you are good to go. If not, add a bit more flour (a couple tablespoons), mix and try again.
You can see from the pictures below that initially, the dough seems pretty sticky, however, it rolls just fine into a ball without a lot of sticky dough on the palm of my hand. Adding too much flour can lead to rolls that are dense and heavy, so take time to learn what a properly floured dough looks and feels like.
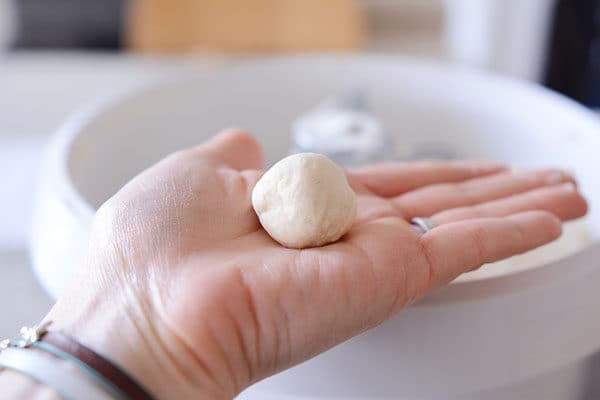
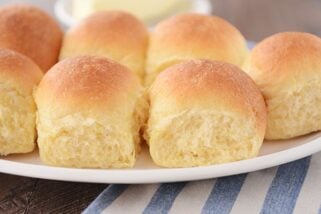
How to Shape French Bread Dinner Rolls
- Cut the dough into 12 equal pieces.
- I like to weigh each piece to make sure they are uniform. Each dough piece usually weighs right around 2.6 to 2.7 ounces.
- Cup your hand around the dough and roll the dough into a smooth ball, keeping the pinky side of your hand against the counter while you roll.
- Pinch the bottom to seal, if needed.
A single batch of roll dough (12 rolls) fits in a 9X13-inch pan. I almost always double this recipe and bake the rolls on a half sheet pan, which fits 24 rolls perfectly.


The Perfect Roll for Sandwiches or Subs
Over the years, these French bread rolls have become more than a dinner roll.
A quick scroll through the comments shows that many of you are using this roll dough for everything from sloppy joes to sub sandwiches.
Make-Ahead and Freezer Notes
Make-Ahead: The dough for these French bread rolls can be made and refrigerated overnight (either in bulk, or the rolls can be shaped, place on a pan, covered and refrigerated). Take the shaped rolls out of the fridge to rise fully before baking.
Freezing: The baked and cooled rolls freeze great. Place the rolls in a ziploc freezer bag, seal the bag, and place in the freezer for up to a month or so.
There is truly not an easier, more perfect roll recipe out there!
I often make these rolls for my holiday dinners – from Thanksgiving to Easter – because they are so easy, they work out every time, and they are always devoured. Plus, they make excellent leftovers!

Tools for Making French Bread Rolls at Home
*Affiliate links included below for products I’ve purchased from Amazon; feel free to shop around for the best price!*
- This is the kitchen scale I use to weigh each piece of dough.
- These containers are great for rising dough (the measurement marks make it easy to keep track of how much the dough has risen).
- Silicone pastry brush for brushing the rolls with butter after baking.
- My go-to OXO bench knife for portioning out the dough.
A quick note about mixers: I use a Bosch Universal stand mixer for all my bread making. Here is an older but helpful side-by-side (unsponsored) review I did between a Bosch stand mixer and a KitchenAid stand mixer.
French Bread Rolls
Ingredients
- 1 ½ cups warm water (105 to 110 degrees F)
- 1 tablespoon instant or active dry yeast (see note)
- 2 tablespoons granulated sugar or honey
- 2 tablespoons canola oil, vegetable oil, or olive oil
- 1 teaspoon table salt
- 3 ½ to 4 cups (497 to 569 g) all-purpose or bread flour, more or less (see note)
Instructions
- In the bowl of a stand mixer fitted with the dough hook or in a large bowl by hand, combine the warm water, instant yeast, sugar, oil, salt and 2 cups of the flour.
- Begin mixing, and continue to add remaining flour gradually until the dough has pulled away from the sides of the bowl.
- Knead the dough for 4 to 5 minutes in a stand mixer (7 to 9 minutes by hand). Add additionally flour a tablespoon or two at a time only if the dough starts to cling to the sides of the bowl and is really sticky to the touch (see note below for clarification).
- Place the dough in a lightly greased bowl and cover. Let the dough rise until doubled, 1 to 2 hours.
- Turn the dough out onto a lightly greased countertop.
- Divide the dough into 12 equal pieces (about 2.75 ounces each, more or less), and form the dough into round balls by cupping your hand around the dough and spinning into a round shape, pinching the bottom to seal any rough edges, if needed (video tutorial here right at minute marker 2:20).
- Place the rolls in a lightly greased 9X13-inch pan or on a lightly greased half sheet pan. Space the rolls about 1/2 to 1-inch apart.
- Cover the rolls loosely with a lightweight towel or greased plastic wrap and let the rolls rise until very puffy and nearly doubled, about 45 minutes to 1 hour.
- While the rolls rise, preheat the oven to 400 degrees F (if your oven bakes hot, preheat to 375 degrees F.) Bake for 17 to 20 minutes until golden and baked through.
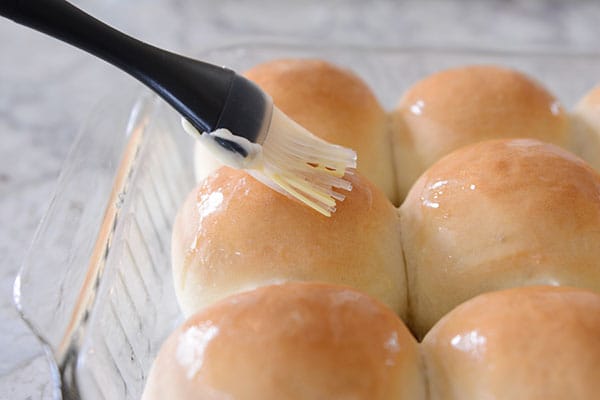
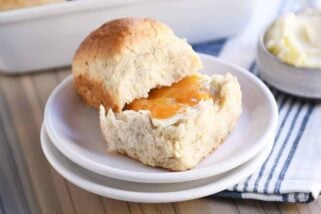
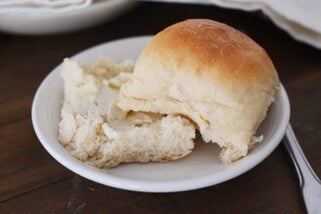
- Immediately out of the oven, brush with butter, if desired. Serve warm or at room temperature.
Notes
Recommended Products

Recipe Source: Mel’s Kitchen Cafe
Recipe originally published 12/2007; updated with new pictures, step-by-step tutorial, and recipe notes.
Oops I meant pretty as yours ha ha
I made this and it taste delish but all my rolls split so they don’t look as pottery as yours????
Did they split on top or on the sides?
Hi. Do you bake it with fan oven on or off? Thanks
I usually use standard bake not convection (with the fan on); if using convection, I’d suggest lowering the temperature by 25 degrees.
Can you make these ahead of time and refrigerate then let sit out before baking?
Do you mean shaping and refrigerating? Yes, you can do that…then just let them rise at room temp before baking (there’s a good chance they’ll rise in the refrigerator a bit, too).
Made them today great
I usually make bread on a Sunday. So I will try your method it was presented very clear. Thank you
These rolls are amazing, thanks for sharing your recipe! I’ve made so many batches now and freeze them.
Just quick question can I double the mixture to do a bigger batch in one go or would you recommend doing individual batches? Thanks 🙂
Very easy and delicious rolls! Nice using instant yeast and not needing to proof or scald milk… I was nervous about adding more than 1/2 cup more flour than the recipe called for, because it’s ‘so easy’ for me to over flour to get away from stickiness. WONDERFUL flavor and texture! The whole family enjoys them, and I will definitely make again & again! Thanks so much. God bless you for sharing & for all your work explaining with pictures!
`
Time & temp wrong. Needs 190 25mins. Otherwise doughy but overcooked on outside at 204c for 15 mins. Look great tho
These came out sooo gorgeous and I haven’t had the best luck with bread making but you were right this did give me hope for future baking now that I know and have proof that I can do it!
Help! I’ve now made two batches of hickey pucks ♀️. First and second rise go well (except first batch the cling wrap stuck to the rolls and when I peeked it off they all flattened. This time, I really greased the cling wrap… they rose well (maybe too well..,.. they grew together) and baked flat again. Teach me your ways!!!!
Hi Michelle, if they rise well but flatten in the oven, it sounds like the rolls may be over rising (and then they expand too much and “pop” like a balloon in the oven).
I never use plastic wrap on my dough rising. I use a damp light weight kitchen towel. It doesn’t cling like the plastic wrap! With plastic wrap I had to many mishaps like you! Plus it’s good for environment!
Oh gosh! Just love it.
Initially I was worried when it became too sticky after risen for an hour. I just spray canola oil on my counter and good to go. Came in good shape.. hehez..
The only thing was it was a bit darker after out from oven. I placed it on 2nd rack in my oven. (5 racks in total) and baked at 185°c.
I will definitely do again. My son loved it!
Do I need to make any adjustments?
Try lowering the temperature or bake for just a few minutes less.
400 degrees?????
200 degrees for uk
These rolls turned out as pictured. I had high hopes for them. I followed the recipe to the letter but they turned out with a very yeasty flavour? They looked the goods but I wouldn’t say they were delicious as everyone else has said. I will try again with hope.
These are the easiest and most delicious rolls I have ever baked make them every week now no need to buy bread anymore make my sandwiches with these.
Thank you for sharing
I have made this recipe several times over the Covid-19 lockdown, and the resulting rolls have been awesome every time. I won’t be buying dinner rolls again. So easy and delicious! Thank you
I made these and I got more than 12 and bigger too. They were soft and fluffy. Very easy to make. I’m keeping this recipe!
Have made these a few times and they are always delicious. I gave the recipe to my son and he makes them now for his family. I am also interested in knowing if I could turn the dough into a loaf pan and bake it? Temp and time? Thanks!
I’m sure you could! I’ve only ever made these as rolls because I have this French bread recipe that I love: https://www.melskitchencafe.com/french-bread/
This is my go to bun recipe, we all love it! Do you think it would work to make into a loaf of bread?
I’ve only ever made these as rolls because I have this French bread recipe that I love: https://www.melskitchencafe.com/french-bread/ but you could definitely experiment!
I didn’t follow the recipe to the letter and put the rolls on a sheet pan spaced apart and I made it a little larger so they ended up like hamburger bun size (by accident) after the final rise. They came out great. I will try and cut the rolls in half to make a sandwichs later this week. Good flavor with a nice chewiness to it. This recipe is a keeper. Thanks a lot.
The best rolls so
Light and fluffy and easy to make.
Girrrlll….these were PERFECTION. From now on, these will be my go-to dinner rolls. Everyone gobbled them right on up!
Hi, Mel! I made these rolls tonight and they were delicious! I made a parmesan, garlic, parsley and butter mixture to put on top, to emulate a kind of garlic knot flavor and it was a great addition! However, I was wondering what the best way to store these is and how long the “shelf life” is for leaving them on the counter. Thanks so much for this recipe – I will be making it often!
Hi Shelby, I store them in a ziploc bag at room temperature. They are good for 1-2 days – after that they get a little dry (but they freeze great, too!)
Hi Mel,
Just wondering, do you think I could substitute all-purpose flour with bread flour, as I am running out of all-purpose. I love this recipe! So delicious and so easy!
yes for sure!
I baked the french bread rolls for the very firat time last evening and Ohhhh lord,they are yummy.
My children are excited.
Thank you Mel for sharing,I thank God for you and the succes I had
This sounds delicious. I will definitely try this recipe.
I made the French bread rolls today after finding your recipe while looking for a French bread recipe (which I also am going to try soon). My family thought the rolls were fabulous and I am going to make more to take to my in-laws once the stay-at-home order is lifted.
Thank you Mel. Trying it for the 1st time. Crossing fingers and toes
Hi, i dont have the cling wrap can I still bake without the cling wrap?
Yes, you can cover them with a clean kitchen towel
Just baked a batch of these today, really good. Made the dough, shaped into 8 larger rolls and placed on baking tray last night, placed in fridge overnight so that I could pop them in the oven this morning ready for lunch. Only used half the sugar and still good.
Thank you for this lovely recipe
I made these for the first time as hamburger buns. I was so happy, they turned out perfectly! They are delicious! Thank you for all the great instructions.
I am intimidated by yeast doughs and prone to overmixing things. This was very easy to follow and execute, all ingredients in hand. The tips were helpful. It was very forgiving of the fact that I kept forgetting about it!
Thanks!
I made these for the first time and it was so easy, and they were the most beautiful rolls ever – only they tasted like cardboard (as my husband said). I can only assume it was my ingredients because they sure looked delicious. The yeast I used was old, although it was active and the dough did rise. But maybe that threw off the flavor. And I used AP Flour versus bread flour. And, I used a low sodium salt. So it could have been all three factors ?? Not sure, but I will definitely try this again if I can get more yeast, and maybe I will try a different flour.
I would love to make this recipe but why people cant use proper metric measurements and resort to cups which seem to be different sizes in different countrys is beyond me
Yes, exactly. Please use a digital set of scales and weigh the ingredients. Australian cups/tablespoons are different but all weight in grams is the same.
Aloha from Hawaii. I have never baked bread before and made these with my wife’s help over video chat today. Thanks for such an easy recipe that makes amazing rolls!
Hi Mel
I’m Sanath from Sri Lanka, For the first time we made very very soft amazing buns by using your recipe. Thanks a million… we were so happy when it was baked so amazingly.. Keep up the good work… Go Bless……
Making these lovely rolls today per my husbands request, it’s his birthday. Approximately how many ounces should they be for hamburger rolls. I’ve done it before but for the life of me can’t remember.
Hi Stacey – I use about 3.5 to 4 ounces per roll if I’m making them into hamburger buns.
Made it! Great recipe, explained well. Thank you.
Perfectly soft rolls! Made them today and so happy with the result. Mine were a little odd sized as I just eyeballed it but they are perfectly cooked and super soft and delicious! I’ve made a lot of different recipe rolls before but was always disappointed in how dense they were. I was sceptical about these because the dough seemed very sticky but they were soft and perfect. Will definitely make again and will pass this recipe along to anyone who asks for a great roll recipe!
You’ve prob answered this but after second rise should I leave rolls in fridge while other pan is cooking? I’m asking cuz I have a countertop oven so I my can bake so many at time.
Yes, you can do that to slow the rise on the 2nd pan.
I have never made bread before and I didn’t have a mixer but they still turned out great! Will definitely make again in the future, and hopefully improve my dough ball rolling skills. Thanks!
Hi Mel, I am Ben from Australia. I made these rolls whilst in isolation and I can honestly tell you that I have been cooking for around 40 years and these are the best rolls I have ever made. Have just made the burger bun version. Thank you so much for your website and stay safe.
Thanks so much, Ben!
Thank you for this wonderful recipe! What a gift to my family … we have several food allergies and this was a great recipe for bread while avoiding milk. My family LOVED it! Thanks for teaching me how to make bread!
Success! I have had so many failures with making bread that I had given up. The only reason I even searched for a recipe today was that I found some instant yeast stored in the fridge about to expire, and the boredom of a Covid-19 lockdown. Who knew it would bring my first successful bread-making attempt! So thank you, Mel!
Hi Mel! I’ve been making these amazing rolls for a few years now. LOVE! Question, can the dough be refrigerated before the first rise? Say, if I wanted to get a head start the night before and make the dough then do 1st and 2nd rise the next morning? Thanks for any tips! 😉
Yes, it does pretty well in the refrigerator (as long as it isn’t left there for days and days). It does best if it’s taken out to come to mostly room temperature – makes it easier to shape the dough into rolls.
Made these for the first time
Wow!! The most amazing rolls EVER…my family commented they were better than shop bought rolls
Will definitely be making these on a regular basis
I e made these a number of times and they work every time – and my kids devour them! I’m just wondering if you have ever made it into a single loaf? Would this work? How would I vary the cooking time/ temp?
I haven’t because I have other bread recipes I love but you could definitely experiment!
Thanks for this wonderful recipe! Is that 400 degrees F or C or what gas mark, please?
400 degrees F.
Wow that’s was the worst.
I have made this recipe several other times with great results. I just made it again yesterday and it did not turn out well. The texture was slightly off and the rolls tasted a lot like yeast, which I’ve never had before when I made them. Any ideas what went wrong?
Hi Heidi – it’s really hard for me to know without being right there and without more information. If they’ve turned out well in the past, my guess is that there might be an issue with one or more of the ingredients you used?
Made these several times and they are amazing, never failed.
Do you know how many calories in each roll?
I don’t – so sorry!
If you download MyFitnessPal on an android phone you can add all the ingredients to it and get the total calorie count the app is amazing for calorie counting and giving you a better idea of whats in the food you’re eating. I credit it for most of my success in losing 60kg
This is 2x on these rolls. First batch flattened during the bake off. Second batch did the same. Not sure what I’m doing wrong. How long should the dough be kneaded in my Kitchen aid? Befuddled
Hi Roxane, it should knead for 3-4 minutes (or even slightly longer). Try adding more flour. If they are flattening, it seems like you might need more flour to strengthen the structure of the rolls.