Easy No-Knead Peasant Bread
This easy no-knead peasant bread is a game changer! Incredibly simple to make, it is soft, fluffy, and so delicious. We can’t stop making it!
I have been so excited to get this bread recipe in front of you. I’m not even exaggerating, not one little bit, when I say it has revolutionized homemade bread around here.
I’ve made it (easily) at least ten times in the last month. I’ve served it to company. Brought it to friends. Made it just because I wanted to eat homemade bread at 1:28 p.m. It is amazing.
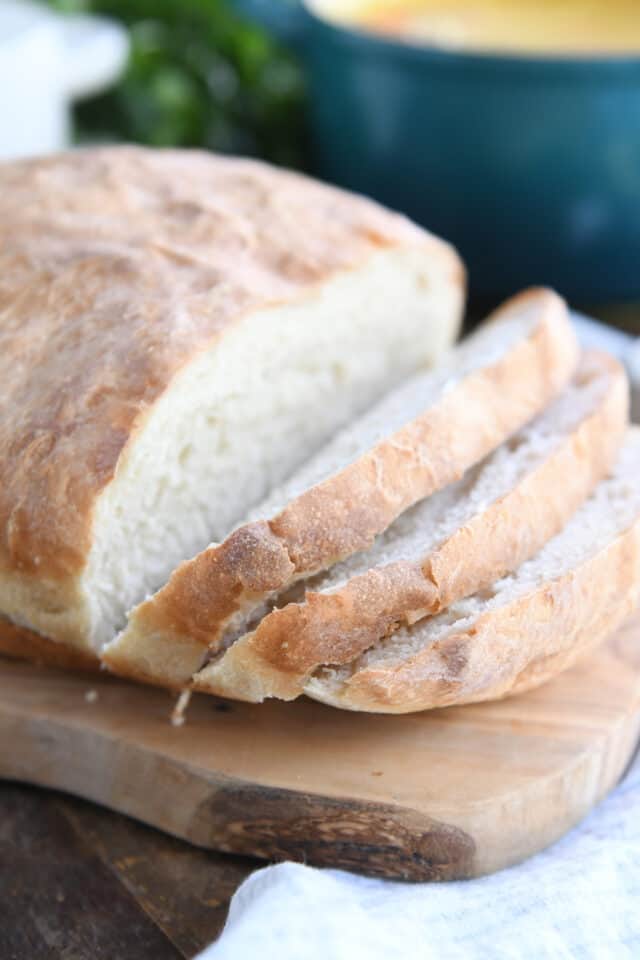
No-Knead Bread is Not New
The no-knead bread trend is not new by any means. Wet, loose doughs formed into shaggy loaves and baked (most often) in a Dutch oven have been around a long time.
I have several recipes like that on my website already, like this artisan no-knead bread and this fantastic rustic crusty bread.
But this peasant bread is different and amazing enough to occupy its own spot here on the blog. For starters:
- it’s easier and a bit more straightforward than other no-knead bread recipes
- you don’t need a Dutch oven or baking stone for baking
- it can be baked in a variety of every day baking pans
- it doesn’t need long rising times
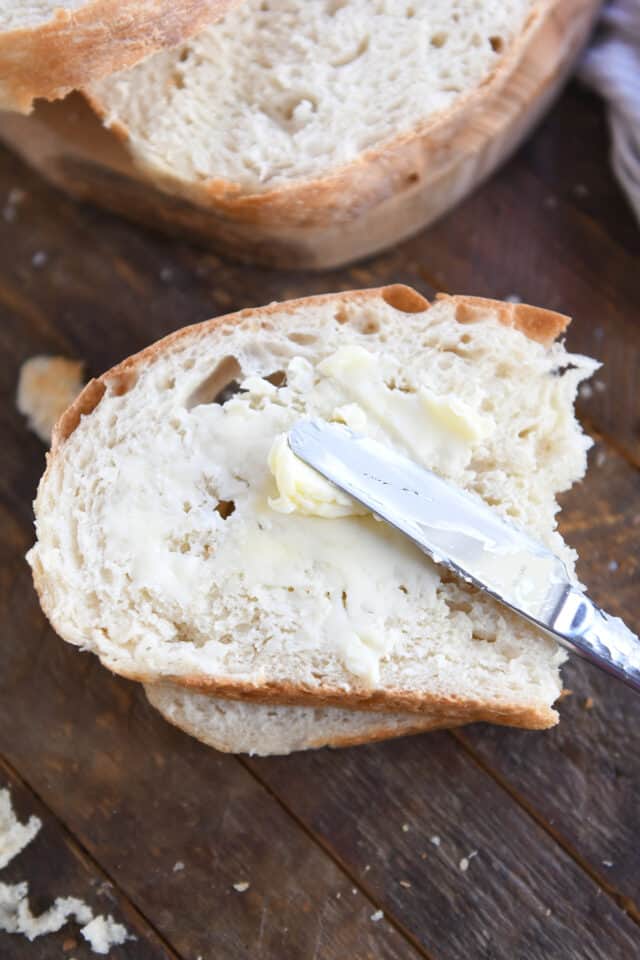
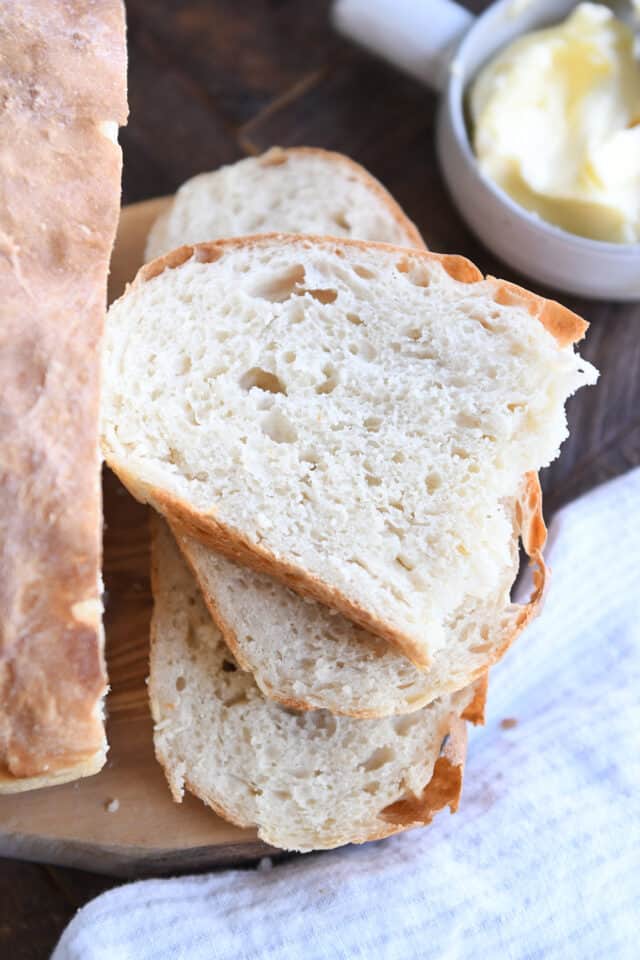
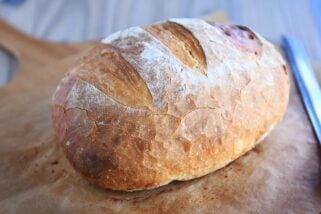
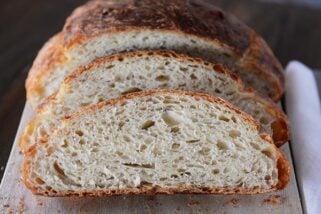
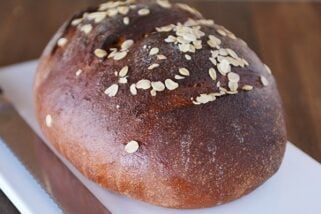
The crumb is soft and fluffy, and the crust is golden with just the perfect amount of bite and crustiness without cutting up the roof of your mouth.
How to Make Peasant Bread
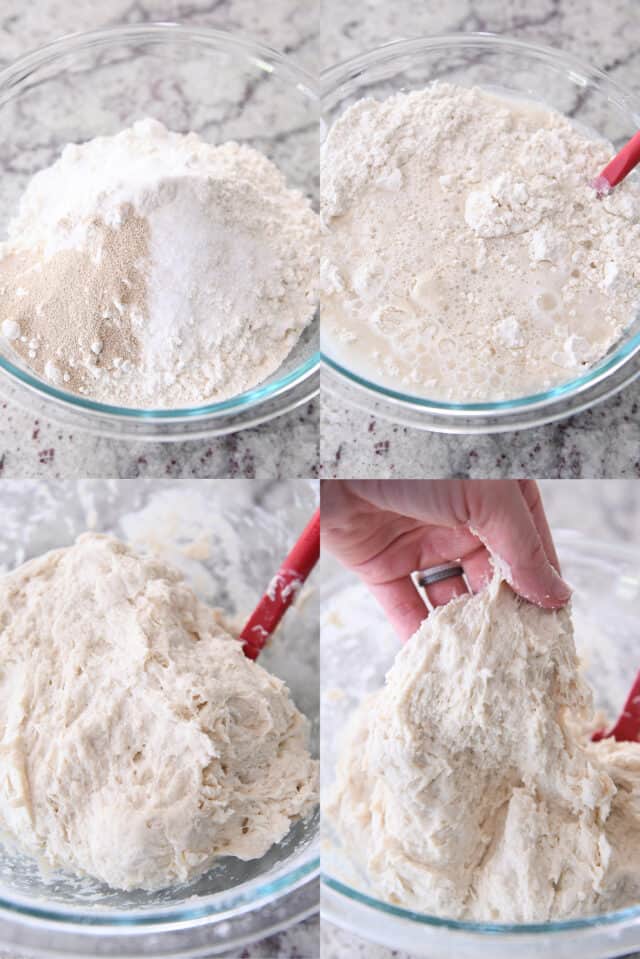
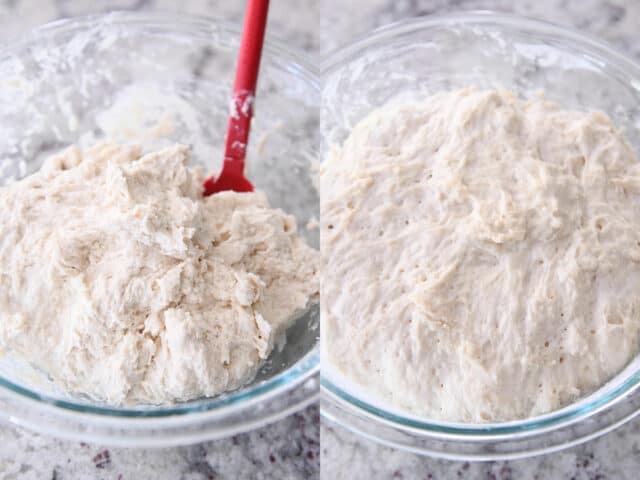
In a large bowl, whisk together the flour, sugar, salt, and yeast. Add the water, and stir until no dry streaks remain.
It’s going to form a shaggy mass, and it’s going to be sticky. That’s exactly how you want it! Resist the urge to add more flour.
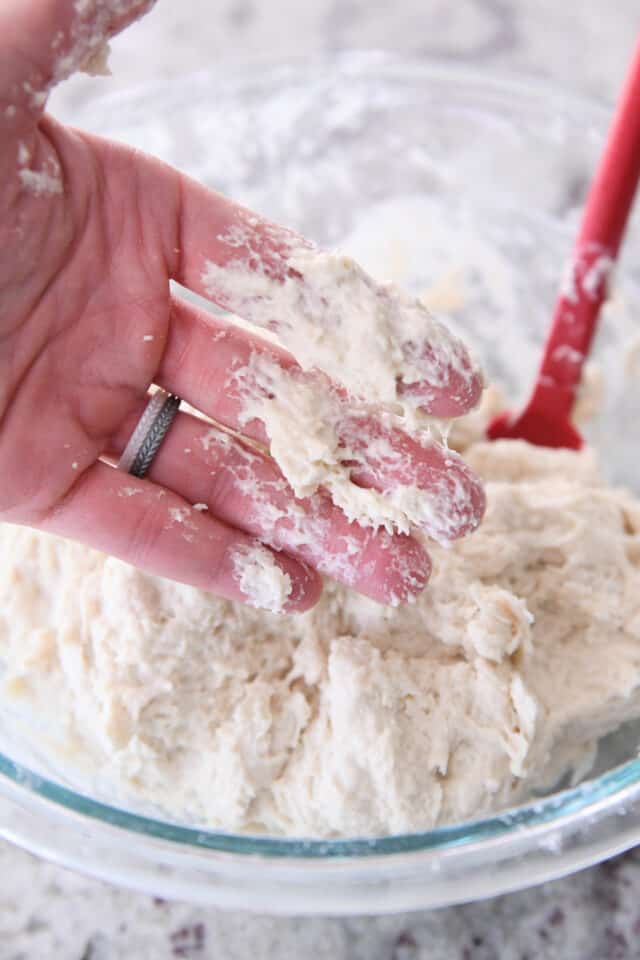
Grabbing a pinch of dough will leave a fair amount of sticky dough residue on your fingers.
Keeping the dough on the wet side of things is what allows us to skip any kneading and still end up with soft, fluffy bread.
Leave the dough right there in the bowl, cover the bowl, and let rise until doubled.
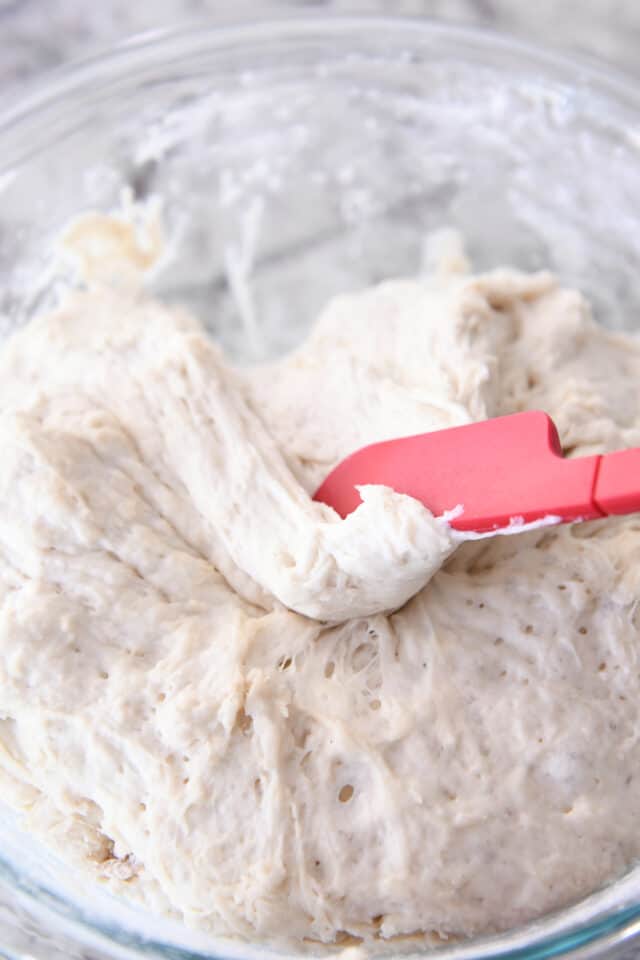
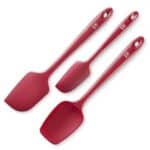
Once it is super puffy, grab a rubber spatula and start scraping the risen dough away from the sides of the bowl to form a messy ball in the center of the bowl.
How to Shape Soft Sticky Dough
Now for the fun part.
It can be a bit messy trying to shape soft, sticky dough like this into a loaf shape. A few tips:
- remember that it’s supposed to be kind of rustic, so ditch the idea of a perfectly shaped loaf
- grease your hands (cooking spray or oil); it makes a world of difference
- handle the dough quickly and efficiently – manhandling the dough will result in an epic dough bomb and lots of frustration
Here’s a quick video of how I shape this dough into a circle. I’m just lifting, rolling, and tucking a few times until it forms a pretty decent round shape.
Notice that my hands still end up with a bit of dough on them at the end. Feel free to use more cooking spray or oil, if needed. But don’t stress! It’s all part of the journey.
Best Pans to Use for Peasant Bread
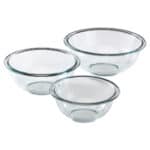
The original peasant bread recipe calls for baking in oven-safe bowls (like Pyrex or others). Based on a traumatic experience in my past when my Pyrex bowls shattered coming out of the oven, I was determined to find a non-bowl solution for baking this bread.
I’m not saying you shouldn’t use a bowl for baking, I’m just letting you know I’ve come up with several fantastic alternatives that you probably already have in your kitchen.
After baking this bread in a Dutch oven, on a baking stone, in a round cake pan, and several other pan types, I’ve settled on the baking pan that works amazingly well and produces a loaf that is PERFECT.
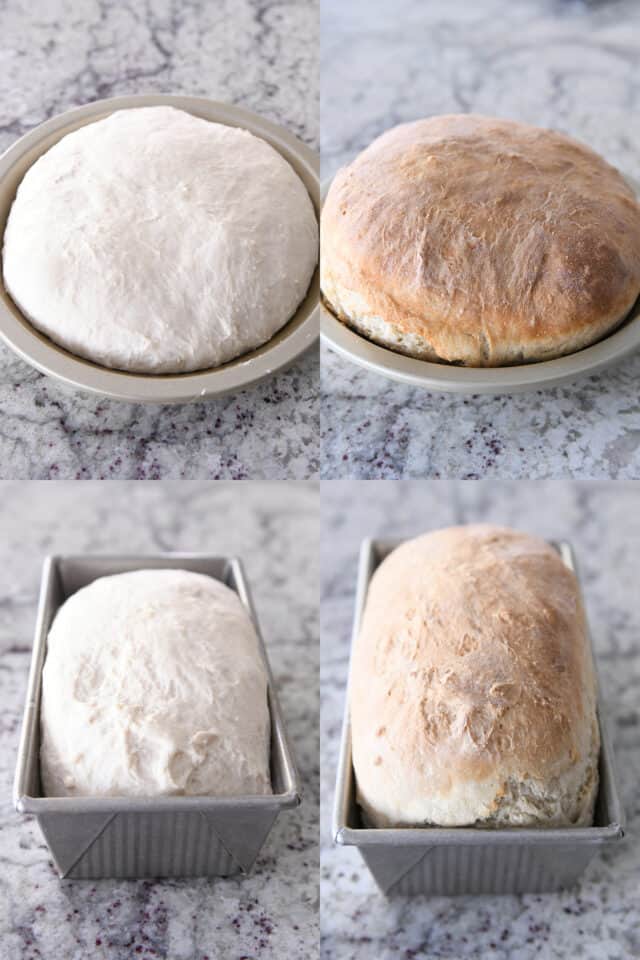
A 9-inch pie plate.
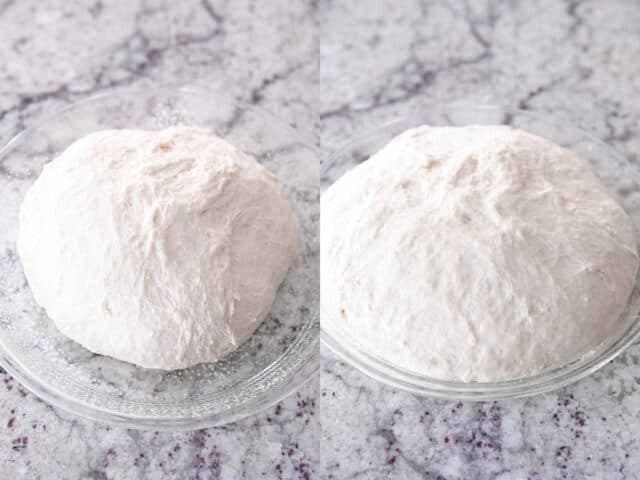
The sides of the pie plate help stabilize the shape of the loaf as it rises and helps prevent the dough from spreading out and flattening.
The peasant bread bakes up beautifully in a 9-inch pie plate! It’s what I use 99% of the time when I bake this bread. And in case I haven’t made it abundantly clear: I have made this bread so.many.times. Like, you can really trust me on this one.
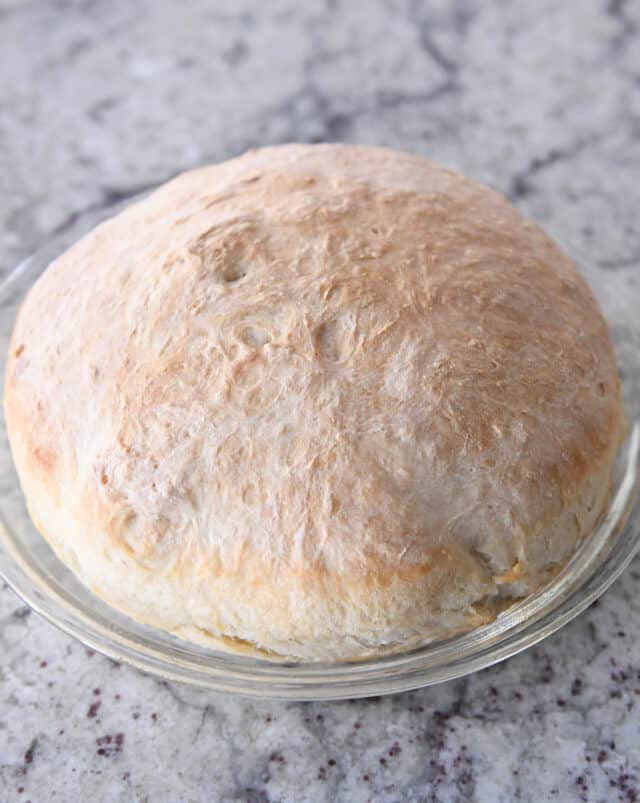
A metal pie plate works just fine, too. In fact, it actually gives a crustier exterior to the bread than a glass pie plate.
And, this bread bakes very well in a loaf pan, too. When shaping, go for more of a rectangle shape (but don’t over think it). Plop the loaf in a greased loaf pan, and get ready for some of the best bread of your life.
Best Bread Ever
I cannot overstate how amazing this easy, no knead peasant bread is. I want to beg, plead, bribe, force you to make it right this minute!
You’ll get all the rock star points for homemade bread with hardly any work. And you aren’t sacrificing anything in the name of it being an ultra-easy recipe. It is straight up some of the most delicious homemade bread ever.
I find myself turning to this bread recipe constantly now that I know it exists. It’s become our go-to bread for just about everything. Perfect for beginner and expert bread makers alike, please promise me you’ll make it soon!
One Year Ago: Mel’s Holiday Gift Guide: His + Hers
Two Years Ago: Perfect Homemade Caramel Apples
Three Years Ago: Perfect Small Batch Cinnamon Rolls
Four Years Ago: Easy Homemade French Bread
Five Years Ago: Harvest Pasta Sauce {Trader Joe’s Copycat}
Six Years Ago: Peanut Butter Cup Cheesecake with Chocolate Cookie Crust
Seven Years Ago: Gourmet Caramel Apples + Free Printable Handout
Eight Years Ago: Black Bean and Butternut Enchilada Skillet
Nine Years Ago: Peanut Butter Oatmeal Chocolate Chip Cookies
Ten Years Ago: Pumpkin Cookies with Caramel Frosting
Easy No-Knead Peasant Bread
Ingredients
- 4 cups (568 g) all-purpose flour (see note)
- 1 ½ teaspoons salt (see note)
- 2 teaspoons granulated sugar
- 1 tablespoon instant yeast (see note)
- 2 cups warm water
Instructions
- In a large bowl, add the flour, salt, sugar, and yeast. Whisk to combine. Add the water and mix with a rubber spatula or wooden spoon until the ingredients form a shaggy, sticky ball and no dry streaks remain.
- Cover the bowl and let the dough rise until doubled, about 1 to 1 1/2 hours.
- Place an oven rack in the center position. Preheat the oven to 425 degrees F. Generously grease a 9-inch pie plate or 8 1/2-by-4 1/2-inch loaf pan with cooking spray. (See note for other pan sizes/options.)
- Scrape the dough away from the sides of the bowl with a rubber spatula, forming a rough ball in the center of the bowl. Lightly grease your hands with cooking spray or oil and shape the dough into a circle loaf shape (or a rectangle loaf shape if using a loaf pan), tucking edges under. Place in the prepared pan. The loaf will not be completely smooth and may look a bit rough in shape, that's ok!
- Let the dough rest, uncovered, for 15-20 minutes until slightly puffy.
- Bake for 15 minutes. Reduce the heat to 375 degrees F and continue to bake for 15-20 minutes until golden.
Notes
Recommended Products
Recipe Source: adapted slightly from a recipe, Katherine B., a longtime reader sent me (thanks, Kat!) – originally from this recipe at Food52 and adding a link to Alexandra Stafford’s blog with lots of variations (I adapted it to use a pie plate or loaf pan for baking, and increased the flour and yeast amounts slightly)


This bread recipe is so easy! I made this yesterday and it was Soooooo good! My dog approved of it as well. Lol. Thank you, for the recipe. This is definitely a keeper at our house! Yummy!!
I tried this recipe for the first time yesterday. I loved the ease and outcome
I also forwarded it to my friends who swear they too would try it.
Thanks for sharing
I just made this tonight and my family really liked it! I used the pie dish and I didn’t have a problem with the stickiness bc I buttered my hands and watched your vid on how to handle it. I wasn’t sure how to store the leftovers so I put in a gallon baggie with a paper towel and sealed it on the counter. It’s a great bread recipe I’ll be using again, thanks!
Yum! Better (and easier) than the no-knead artisan bread. Thank you!!!
I agree, Laurie – thanks for taking the time to let me know!
My husband thought this was the best bread he ever ate. It was so easy!
Glad to hear that, Beverly! Thanks for letting me know!
Yes I was very impressed with how easy making this loaf was.
I have deep dish pie plates .Do u think these would be better. or the same using regular. Pie plates.
Hi Sally, you could definitely use a deep pie plate for this bread.
Delicious! Any advice for making smaller loaves out of this, like ideas for pans to use and baking time? Also, how do you recommend storing this bread so the crust stays crusty? Thank you!
I’ve found the crust inevitably softens over time. It’s hard to keep it quite as crusty as when it comes out of the oven. For smaller loaves, you could try a 1 or 1.5-quart baking dish of any size (even small loaf pans would work)
OH Mel! I’ve literally made this 5 times since you posted this the day before yesterday. It’s amazing as are all your recipes.
I love this so much! Thank you, Becki!
Ii made this to accompany a ham and bean soup I make. It was wonderful as usual! I like your recipes and write ups o. How to handle the dough. It makes it easier to troubleshoot what I did or didn’t so right. I know I was trying too hard for the perfect tucked in tight ball dough, it slipped in my oiled hands and landed in my oiled pie pan. I let it go where it plopped. It turned out lovely. The pie pan was perfect. I might have undercooked it by a few minutes. But nothing was raw dough so that’s just getting the feel of things in my oven. Plus I cut it when it was still mostly hot and that will always make bread gummy. Very delicious flavorful loaf. I used active dry yeast without any issue. Definitely gonna make again! You definitely have to overcome the sticky dough issues to be okay with the process.
Thanks so much for including your details and experience, Andrea! Super helpful. It’s good to know that plopping it in the pan will work just fine!
Currently making my second loaf because the first was so good! I think what impressed me most was that even the day-old leftovers were good, which is not true of any of the other homemade bread I make. I much preferred this to the usual no-knead with the cut-your-mouth sharp crust (though it is beautiful and I do enjoy it). Thanks Mel!
I agree with you on the leftovers! The next day, this bread is still very soft and moist.
Day three and the leftovers are still yummy (toasted and buttered)!
Awesome!!!!
hi when you say all purpose flour do you mean self raising ,regards gary
Hi Gary, no, not self-rising. Just regular white flour (not bread flour) without anything added to it.
Easy and delicious! I used half AP and half white whole wheat, and since my bowl was about 9″ across, I just upended the pie pan on top and flipped the whole thing over. We’re calling it rustic. I just enjoyed some for breakfast.
Ok, LOVE that method! Brilliant! Thanks for sharing, Margie.
I was surprised that you didn’t put it into fridge overnight as in most no-knead recipes. Maybe that’s why it calls for 1 Tablespoon of yeast. I’ll have to try this out. Thanks.
I am making this rdcipe but the flour does not seem to be stucky at all.add more liquid?
Hmmm, if the dough isn’t sticky at all it might need more water to loosen it up.
I made a mistake . I used a two cup measure thi king it was a one cup. So i had too much flour. I just redid it and its sticky!!sorry.
Oh my word. Absolutely amazing!!!! Thank you, Mel!!!
I’m glad you liked it!
Can I bake this bread in a muffin pan for small individual servings? If I can, how long and at what temp?
Thank you.
I haven’t tried that, but I assume that would probably work. I’d probably bake at 425 degrees for five minutes and then decrease to 350 degrees for another 5-10 minutes.
Working from home today, and I whipped this up on my lunch break. Sooo easy! Generously buttered a pie pan as others suggested, and it baked up beautifully. Now my house smells like fresh bread and my belly is full of it! Bliss! I think I must purchase Bread, Toast, Crumbs to get more of these delicious and quick bread recipes. Thanks for sharing, Mel!
I just bought that cookbook based on so many great recommendations!
This bread recipe is so easy! I made this yesterday and it was Soooooo good! My dog approved of it as well. Lol. Thank you, for the recipe. This is definitely a keeper at our house! Yummy!!
Do you think that this could possibly be made into rolls, muffins, or drop biscuits? I find that making it into loaf form poses problems for portion control!!
Thanks.
I haven’t tried making it into smaller portions, but I think it could work!
Yes. It worked!!! I am eating the heel as “we speak”. Fresh homemade bread.
Thank YOU!
(I’m already a subscriber, have been so for at least a year. I love your recipes & your methodology of presenting them. Have never even thought of unsubscribing & have been rewarded with this recipe)
You are so kind – thanks so much, Hilda!
I made it and it was everything you said it would be, most importantly, easy and delicious. Thank you! I will be adding this to my “Mel’s Kitchen Cafe shrine” on Pinterest
Haha, thanks, Charlotte!
I can’t wait to try this I am so excited
So freaking good!! I made it last night and my husband and I were in bread heaven! :).
Thanks for letting me know, Kim!
This bread was so delicious! The crust is a great texture, especially for kids, not too hard to bite through. I baked it in two, rectangle bread pans (I doubled the recipe). Thank you so, so, so much!!!
Thanks for the review, Alicia! I love baking it in loaf pans, too, because it makes great sandwiches!
I love you Mel, but I can’t believe you just ripped off Alexandra Staffords’s recipe. Her blog alexandracooks and her book Bread, Toast crumbs has changed my life.
@Karen I’m a little confused why you’re saying she’s ripped off someone’s recipe. Mel ALWAYS gives credit to the sources she receives her recipes from. She isn’t claiming to say she wrote this recipe on her own. She mentioned she got the recipe from a reader and the original source she received it from was stated here in this post as well. ❤️
Hi Karen, I would never rip off someone’s recipe. I’m sorry you feel that way. I linked to the website I got this recipe from below my recipe card (food52 site where Alexandra shares the recipe). I also modified the recipe (baking pan and buttering method was changed, altered the yeast amount and the flour amount by weight) enough that I felt like posting my version would be helpful. The internet is full of variations on amazing recipes – mine is just my take on Alexandra’s brilliant recipe with credit given to her by way of that link.
Bis Du Dir nicht mehr die Finger verbrennst!!
I make the peasant bread from Alexandra’s Kitchen (very similar to this recipe – and she has a cookbook based around variations of this bread – super recommend it! It’s called Bread Toast Crumbs) and just a tip – using a generous amount of butter instead of cooking spray for the pan really creates an awesome crust. And I do just bake mine in standard glass Pyrex bowls, but I may have to try your pie plate idea! I also always sub in some fresh ground wheat flour. I make this bread all the time, SO good!!
I just bought that cookbook!
Easiest bread I’ve ever made, and so yummy!
So happy to hear that, Stephanie!
Have you tried unbleached flour? What sort of a difference do you think that wld make.?
Hi Nikki, I use unbleached all-purpose flour, and it works great!
How long should I wait before slicing the bread?
Oh yum! This was so fun!
Bis Du Dir nicht mehr die Finger verbrennst!!
Hi Sue, I find the bread holds up best if I wait to slice until it has cooled.
I’m new to bread making and plan to try this ASAP. Looking at my store, it has Fleischmann’s Bread Machine Instant Yeast. Will this work with your recipe as written? Am thinking instant is instant bread machine involved or not. An I right?
Yes, that yeast will work just fine!
I’ve been wanting to make peasant bread for a couple of years, but have never gotten around to finding the vintage pyrex bowl. A pie plate is genius! Thank you!!! I look so forward to making it.
Hope you like the bread, Stacey!
I made this this morning since today is already a bread day and it’s delicious and almost all gone! I like that it didn’t need long rises. I used active dry yeast and swapped in a cup of whole wheat and it was light and fluffy. I’ve made one of Alexandra’s bread recipes before and loved it. Glad to have another one! Thanks for sharing, Mel!
Thanks for including your changes, Nicole!
This is in the oven right now. Can’t wait to try it.
I’m so glad you tried it today, Denise! I hope you love the end result!
I did not hesitate when you said make it now. I’m eating warm bread right now and it is amazing! Thanks for another go-to recipe.
Yay!! I’m so happy to hear that!
I have to make this bread after finding out you are Idahoan by choice…We moved from central Florida to South Central Idaho, but presently exiled in Hawaii due to employment. It’s not a bad place to be stuck, but really miss the Gem State! My bread baking talent is more at the frozen loaf stage, but I’m giving this a try this afternoon, and I’ll think of Idaho the whole time!
I can’t say as I’d be sad to be stuck in Hawaii, BUT, I am a homebody, so I think my heart would be longing for Idaho, too!
Can this recipe be adapted for a gluten free diet?
Hi Donna, I haven’t tried making this gluten free. I’m sorry I’m not more help!
The book, “Bread Toast Crumbs” by Alexandra Stafford, has a very similar recipe which I have been making for years. I do use the pyrex bowls, coated with butter, as her recipe calls for. It makes the exterior crust sooo good. I like your idea of making one loaf in a glass pie dish and shall try it that way when I make it next! Thanks!
Can’t wait to try the pie plate!!
I’ve been making a similar recipe all year! Bread really can be life changing!!
Yes, it sure can be!
Yay! I’m so glad you loved this bread as much as I did! I’m excited to try baking it in a pie plate! You’re the best, Mel!
Thanks so much for sending me the recipe!!
Thanks for all the info on different pans and flours. Will be making this soon. Just to be sure, there’s no second rise, just the rest period while the oven heats up?
Yes! You’re right, it rests in the pan for 15-20 minutes before baking. It’ll puff a bit but won’t necessarily double in size.
Mel, your timing is spot on!! I just learned about and had some peasant bread for the first time last night. I cannot wait to try out your recipe.
There are a lot of different peasant bread variations around online – this one is fantastic, but I bet there are some other great ones, too. I messed with this recipe a bit – using slightly more yeast and a bit more flour.
I’ve been making Alexandra’s bread for years and it is spectacular. I believe she also recently published a cookbook. I think the bread is based on a recipe her mom taught her. Everyone should try this. I make it in the two Pyrex glass bowls and have never had a problem. I love buttering the glass bowl and love the resulting shape and flavor. Yum.
I just bought her cookbooks! Bread, Toast, Crumbs. I’m excited. I’ve heard great things about it.
So excited to try this recipe.
How would this work with sourdough starter instead of yeast?
I was wondering the same thing. Maybe at least replacing some of the flour and water with starter. and still including the instant yeast?
Hey Stephanie and Kami – I thought someone might ask this…I haven’t tried using sourdough starter in this recipe yet, but you could definitely experiment! Maybe subbing in 1 cup sourdough starter and taking out 1/2 cup flour and 1/2 cup water? I don’t know if that would be enough to eliminate the yeast entirely.
Thanks for the suggestions. I made bread tonight with 1C starter, and 1/2 less of both flour and water. I did add 1 tsp yeast. It was fantastic! So delicious and rave reviews from family.
I just made it tonight with 1 cup of sourdough starter. I reduced the flour and water each by 1/2 cup and the instant yeast by half. It turned out delicious! Thank you Mel!
So excited someone checked in on a sourdough version. Thank you, Kim!
Was your sourdough starter fed or was it discard? I want to try this tomorrow!
I can’t wait to try this!
I hope you love it as much as we do!
I’ve been making this bread for years and it is life changing and delicious bread! But I’ve always made it in the 2 pyrex bowls so I am excited to try it in a pie plate. I’ve never done that before and it sounds intriguing. Thanks for the tip!
Sounds like the pyrex bowls work really well for a lot of people!
I want to try this! It’ll be my first time making bread and I’ve got a question.
If using a loaf pan, do you have to shape it or can you just dump the dough into the pan without shaping at all?
I haven’t tried a true lift-and-dump method into the loaf pan. I give it a little shaping with lightly greased hands…but where this dough is pretty rustic, you might be able to just plop it in there.
I just dumped it, and it turned out perfectly
How do you think this would do with cup for cup GF flour?
I’m not experienced baking gluten-free bread, so I’m not sure. Gluten free flour doesn’t *usually* sub well 1-for-1 in yeast bread recipes made with wheat flour, so I don’t know if it would come out the same.
I promise to make this right away. I’ve been making your french bread rolls to go with my Dutch Meatball Soup. Tomorrow I’ll make this bread to go with it to share with a friend who had knee surgery. Thanks again for all your awesomeness!
I hope you love the bread, Kelli! I made it once…and then never stopped. We’ve been making it several times a week because it’s so easy…and so delicious! Good luck to your friend who just had surgery!
Kelli, I saw your comment about making this bread to go with your Dutch meatball soup. I have a recipe for Italian meatball soup and would really like to get the recipe from you if possible. Thanks, Gary
1 pound leanest hamburger
1 egg
1/2 cup bread crumbs
1 tsp salt
1/2 tsp pepper
1/2 tsp nutmeg
1-2 Tablespoons dried parsley
Mix well and form into very small balls
12 cups chicken broth
1 cup pearl/calrose rice
1 cup finely chopped onion
3 cups finely chopped celery with leaves
3 cups grated carrots
1 1/2 cups finely chopped cauliflower
Many dashes of Maggi liquid seasoning.
1 tsp salt, 1/2 tsp pepper, 1/2 tsp nutmeg, 2 TBLS dried parsley
Bring broth to rolling boil. Slowly add meatballs to keep boil going. Add rice, keep boiling, and then slowly add veggies to not lose boil. Put a lid on, turn down to simmer for 1 1/2 hours stirring regularly, especially at the the end or the rice will stick.
Serve with additional Maggi and this yummy peasant bread slathered in butter.
Great….now I want bread…..
Thank you though! I don’t have a dutch oven (can’t use one on a glass stove top) & haven’t figured out how to bake all the wonderful rustic bread recipes. This is fantastic & will be made sooner rather than later!
Hope you enjoy it, Christi!
How about a cast iron pan????
Yes, that would work great!