

How to Make Almost Everything Ahead of Time for Thanksgiving Dinner
If you’ve ever wondered what can be made ahead of time for Thanksgiving dinner (and what can’t!), this post is for you!
Below, I’m detailing ALL of the main Thanksgiving dishes with tips on how to make them ahead of time (either freezing weeks ahead of time or prepping a day in advance) and the best recipes to use for each.
Bonus Resources:
- Free, downloadable Thanksgiving menu planner
- 50+ of my go-to Thanksgiving recipes.
How to Make Dinner Rolls Ahead of Time
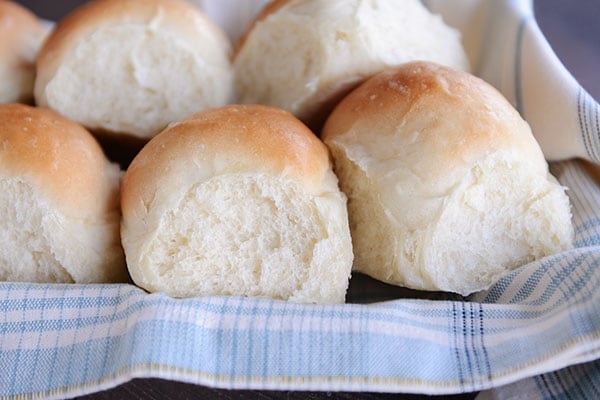
Dinner rolls are so easy to prep ahead of time! Below, I’m giving you my favorite roll recipes, as well as three options for making ahead of time: 1) freezing unbaked roll dough to bake the day of, 2) freezing baked rolls and rewarming them the day of, and 3) prepping roll dough a day ahead of time to bake and serve on the big day.
How to Freeze and Bake Roll Dough:
- Make the dough according to the recipe and let rise in bulk.
- Shape the rolls as desired and place on a parchment-lined, greased baking sheet, and freeze (for up to two months).
- Once frozen, the rolls can be taken off the sheet pan and placed in freezer ziploc bags.
- The day you want to bake the rolls, remove them from the freezer and place on a parchment-lined, greased baking sheet (or in a 9X13-inch pan).
- Cover with greased saran wrap and let the frozen roll dough rest at room temperature until thawed and risen, anywhere from 3 to 6 hours depending on the warmth of your kitchen.
- Bake as directed.
How to Freeze and Rewarm Already-Baked Rolls:
- Make your preferred roll recipe start-to-finish.
- Let the rools cool completely.
- Place the cooled rolls in freezer ziploc bags. Remove as much air from the bag as possible without squishing the rolls.
- Freeze for up to two months.
- Remove the rolls from the freezer 2 to 3 hours before serving. Let thaw at room temperature.
- To lightly rewarm, place the rolls in a baking dish (brush the tops with butter, if desired) and loosely cover with foil. Warm in a 325 degree oven for 7 to 8 minutes.
How to Prep Rolls a Day Ahead of Time:
- Make the dough according to the recipe and let it rise in bulk.
- Shape the rolls and place on a parchment-lined, greased baking sheet or pan (use the pan you are planning to bake the rolls on!).
- Immediately cover with greased saran wrap and refrigerate. Do not let the rolls rise at room temperature on the baking sheet at this point.
- Refrigerate for up to 18 to 20 hours.
- Remove the rolls from the refrigerator 1 to 2 hours before baking.
- It’s likely the rolls will have puffed up and risen in the refrigerator. Let the rolls continue to rise at room temperature until puffy and nearly doubled. Take care not to let the rolls over rise or they can deflate in the oven.
- Bake per the recipe.
How to Make Pies Ahead of Time

If you haven’t made and frozen your Thanksgiving pies ahead of time, you are missing out on one of the best make-ahead tips for Thanksgiving.
Rule of Thumb: Most baked fruit pies, like apple pie, cherry pie, and triple berry pie, freeze great, as well as pecan pie, pumpkin pie, and baked chocolate pies. Cream pies, like banana cream pie or coconut cream pie, or other pies with unbaked creamy fillings do not freeze well. I have tips for other ways to make those pies ahead of time below.
Here’s an Instagram reel with details on freezing Thanksgiving pies (I included the same info below).
How to Make and Freeze Pies Ahead of Time:
- Make the pie start-to-finish, bake and let cool completely.
- Cover the pie with a layer of saran wrap followed by a layer of aluminum foil.
- Freeze for up to two months.
- Remove the pie from the freezer and thaw for 24 to 48 hours in the refrigerator.
- To reheat, remove the foil and saran wrap and recover with a loose layer of aluminum foil. Reheat in a 325 degree oven for 15 to 20 minutes.
➡️ Alternately, you can make and bake all of these pies 2 to 3 days ahead of time, cool, cover well with foil or saran wrap and refrigerate until ready to serve. To rewarm, cover loosely in foil, and place in a 325 degree oven for 15 to 20 minutes.
How to Prep Cream Pies Ahead of Time:
- Prepare crust according to the recipe.
- Make the pudding/cream fillings.
- Option 1: Assemble the pudding filling in the pie crust, cover and refrigerate for up to two days (the crust may soften a bit if refrigerated the full two days). Do not top with whipped cream topping until within an hour of serving as whipped cream can deflate and get weepy if made ahead.
- Option 2: Refrigerate all the pie components separately (crust, pudding filling, etc). Assemble the pie an hour or two before serving.
How to Make Gravy Ahead of Time

Homemade gravy fares very well being made ahead of time and frozen or refrigerated for several days!
➡️ This is the all-time best recipe for homemade gravy ever!
How to Make Homemade Gravy Ahead of Time:
- TO FREEZE: Make gravy start-to-finish and let cool completely. Scoop into freezer ziploc bags (pressed flat) or freezer-safe containers. Freeze for 2 to 3 months. Remove from the freezer and thaw in the refrigerator for 24 to 48 hours. To reheat, add the gravy to a saucepan and heat slowly over medium-low heat, whisking constantly. If the gravy separates, whisk it vigorously until recombined (and try increasing the heat just a bit). Thin with additional broth or thicken with a simple cornstarch slurry, if needed.
- TO REFRIGERATE: Make gravy start-to-finish and let cool. Scoop the gravy into container(s) and refrigerate for up to 3 days. To reheat, add the gravy to a saucepan and heat slowly over medium-low heat, whisking constantly.
To use turkey drippings in already-made gravy, skim or strain the fat from the drippings. Add the already-made gravy to a saucepan and warm over medium-low heat, whisking constantly. Stir or whisk in the drippings. Bring the gravy to a simmer and cook for 2 to 3 minutes, stirring often.
How to Make Cranberry Sauce Ahead of Time

Cranberry Sauce Recipes:
To make cranberry sauce ahead of time:
- Make the cranberry sauce per the recipe. Let cool. Transfer to containers and freeze for up to 3 months or refrigerate for up to a week.
- If frozen, remove from the freezer and thaw in the refrigerator for 24 to 48 hours.
- Give the cranberry sauce a good stir and serve chilled or at room temperature.
How to Make Sweet Potato Casserole Ahead of Time

Sweet Potato Casserole Recipes:
How to make sweet potato casserole ahead of time:
- Make the sweet potato filling according to the recipe you are using, and spread it evenly in the baking pan. Let it cool completely if the sweet potatoes were warm when assembling.
- Do NOT top the sweet potatoes with any toppings (marshmallows, pecan topping, etc) until ready to bake and serve.
- TO FREEZE: Press saran wrap lightly on the surface across the sweet potatoes. Cover the pan with foil. Freeze for up to 2 months. Remove from the freezer and thaw in the refrigerator for 24 to 48 hours. Make sure the casserole is completely thawed before baking. Better yet, let the dish sit out at room temperature for an hour before baking to take the chill off. Remove the plastic wrap, top with any toppings the recipe calls for and bake per the recipe.
- TO REFRIGERATE: Cover the pan of sweet potato casserole (remember: no toppings yet!) and refrigerate for up to two days. Preferably, remove the pan from the refrigerator to sit at room temperature for an hour before baking. Top with any toppings the recipe calls for and bake per the recipe.
How to Make Mashed Potatoes Ahead of Time

If you are weighing which Thanksgiving dishes to make ahead or not, I’d put mashed potatoes on the list of foods that just can’t be beat when made and served hot and fresh.
However, mashed potatoes can be made ahead of time (and even frozen). If doing so, it’s important to take note of a few key ingredients and steps to make sure they turn out ok.
Important Note for Freezing Mashed Potatoes:
- Use a recipe that mashes the potatoes with plenty of butter, milk, or sour cream. The fat content is what ensures the mashed potatoes will hold their texture and flavor when frozen, thawed, and reheated.
- ➡️ ➡️ This is the only mashed potatoes recipe I’ve used to freeze mashed potatoes ahead of time.
To make and freeze mashed potatoes ahead of time:
- Make mashed potatoes per the recipe (remember to add a decent amount of butter, milk and/or sour cream).
- Let the potatoes cool a bit before scooping into freezer ziploc bags. Let the potatoes cool completely in the bags (keep them open) before pressing flat and eliminating as much air in the bag as possible. Seal the bags and freeze for up to two months.
- To reheat, remove from the freezer and thaw in the refrigerator for 24 to 48 hours.
- Place the potatoes in a baking dish (you can stack several layers of potatoes that were frozen in bags).
- Cover the dish with foil and heat in a 350 degree oven for 30 to 45 minutes. Stir gently once or twice. Avoid over-stirring or the mashed potatoes can turn a bit gluey in texture.
- If the potatoes are thinner or separate upon reheating (quite likely as freezing can make them more liquidy/softer after thawing), stir in a bit of sour cream or a few tablespoons of cold butter to thicken and recombine. Additionally, a few tablespoons of instant mashed potatoes can be stirred into watery mashed potatoes to thicken them up.
Alternately, the mashed potatoes can be made up to two days ahead of time, stored in the refrigerator, and then reheated in a 350 degree oven for 30 to 45 minutes or in a greased slow cooker set to low for 2 to 3 hours.
How to Prep Stuffing Ahead of Time

I don’t recommend freezing stuffing – either baked or unbaked. Despite what the online search results tell you, in my experience, it doesn’t freeze well. It is one of those dishes that is best baked same-day.
However, there are several things you can do to prep stuffing ahead of time so that it is super easy to assemble and bake.
Stuffing Recipes You Can Prep in Advance:
To prep stuffing ahead of time:
- Cube the bread for the stuffing and follow recipe instructions for toasting or drying out. This step can be done 3 to 4 days in advance. Be sure to store the toasted/stale bread cubes in a sealed bag. (Note: toasting or drying out bread in advance can be trickier in humid climates.).
- Prep the aromatics for the stuffing, like sauteeing onions, celery and other vegetables, up to two days in advance. Scrape the prepared veggies into a container and refrigerate.
- Assemble the stuffing when ready to bake. Bake per the recipe.
How to Make Turkey Ahead of Time

For the best juicy, flavorful meat, turkey is another food that I highly recommend making the day of rather than making in advance and freezing.
However, if you need to make the turkey ahead of time, here are a few tips to keep in mind:
- Make sure to cook the turkey to 165 degrees F.
- Let the turkey cool for 15 minutes before slicing into pieces.
- Remove the meat from the bones and slice into thick pieces (don’t slice or shred too thinly).
- Place the meat into bags or into a dish and add turkey drippings or broth (enough to moisten the meat but it doesn’t need to fully cover the meat).
- Let the meat cool completely before covering well/sealing the bag and freezing.
- Freeze for up to 2 months.
- Remove from the freezer and thaw in the refrigerator for 24 to 48 hours.
- Place the thawed meat in a baking dish and add about a cup of broth. Cover the dish tightly with foil to lock in the moisture and steam.
- Reheat in a 325 degree oven for 45 to 60 minutes until the internal temperature reaches 165 degrees F.
How to Make Ham Ahead of Time

Ham is a great make-ahead dish!
Here are some tips to make ham ahead of time:
- Sweet Baked Ham: This recipe for sweet baked ham is perfect for making ahead of time. Follow the instructions in the recipe to assemble the ham in a dish with the brown sugar. Let the ham cool completely. At this point, the dish can be covered with foil and frozen for up to two months or refrigerated for up to three days. Remove the frozen ham from the freezer and let thaw in the refrigerator for 24 to 48 hours. Bake per the recipe.
- Spiral Cut or Other Baked Ham: Prepare, bake and glaze the ham up to three days ahead of time. Let the ham cool completely and then cover well and store in the refrigerator. Store whole or cut the meat off the bone and store in slices. To reheat, place the whole ham or ham slices in a dish. Add about 1/2 to 1 cup broth, tightly cover the ham and/or the dish and reheat in a 325 degree oven for 15 to 20 minutes. Take care not to overcook when reheating – ham can dry out easily.
Tips on Making Other Side Dishes Ahead of Time

Here are some ideas and tips for other side dishes and components of side dishes that can be prepped in advance!
- Salad dressings, for salads like this harvest apple salad or amazing romaine salad, can be prepped up to a week in advance and refrigerated. Stir or whisk to recombine before serving.
- Almost every casserole-type dish (even ones like this confetti corn) can be prepared and refrigerated for up to two days before baking or reheating. If the recipe calls for any type of crisp topping, wait to top the casserole until just before serving. The topping can be made in advance, as well, just be sure to store it separately.
- Fruit side dishes, like cranberry jello, raspberry pretzel jello, or raspberry ribbon salad, can be made and refrigerated up to two days in advance. If the recipe calls for whipped cream topping, wait to add that until right before serving.
If you need help planning the details of your big holiday menu, here is a free, downloadable Thanksgiving menu planner!
Here is a link to 50+ of my go-to Thanksgiving recipes.
How thoughtful of you to share this Mel! I love all this info and the helpful forms!
This is so helpful! I need these notes/suggestions in a printable. Thank you so much for sharing!
Mel, this is seriously pure gold and something I’ll archive to refer to again and again. This must’ve taken forever to put together. THANK YOU.
You’re amazing! Thanks for this!
This information is a definite keeper. How wonderful!
Many thanks for sharing all of your work with this. Fabulous job!
Bless you Mel! I’m always scrambling to make my gravy right at the end, with perspiration gathering on my forehead, while guests arrive and want to chat. It’s so stressful. I will DEFINITELY try your make ahead method. Thank you!