Easy No-Knead Peasant Bread
This easy no-knead peasant bread is a game changer! Incredibly simple to make, it is soft, fluffy, and so delicious. We can’t stop making it!
I have been so excited to get this bread recipe in front of you. I’m not even exaggerating, not one little bit, when I say it has revolutionized homemade bread around here.
I’ve made it (easily) at least ten times in the last month. I’ve served it to company. Brought it to friends. Made it just because I wanted to eat homemade bread at 1:28 p.m. It is amazing.
No-Knead Bread is Not New
The no-knead bread trend is not new by any means. Wet, loose doughs formed into shaggy loaves and baked (most often) in a Dutch oven have been around a long time.
I have several recipes like that on my website already, like this artisan no-knead bread and this fantastic rustic crusty bread.
But this peasant bread is different and amazing enough to occupy its own spot here on the blog. For starters:
- it’s easier and a bit more straightforward than other no-knead bread recipes
- you don’t need a Dutch oven or baking stone for baking
- it can be baked in a variety of every day baking pans
- it doesn’t need long rising times
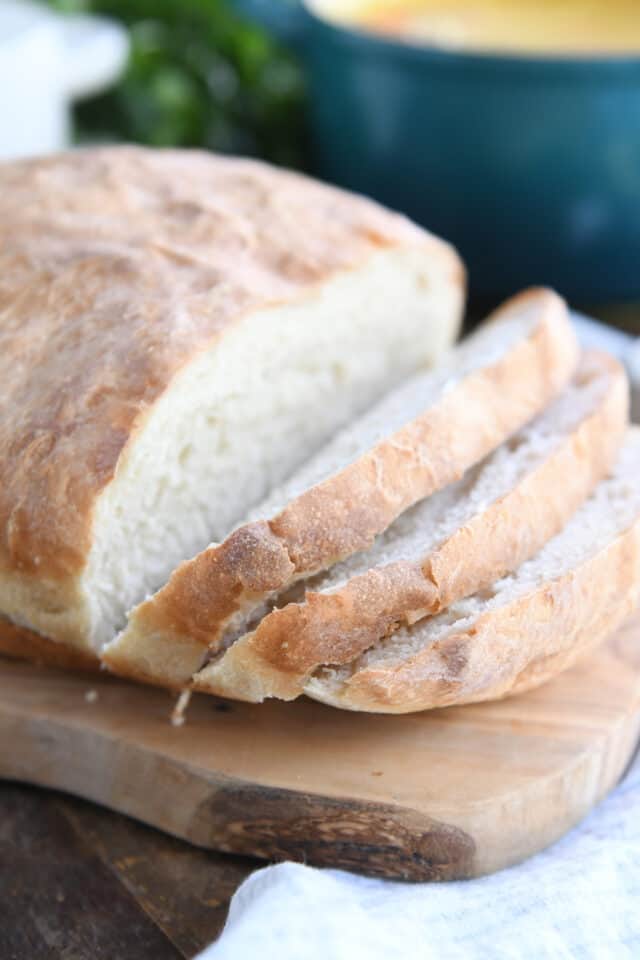
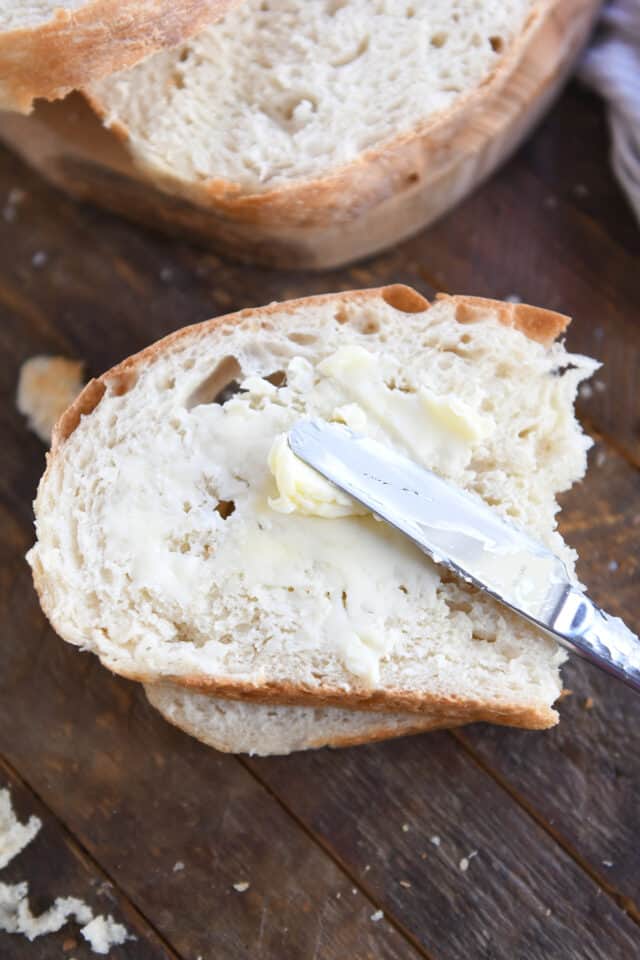
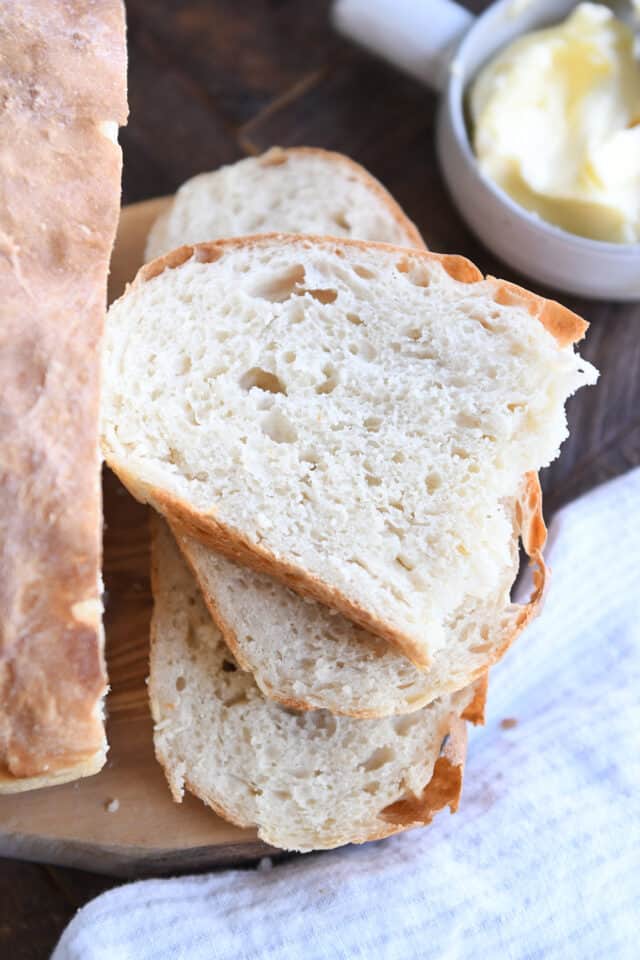
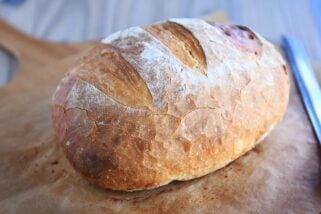
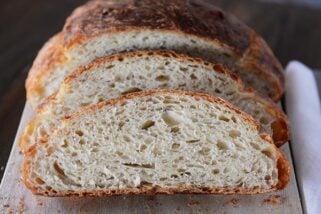
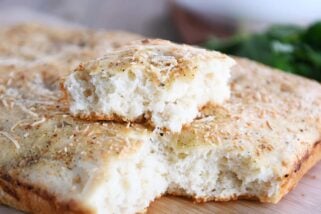
The crumb is soft and fluffy, and the crust is golden with just the perfect amount of bite and crustiness without cutting up the roof of your mouth.
How to Make Peasant Bread
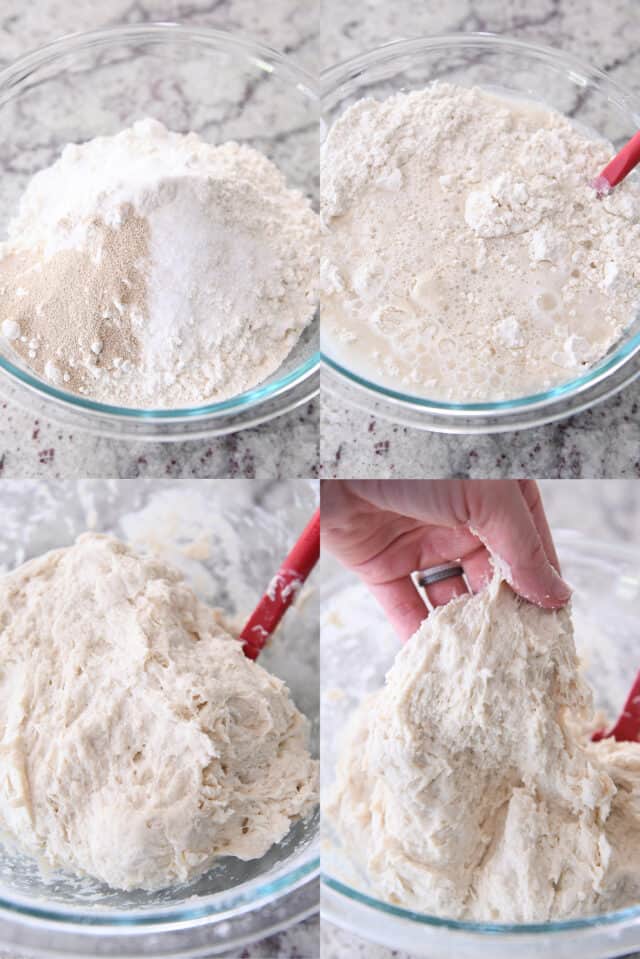
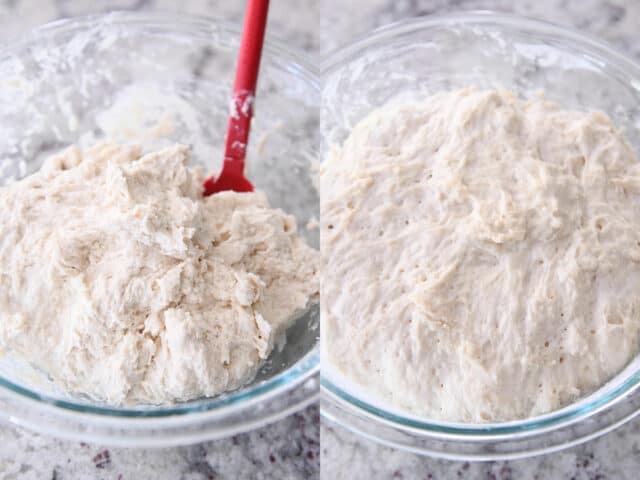
In a large bowl, whisk together the flour, sugar, salt, and yeast. Add the water, and stir until no dry streaks remain.
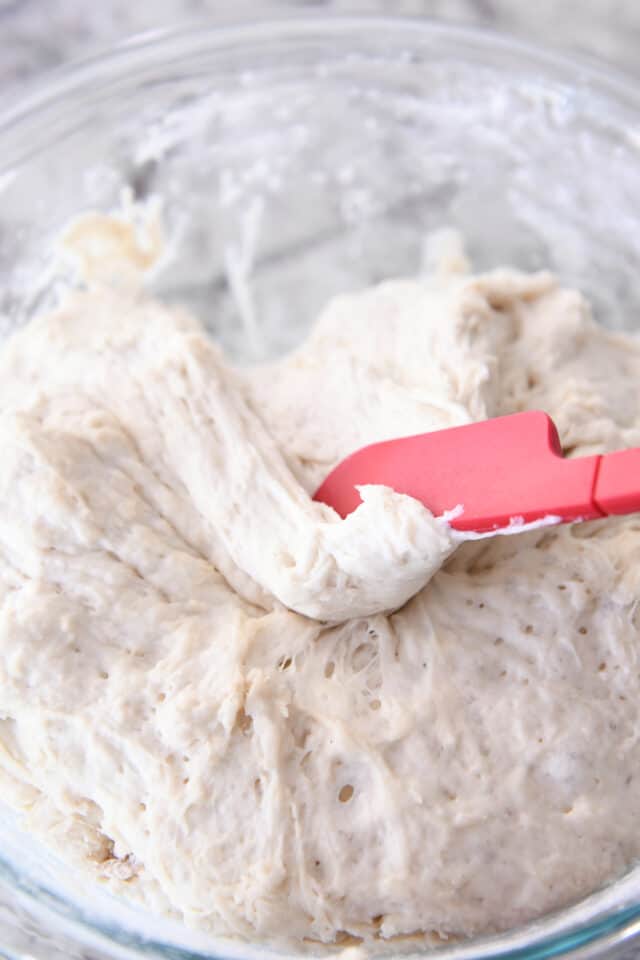
It’s going to form a shaggy mass, and it’s going to be sticky. That’s exactly how you want it! Resist the urge to add more flour.
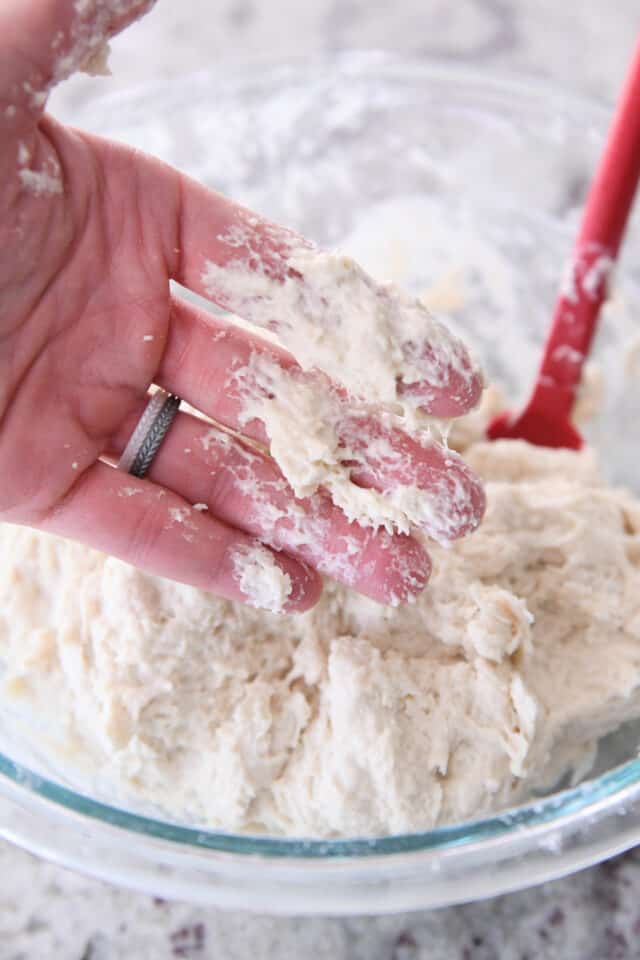
Grabbing a pinch of dough will leave a fair amount of sticky dough residue on your fingers.
Keeping the dough on the wet side of things is what allows us to skip any kneading and still end up with soft, fluffy bread.
Leave the dough right there in the bowl, cover the bowl, and let rise until doubled.
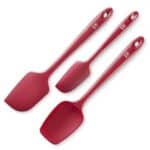
Once it is super puffy, grab a rubber spatula and start scraping the risen dough away from the sides of the bowl to form a messy ball in the center of the bowl.
How to Shape Soft Sticky Dough
Now for the fun part.
It can be a bit messy trying to shape soft, sticky dough like this into a loaf shape. A few tips:
- remember that it’s supposed to be kind of rustic, so ditch the idea of a perfectly shaped loaf
- grease your hands (cooking spray or oil); it makes a world of difference
- handle the dough quickly and efficiently – manhandling the dough will result in an epic dough bomb and lots of frustration
Here’s a quick video of how I shape this dough into a circle. I’m just lifting, rolling, and tucking a few times until it forms a pretty decent round shape.
Notice that my hands still end up with a bit of dough on them at the end. Feel free to use more cooking spray or oil, if needed. But don’t stress! It’s all part of the journey.
Best Pans to Use for Peasant Bread
The original peasant bread recipe calls for baking in oven-safe bowls (like Pyrex or others). Based on a traumatic experience in my past when my Pyrex bowls shattered coming out of the oven, I was determined to find a non-bowl solution for baking this bread.
I’m not saying you shouldn’t use a bowl for baking, I’m just letting you know I’ve come up with several fantastic alternatives that you probably already have in your kitchen.
After baking this bread in a Dutch oven, on a baking stone, in a round cake pan, and several other pan types, I’ve settled on the baking pan that works amazingly well and produces a loaf that is PERFECT.
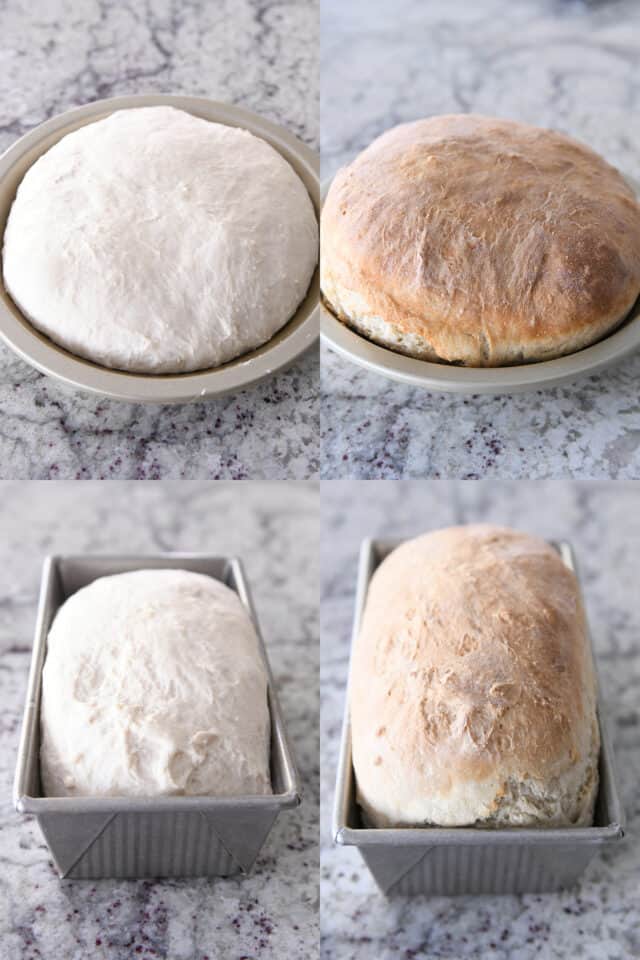
A 9-inch pie plate.
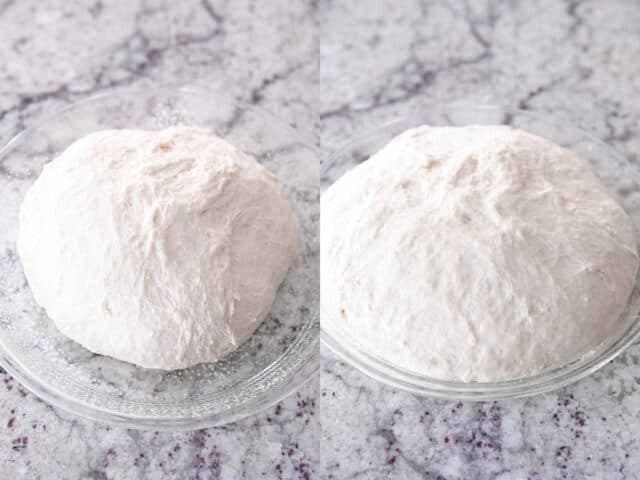
The sides of the pie plate help stabilize the shape of the loaf as it rises and helps prevent the dough from spreading out and flattening.
The peasant bread bakes up beautifully in a 9-inch pie plate! It’s what I use 99% of the time when I bake this bread. And in case I haven’t made it abundantly clear: I have made this bread so.many.times. Like, you can really trust me on this one.
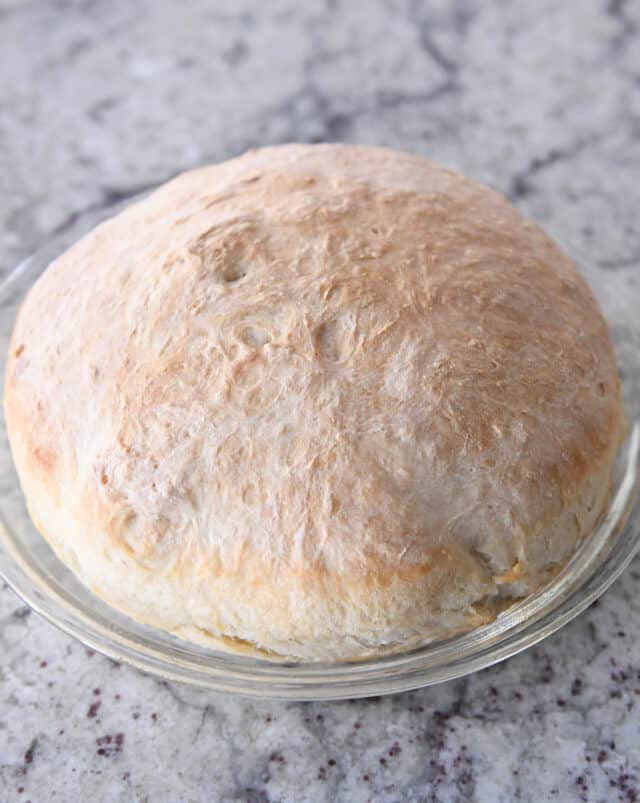
A metal pie plate works just fine, too. In fact, it actually gives a crustier exterior to the bread than a glass pie plate.
And, this bread bakes very well in a loaf pan, too. When shaping, go for more of a rectangle shape (but don’t over think it). Plop the loaf in a greased loaf pan, and get ready for some of the best bread of your life.
Best Bread Ever
I cannot overstate how amazing this easy, no knead peasant bread is. I want to beg, plead, bribe, force you to make it right this minute!
You’ll get all the rock star points for homemade bread with hardly any work. And you aren’t sacrificing anything in the name of it being an ultra-easy recipe. It is straight up some of the most delicious homemade bread ever.
I find myself turning to this bread recipe constantly now that I know it exists. It’s become our go-to bread for just about everything. Perfect for beginner and expert bread makers alike, please promise me you’ll make it soon!
One Year Ago: Mel’s Holiday Gift Guide: His + Hers
Two Years Ago: Perfect Homemade Caramel Apples
Three Years Ago: Perfect Small Batch Cinnamon Rolls
Four Years Ago: Easy Homemade French Bread
Five Years Ago: Harvest Pasta Sauce {Trader Joe’s Copycat}
Six Years Ago: Peanut Butter Cup Cheesecake with Chocolate Cookie Crust
Seven Years Ago: Gourmet Caramel Apples + Free Printable Handout
Eight Years Ago: Black Bean and Butternut Enchilada Skillet
Nine Years Ago: Peanut Butter Oatmeal Chocolate Chip Cookies
Ten Years Ago: Pumpkin Cookies with Caramel Frosting
Easy No-Knead Peasant Bread
Ingredients
- 4 cups (568 g) all-purpose flour (see note)
- 1 ½ teaspoons salt (see note)
- 2 teaspoons granulated sugar
- 1 tablespoon instant yeast (see note)
- 2 cups warm water
Instructions
- In a large bowl, add the flour, salt, sugar, and yeast. Whisk to combine. Add the water and mix with a rubber spatula or wooden spoon until the ingredients form a shaggy, sticky ball and no dry streaks remain.
- Cover the bowl and let the dough rise until doubled, about 1 to 1 1/2 hours.
- Place an oven rack in the center position. Preheat the oven to 425 degrees F. Generously grease a 9-inch pie plate or 8 1/2-by-4 1/2-inch loaf pan with cooking spray. (See note for other pan sizes/options.)
- Scrape the dough away from the sides of the bowl with a rubber spatula, forming a rough ball in the center of the bowl. Lightly grease your hands with cooking spray or oil and shape the dough into a circle loaf shape (or a rectangle loaf shape if using a loaf pan), tucking edges under. Place in the prepared pan. The loaf will not be completely smooth and may look a bit rough in shape, that's ok!
- Let the dough rest, uncovered, for 15-20 minutes until slightly puffy.
- Bake for 15 minutes. Reduce the heat to 375 degrees F and continue to bake for 15-20 minutes until golden.
Notes
Recommended Products
Recipe Source: adapted slightly from a recipe, Katherine B., a longtime reader sent me (thanks, Kat!) – originally from this recipe at Food52 and adding a link to Alexandra Stafford’s blog with lots of variations (I adapted it to use a pie plate or loaf pan for baking, and increased the flour and yeast amounts slightly)



I’ve made sourdough bread for years. Made this and W.O.W. — no words! Came out perfectly. I never even touched it with my hands just dumped it in the pie pan and did a little smoothing with the spatula. A thousand thanks for sharing this! Easily memorized.
I have made this 3 times in the past 2 weeks. It deserves the high ratings, a very pleasant loaf, pretty appearance but the flavor is not quite a normal homemade bread. But that is the trade off for not spending a lot of time babysitting the dough. The texture is great and people I served it too like it more than a typical no knead bread. Want to try the sourdough bread next. Thanks for some help in the kitchen.
absolutely love this recipe – my go to ! quick question tho – I’m out off AP flour – got lots of bread flour …. Yes? Good to go ?
Thanks
Bread flour should work just fine! Although the bread might be slightly more dense and/or chewy due to the bread flour being much higher in protein and gluten.
Hi! I want to try your recipe, looks fab!
Oven at 425 degrees F. Is that with oven fan on?
Does it make a difference, with or without fan? No need to mist the inside of the oven or have a dish of water in?
This week I did this bread twice! Wow I am impressed on how easy (no kneading nightmare!) and tasty it is. Thank you. It is the first time that a no‐knead recipe I tried worked well. So thank you really, I do think all the water makes all the difference!
I baked them with oven fan on. The 2nd time, I split the dough in 4 in smaller pans and with baking paper at the bottom (to avoid sticking).
If you are using the fan (convection), I’d suggest reducing the oven temperature to 400 degrees.
I’ve made this recipe several times and it always works out great! One big loaf is just too much for our little family but I have found that splitting it in two and baking them in 6” metal cake pans has been perfect! Makes a great little loaf and then I have another to freeze for later!
So easy and good!
I used Cup4Cup GF flour and it came out great! It was my first time making plain bread too. It’s almost impossible to find good GF bread for me so your recipe was a savior!
That’s great news that it worked out well with gluten free flour!
Mine was also too wet! I’ve tried it twice. Can’t seem to figure out what I’m doing wrong.
Hey Rachel – the dough was too wet? Or the baked loaf had a wet texture inside? Either way, try adding 1/2 cup additional flour and see if that helps.
I read if you add 3 T. of oil to the dough it will make a fluffier crumb. Is this feasible?
Hi Terry, you can definitely try adding oil if you’d like to experiment. You might need a bit more flour to compensate.
I love this recipe! However someone else made it and they said this was the recipe they used, and their bread was light and airy but when my bread comes out it’s super doughy and dense. I followed the recipe exactly I just don’t know what to do to fix my bread?
Can this dough be frozen before being baked or after being baked? Thanks! I’ve made it one already and it was a HUGE hit and I would live to be able to make it in batches that I can just pull out of the freezer.
I have only ever frozen after it has been baked and cooled – works great!
Mine was a disaster. I followed your advice to not add more flour, when I probably should have. Dough was way too wet. I might try again, though.
Hi. How could I adapt this recipe to make it overnight? Or should I use your overnight recipe and bake it in a pie pan? Thank you.
I think you could let the dough rise in the pie pan overnight, take it out in the morning, let it come to room temp and then bake?
Made this for the first time today and it is amazing. I do have one question about the rise time, I make a lot of your bread recipes and they always turn out delicious, but it seems that my dough always rises in half the time, and the loaves bake up so tall above the bread pans, they look like mushroom tops. I measure everything to the gram (I have issues ) I do live at a high elevation, but was wondering if I need to use less yeast at a higher elevation? Even if I cut the rise time, when it’s in the oven it bakes up really high.
(I apologize if you have already answered this, I tried looking through comments to find the answer)
Thank you for all the delicious recipes, I love your site.
Hi Ashley! The rise time could be affected by the temperature of our houses, and high elevation can definitely make a difference (and sometimes wreak havoc on bread recipes!). You can try cutting the yeast back a bit…or just watching the rising and bake the bread when it’s risen fully (even if it’s half the time then what is stated in the recipe).
Absolutely divine and so easy. My new go-to for white bread. I used a loaf pan and made one large loaf.
Can’t wait to make it
Hi, does this recipe work as well without the sugar. I can not have sugar, first time making a loaf of bread.
Thank you
Juanita
The sugar helps activate the yeast and helps with overall flavor but you could probably leave it out.
The Easy Rustic Crusty bread dose not have any sugar in the recipe.
Hi, does this recipe work as well without the sugar. I can not have sugar
Thank you
Just waiting for it to rise. It looks like it is to moist. But my son loves to bake bread. Can you add flavor into the dough?
Hi Kim – what kind of flavors are you wanting to add?
OMG! This bread was so easy to make that I kind of wondered how it would taste. This bread was wonderful—moist, tasty, and a wonderful addition to dinner . Mel, this almost has made me think I could make bread more often. Lol! Thanks for this very quick dinner addition.
Is this a good bread for sandwiches?
Yes, we use it for sandwiches!
I love this recipe! I make it with Kamut flour, add Italian seasoning and garlic powder, and bake it in my cast iron pot
Hey Mel,
A few years ago, I made bread all the time, so I was eager to make this, and I did, but each time I tried this, the middle was uncooked and just extremely doughy. What am I doing wrong?
Hi Rita, I think if you added more time onto baking that should do the trick. Every oven is a bit different in terms of temperature – so baking for 5-15 minutes longer could help!
My loaves has risen perfect but after a little on the oven they collapsed and I took them out early cause they looked like they were just baking way faster then the time given. Can’t put soft and tasty but what made them collapse after few min in oven
How long did the bread rise before going in the oven? If the loaves collapsed, it could be they rose too much before going in? Or if your oven bakes hot, that might have contributed…so perhaps try putting the loaves in the oven sooner and/or reducing the oven temp by 25 degrees.
My family love this. I do 3 stretch and folds every 30mins during step 2.
Has anyone tried adding pineapple juice to it to make it more Hawaiian flavored?
Came out very dense what am I doing wrong? Under proofed?
Could be that it needs to rise longer – what type of pan are you baking it in?
Delicious! Followed the recipe & it turned out just like my moms homemade bread, without the kneading!
This is a great recipe for beginners and the end result is a great homemade loaf of bread.
I’m using half light while wheat and half bread flour today. It’s about the fifth time I’ve made it
*half light WHOLE wheat
Going to try this right now. Love your thoughts and directions.
This was easy and delicious! Have made it quite a few times now!!! Thank you!
This sounds so good. I have just found out that I have allergies to many foods, wheat being the number one! Has anyone tried using gluten free AP flour to make this bread? I wonder if it would work as well as regular flour. Any ideas?
Hi Mel! I have made this wonderful & very easy bread recipe multiple times, always with stellar results. I usually follow exactly as written, but have also used 1 cup bread flour, & today I used a cup of whole wheat flour. I always weigh the flour to your specifications. I often brush melted butter on top before baking.
This is just the quickest route to homemade bread ever. It rises beautifully & has a lovely crumb to it. I initially made it in the pie plate but now usually use a loaf tin, mainly because it is easier to slice that way.
Thank you for another WINNER!
My husband is on a salt free diet. Would bread still rise without salt?
Hi Wendy, unfortunately, eliminating the salt from bread can really wreak havoc on the result. I’ve left it out accidentally before and the bread doesn’t rise well and is dense and bland.
I subscribed 1 cup of buckwheat flour for 1 cup of white.
It make the most incredible toast.
Just butter and maybe a little honey.
i haven’t tried making this bread , but my daughter has. it is my husbands favorite. I’m going to try and make it Gluten Free.
This bread was easy to make and the taste and texture are good. I have a question. The little packet of yeast said it contained 2 1/4 teaspoons. I just used that packet instead of using the full 1 Tablespoon called for. It seemed to work out fine. Would the bread have risen higher if I used the full amount?
It’s likely that using the full tablespoon of yeast will result in a slightly fluffier bread (because it will rise more quickly and create more air bubbles).
Just baked this bread….aroma in the house is wonderful.. Can’t wait for it to cool to try a piece. Just have one question….does the bread cool whatever it was baked in or does it gets taken out and put on a rack to cool? Thanks for the recipe & the answer.
I usually pop it out of the pan a few minutes after it comes out of the oven and let it cool on a rack so the bottom doesn’t get soft/soggy.
Mind. Blown. I have made bread SO MANY TIMES and it always is like lead. This??? This is the PERFECT bread. I actually made bread!!!!
Thanks for the recipe. I tried it but something doesn’t seem right. Followed all the directions and the bread is quite doughy- like it didn’t bake long enough (I baked for 20 minutes) Not a lot of air holes either. I did 1.5 hours or rise time, followed by 20 minutes of rise time. Should I have have done more rise time? Going to try again… Just want to know what
you think I could adjust. Thank you, Dana
Hi Dana, the bake time is 15 minutes at 425 degrees and 20 minutes at 375 degrees. You can definitely add time if the bread needs it.
I love this recipe. I make it every 5-6 days. It’s just me to cook for. I use a large pyrex bowl (that’s all I have at the moment) and it makes a beautiful high loaf. It slices well and I use it for toast, sandwiches, egg on toast, sopping up gravy… MMmmm.
I haven’t made bread in years and the being able to make a loaf I can be proud of feels like a bug accomplishment!
Mel!! I made this bread yesterday and while it didn’t look quite like yours it tasted amazing! We shared our loaf with a friend who’s going through her second round of breast cancer. They were thrilled with getting a homemade dinner that included this bread. Thank you, once again for an amazing recipe!
Hi Mel! I just took my delicious smelling and almost-as-nice-looking as yours bread out of the oven. I wanted to make it today for a lunch with some special friends tomorrow but would like any suggestions how to store it til then? I appreciate any advice you can give me. I followed your recipe to a T and it is SO EASY to make!!! The only addition I did was to melt some butter, add some garlic powder and dried dill and brushed lightly over dough after it rose and while waiting for the 15-20 rest period. Do you think you can brush melted butter over it again once it’s baked? MANY THANKS FOR ANOTHER GREAT RECIPE!!!
Susan
Hi Susan, yes, you can definitely brush butter on the bread after it comes out of the oven. If you let it cool completely and store it in a sealed bag, that should be fine!
MANY THANKS MEL!! I can’t wait to cut into it! I’ll let you know what my friends say.
This bread is amazing and so easy! My family loved it. Thank you!!
Has anyone here tried this bread with the variation of getting it to resemble Mel’s Sweet Molasses Bread (Outback Knockoff)?
It would mean using 1/3 cup molasses and 1/3 cup honey and I’d probably use half whole wheat flour. The little bit of cocoa in the molasses bread is no issue right?
I don’t want to mess up a batch of this amazing bread by adding that much extra sweetener!
Wouldn’t that be a completely different recipe?
What an incredibly easy bread to make! Excited to show how lovely it looks! Wish I could share how beautiful it smells!!!!
And now I see… no way to post pic
Thanks for the recipe! A new “go to”
Made this bread, but was very dense. Followed instruction to a tee. Used a loaf pan. I think the next time I make this I will divide the dough. Otherwise it taste pretty good.
Excellent bread .i used 2 cups bread flour, one cup wheat flour and one cup ap flour .i never even had to get my hands messy- just stirred it with rubber spatula -shaped it and flipped it into pie pan. A Tip though- don’t grease pan with olive oil the bread just absorbed it and it was very difficult to get out.I’ll use vegetable oil next time
Hi Mel,
I just made this for the third time. Easy and works for a challenged bread baker for me! Knowing I shouldn’t mess with what isn’t broken I still have a question.
You link to the recipe on food 52 which links to the original recipe on Alex Stoddard blog.
You use 4 cups of flour which you have at 568 g. You also use 1 tablespoon of yeast.
Alex Stoddard uses 4 cups of flour which she weighs at 512 g and uses 2 teaspoons of yeast. Everything else is the same.
(I know flour doesn’t have a universal weight per cup. Drives me nuts)
***Why did you use 568 g instead of the original 512 g of flour? Did you reach that 568 number by experimenting what works best in one pan vs two pans?
I’m very curious about this as I’m deciphering the mysteries, for me, of bread.
Anne O.
Replying to my own post haaaa!
I see farther down from reading the comments that you used 568 g because you experience better results that way.
In what way were your results better? Was the dough too wet with 512 grams which did something to make it not bake well?
I’m curious how one decides to increase or decrease flour based on experience.
Hi Anne. Great questions! Yes, I used 568 grams for my flour weight after multiple test batches. Because I wanted to be able to bake this in a pie plate instead of the glass bowls that the original recipe is baked in, I found I needed a bit more flour for structure since the bread doesn’t have the sides of the bowl to rise up against. So that, and the fact that I use 142 grams per cup of flour, landed me on the 568 grams of flour for this recipe. I found that using 1 tablespoon yeast produced a slightly lighter crumb.
Mel,
Thank you for this specific information!
I get your reason now. And because of this explanation I will know how to do this myself if I need to.
I know readers have asked about high elevations and your recipes. And by a couple of experiments I have found that there used call for lower elevations makes my bread rise really, really fast here at 3,000.
I’ve discovered trial and error that using a bit less yeast makes the rising behave as it does when we were at about 200 feet elevation in Washington.
For example for this recipe I use between 2 1/4 and 2 1/2 teaspoons of instant yeast. If I use one tablespoon of instant yeast the dough rises to the double mark about 30% faster than the recipe time.
I’ve looked this up in different places and it seems like less air pressure can equal faster yeast growth. I wouldn’t bet money on this but it is true for me up here in Montana.
I also lower baking powder and baking soda in cookies by a little bit and I think it’s (like around 10 to 15% but I don’t measure it I just take a couple finger pinches out.)
But it makes sense to me that anything needed to be adjusted for elevation doesn’t magically switch on at the 4000 feet but that it’s a continuum that gradually changes the higher you go. It makes a difference in my personal experience anyway.
I make all your bread recipes, when we’re in Washington, just as they’re written and they work wonderfully at that low elevation. Thank you so much for answering this!!
Wow Anne this is exactly what I have been looking for. I have made this recipe many times but have just moved from CA to Colorado Springs & have been looking for adjustments for high altitude . THANK YOU!
How is this bread real?? I make a lot of bread and this was by far the EASIEST, FASTEST bread with the YUMMIEST results! I don’t know why I’d ever use another recipe again! Thank you!
Great easy bread! Perfect for when you haen’t planned ahead to allow for lengthy rising lol. My family loves having a sliced loaf of this bread in the freezer at all times for breakfast toast or quick garlic toast!
Hello Mel,
I have made this one time. I goofed up the recipe by warming water and not paying attention to how much was actually in the measuring cup. Dumped it all in and had a soupy mixture. Realized what I had done. Added flour until it seemed “right”. It rose and baked okay.
I plan to do it correctly, next time, but also wondered about using milk in place of some or all of the water, on my third go round, : ).
Love your site and I appreciate everyone’s hints and comments too.
Thank you!
Wonder and so easy to make!