Easy No-Knead Peasant Bread
This easy no-knead peasant bread is a game changer! Incredibly simple to make, it is soft, fluffy, and so delicious. We can’t stop making it!
I have been so excited to get this bread recipe in front of you. I’m not even exaggerating, not one little bit, when I say it has revolutionized homemade bread around here.
I’ve made it (easily) at least ten times in the last month. I’ve served it to company. Brought it to friends. Made it just because I wanted to eat homemade bread at 1:28 p.m. It is amazing.
No-Knead Bread is Not New
The no-knead bread trend is not new by any means. Wet, loose doughs formed into shaggy loaves and baked (most often) in a Dutch oven have been around a long time.
I have several recipes like that on my website already, like this artisan no-knead bread and this fantastic rustic crusty bread.
But this peasant bread is different and amazing enough to occupy its own spot here on the blog. For starters:
- it’s easier and a bit more straightforward than other no-knead bread recipes
- you don’t need a Dutch oven or baking stone for baking
- it can be baked in a variety of every day baking pans
- it doesn’t need long rising times
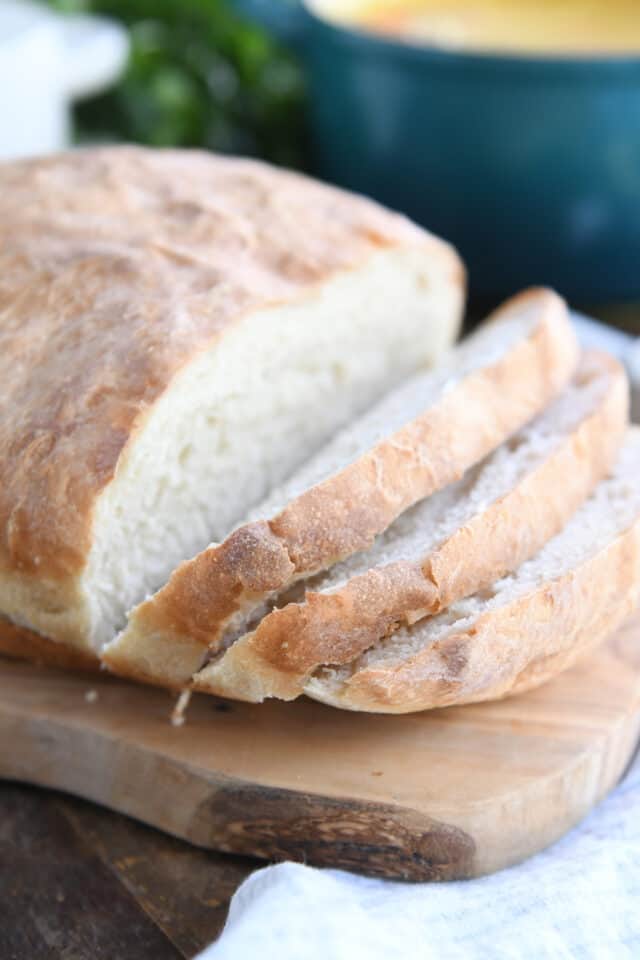
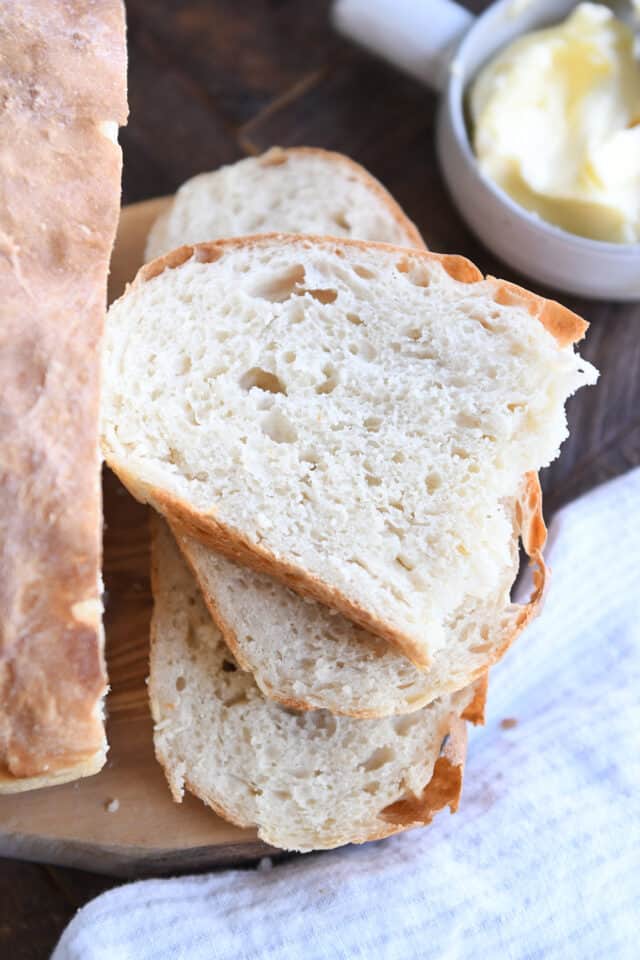
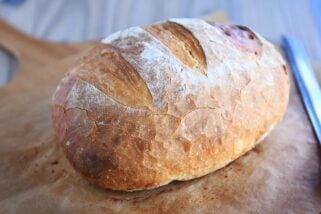
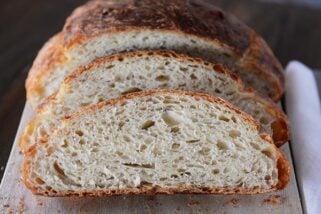
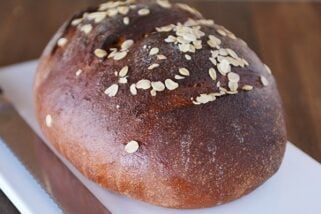
The crumb is soft and fluffy, and the crust is golden with just the perfect amount of bite and crustiness without cutting up the roof of your mouth.
How to Make Peasant Bread
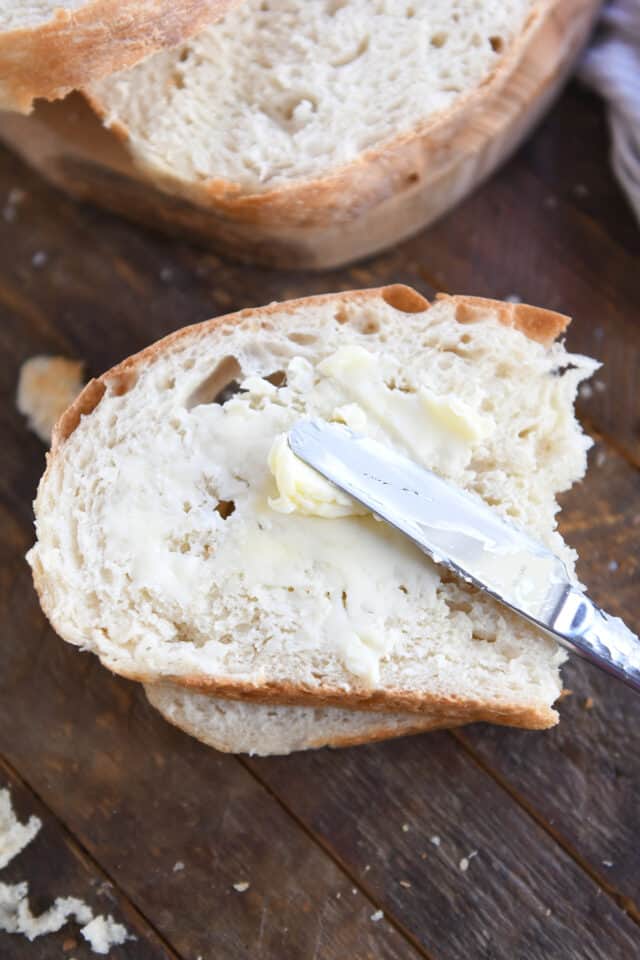
In a large bowl, whisk together the flour, sugar, salt, and yeast. Add the water, and stir until no dry streaks remain.
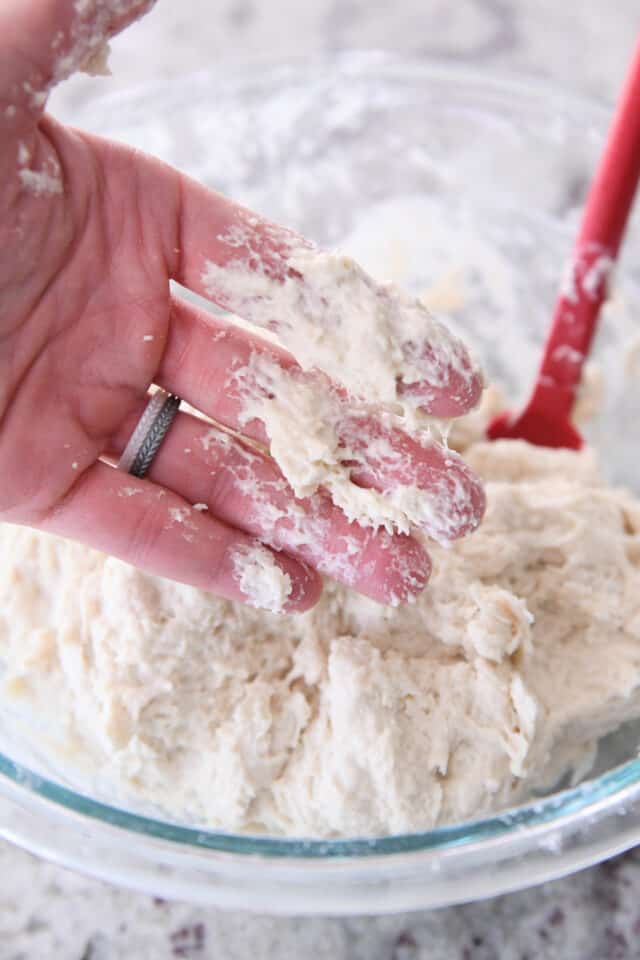
It’s going to form a shaggy mass, and it’s going to be sticky. That’s exactly how you want it! Resist the urge to add more flour.
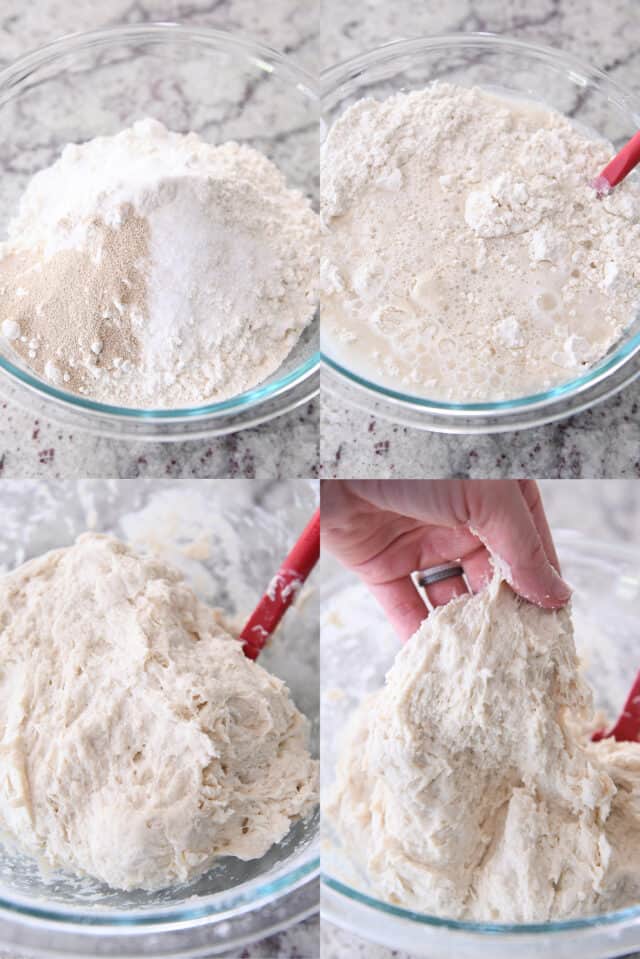
Grabbing a pinch of dough will leave a fair amount of sticky dough residue on your fingers.
Keeping the dough on the wet side of things is what allows us to skip any kneading and still end up with soft, fluffy bread.
Leave the dough right there in the bowl, cover the bowl, and let rise until doubled.
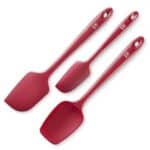
Once it is super puffy, grab a rubber spatula and start scraping the risen dough away from the sides of the bowl to form a messy ball in the center of the bowl.
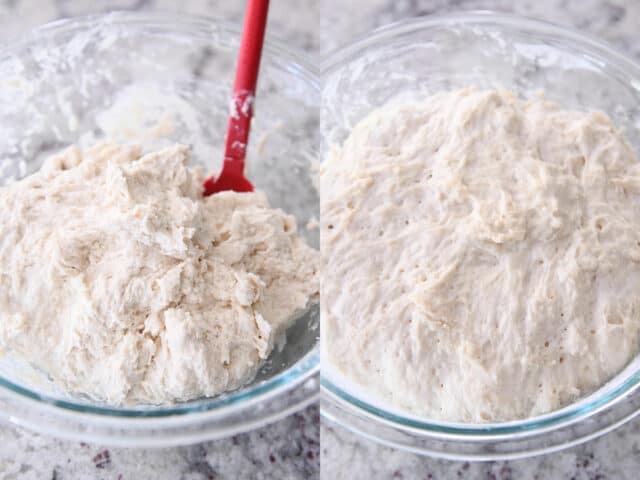
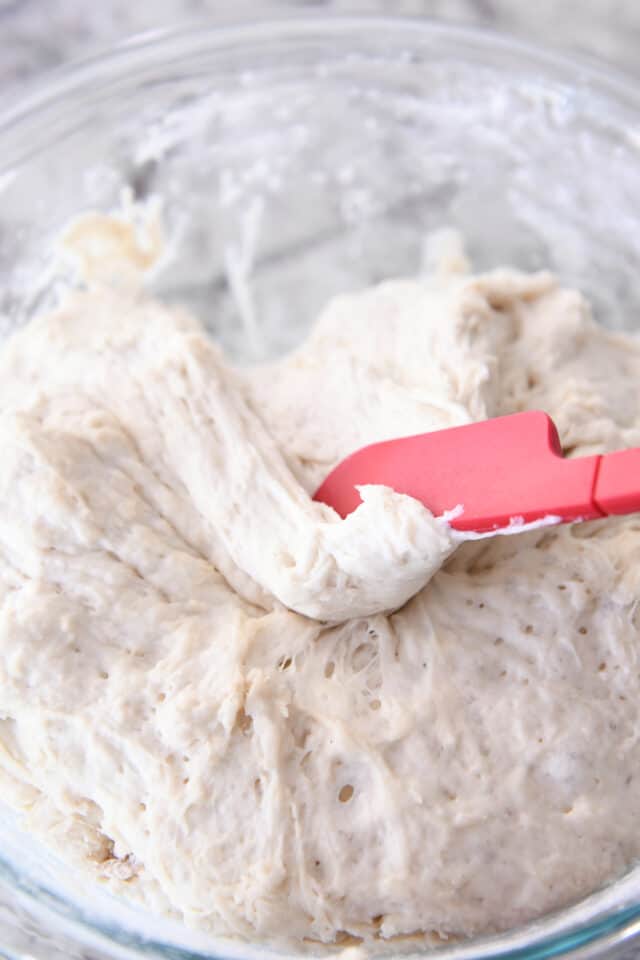
How to Shape Soft Sticky Dough
Now for the fun part.
It can be a bit messy trying to shape soft, sticky dough like this into a loaf shape. A few tips:
- remember that it’s supposed to be kind of rustic, so ditch the idea of a perfectly shaped loaf
- grease your hands (cooking spray or oil); it makes a world of difference
- handle the dough quickly and efficiently – manhandling the dough will result in an epic dough bomb and lots of frustration
Here’s a quick video of how I shape this dough into a circle. I’m just lifting, rolling, and tucking a few times until it forms a pretty decent round shape.
Notice that my hands still end up with a bit of dough on them at the end. Feel free to use more cooking spray or oil, if needed. But don’t stress! It’s all part of the journey.
Best Pans to Use for Peasant Bread
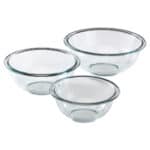
The original peasant bread recipe calls for baking in oven-safe bowls (like Pyrex or others). Based on a traumatic experience in my past when my Pyrex bowls shattered coming out of the oven, I was determined to find a non-bowl solution for baking this bread.
I’m not saying you shouldn’t use a bowl for baking, I’m just letting you know I’ve come up with several fantastic alternatives that you probably already have in your kitchen.
After baking this bread in a Dutch oven, on a baking stone, in a round cake pan, and several other pan types, I’ve settled on the baking pan that works amazingly well and produces a loaf that is PERFECT.
A 9-inch pie plate.
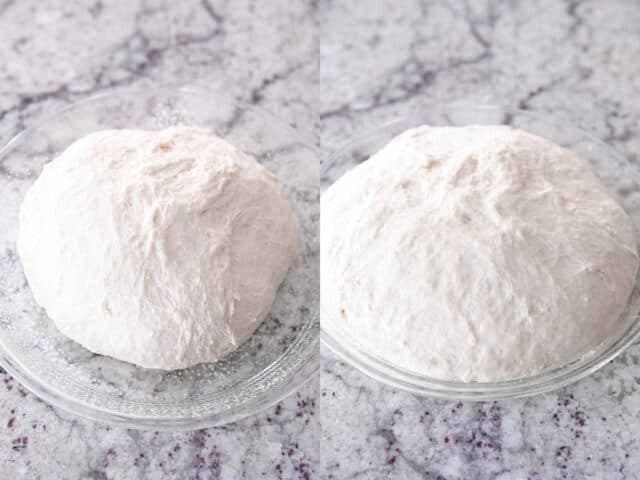
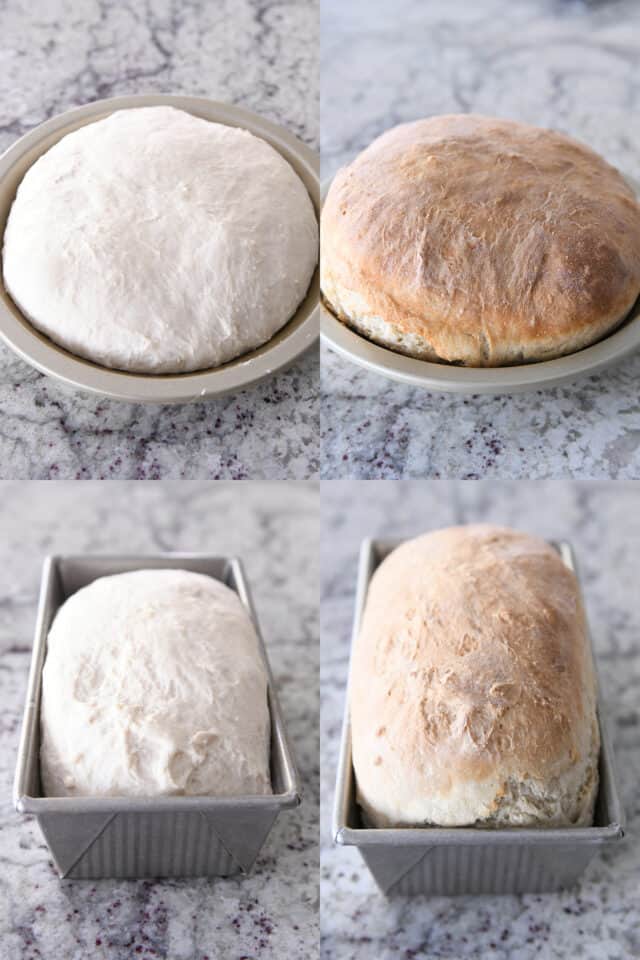
The sides of the pie plate help stabilize the shape of the loaf as it rises and helps prevent the dough from spreading out and flattening.
The peasant bread bakes up beautifully in a 9-inch pie plate! It’s what I use 99% of the time when I bake this bread. And in case I haven’t made it abundantly clear: I have made this bread so.many.times. Like, you can really trust me on this one.
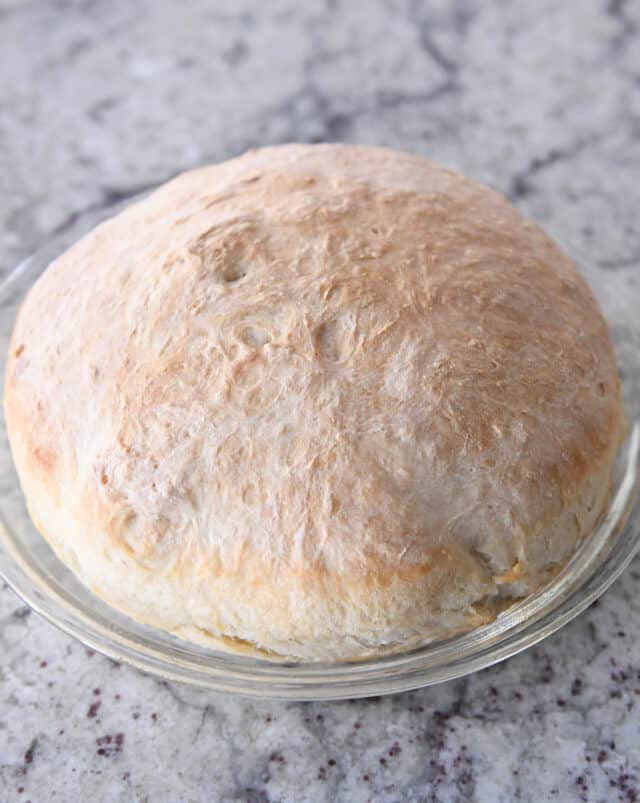
A metal pie plate works just fine, too. In fact, it actually gives a crustier exterior to the bread than a glass pie plate.
And, this bread bakes very well in a loaf pan, too. When shaping, go for more of a rectangle shape (but don’t over think it). Plop the loaf in a greased loaf pan, and get ready for some of the best bread of your life.
Best Bread Ever
I cannot overstate how amazing this easy, no knead peasant bread is. I want to beg, plead, bribe, force you to make it right this minute!
You’ll get all the rock star points for homemade bread with hardly any work. And you aren’t sacrificing anything in the name of it being an ultra-easy recipe. It is straight up some of the most delicious homemade bread ever.
I find myself turning to this bread recipe constantly now that I know it exists. It’s become our go-to bread for just about everything. Perfect for beginner and expert bread makers alike, please promise me you’ll make it soon!
One Year Ago: Mel’s Holiday Gift Guide: His + Hers
Two Years Ago: Perfect Homemade Caramel Apples
Three Years Ago: Perfect Small Batch Cinnamon Rolls
Four Years Ago: Easy Homemade French Bread
Five Years Ago: Harvest Pasta Sauce {Trader Joe’s Copycat}
Six Years Ago: Peanut Butter Cup Cheesecake with Chocolate Cookie Crust
Seven Years Ago: Gourmet Caramel Apples + Free Printable Handout
Eight Years Ago: Black Bean and Butternut Enchilada Skillet
Nine Years Ago: Peanut Butter Oatmeal Chocolate Chip Cookies
Ten Years Ago: Pumpkin Cookies with Caramel Frosting
Easy No-Knead Peasant Bread
Ingredients
- 4 cups (568 g) all-purpose flour (see note)
- 1 ½ teaspoons salt (see note)
- 2 teaspoons granulated sugar
- 1 tablespoon instant yeast (see note)
- 2 cups warm water
Instructions
- In a large bowl, add the flour, salt, sugar, and yeast. Whisk to combine. Add the water and mix with a rubber spatula or wooden spoon until the ingredients form a shaggy, sticky ball and no dry streaks remain.
- Cover the bowl and let the dough rise until doubled, about 1 to 1 1/2 hours.
- Place an oven rack in the center position. Preheat the oven to 425 degrees F. Generously grease a 9-inch pie plate or 8 1/2-by-4 1/2-inch loaf pan with cooking spray. (See note for other pan sizes/options.)
- Scrape the dough away from the sides of the bowl with a rubber spatula, forming a rough ball in the center of the bowl. Lightly grease your hands with cooking spray or oil and shape the dough into a circle loaf shape (or a rectangle loaf shape if using a loaf pan), tucking edges under. Place in the prepared pan. The loaf will not be completely smooth and may look a bit rough in shape, that's ok!
- Let the dough rest, uncovered, for 15-20 minutes until slightly puffy.
- Bake for 15 minutes. Reduce the heat to 375 degrees F and continue to bake for 15-20 minutes until golden.
Notes
Recommended Products
Recipe Source: adapted slightly from a recipe, Katherine B., a longtime reader sent me (thanks, Kat!) – originally from this recipe at Food52 and adding a link to Alexandra Stafford’s blog with lots of variations (I adapted it to use a pie plate or loaf pan for baking, and increased the flour and yeast amounts slightly)


This bread is “the bomb”! I”ve been making it all fall and everyone LOVES it. Also, it is SO easy to make. Mel doesn’t kid around when she says that.
I do have a question. The amount of yeast called for in the recipe is 1 tablespoon. When I open a packet of instant yeast and pour out the packet, it comes out to slightly less than 1 tablespoon. So, I have been opening another packet to make up the difference and then I toss it because I’m never sure if it’s good or not after you open it and don’t want to ruin a whole recipe trying to save a penny. Anyway, my question is: do I need to continue doing this to make the tablespoon accurate? Or is a scant tablespoon okay?
Thanks so much for this recipe, Mel. It is SO good!
I made a dry brush of cornmeal, salt, garlic powder and crushed rosemary . I layed this on the the bottom of the pie plate, then sprinkled it in top of the bread as well. The bread recipe was perfect, and the cornmeal was the frosting in the cake
Just finished my 1st loaf and I’m dying to cut into it! So easy! I did use bread flour so we shall see!
Thanks for such a wonderful recipe. My kids made it today! The inside of the bread was very soft, lumping, and crumbling. Is that because we need to bake it longer or is the inside suppose to be like that?
Hi Julie – hmmm, the inside shouldn’t be crumbly. Was the loaf cut into while still warm? That isn’t a bad thing, but it can affect the texture of the slices. If the inside seemed doughy or too soft, you might try adding a few minutes to the baking time. What type of pan did you bake it in?
So soo good and easy to make!!I like this recipe wery much,and I tried a lot of recepies before,but I will stick to this one!
Looking at this, I’m pleased to find just what I was looking for. I prefer active dry yeast and when I make will I let you know. I may compare to using instant.
Thank you,
I LOVE this bread! I saw Alex’s video on tiktok last year and I’ve been making it since. I opened Google tonight and here was your blog…I just put another together! This time I decreased the flour and water and added sourdough starter. So mine goes into the fridge overnight to get that wonderful sourdough twang. I haven’t bothered with any other yeast bread since I started making this. We love it that much! I do mine in loaf pans. With this recipe I can get 2 of the 8×4. Alex also converted the recipe down to a single loaf. That makes the larger 9×5 loaf pan. It’s definitely a keeper and should be made by more people!
I’ve made this four times in the past week since discovering the recipe! I’ve always wanted to bake homemade bread but I’ve been intimidated by it. But I read this recipe and thought, I can totally do that! It’s turned out so yummy every time! Thank you thank you!
Way to go, Lindy!
My go to bread is Mel’s “Easy French Bread” recipe. I make it often.
Today I was looking for a recipe using less flour, and found the above recipe. I plan on using it for French toast this weekend.
I love your recipes.
Wow! That’s all I can say! I’ve been baking bread since I was a kid since I love homemade bread so much. But I never knew such a great loaf could be made so simply and quickly. I threw the ingredients together this morning and was able to bake the loaf before leaving for work today. We ate it with dinner after I got home and we were all so impressed that I whipped up another batch before finishing my dinner so I could get another loaf in the oven before bed tonight! I already have the recipe memorized and I know this will definitely be on my regular bread baking schedule from now on! THANK YOU!!!
I thought what a sticky mess, but only adding 30 grams more flour ,it came out gorgeous! You are my new hero.
I had to laugh at myself when getting this bread into the pie plate. It was very wet and sticky, but I just plugged right along.
Got it into the plate, let it rest, and popped it in the oven. I had a thought to put the plate on baking sheet, and then said, nah, it will be fine. It rose beautifully, and then spilled over the sides; but it still was consistent with your picture of it, Mel.
I read over the recipe again and discovered my mistake.
I had left out a whole cup of flour! Lol, was my face red! And I thought, oh this will taste terrible.
Not one to shy away from my kitchen mistakes, I pulled it out of the oven, let sit a few minutes. Then I had a well buttered piece of it.
I have to tell you, i WILL make this again, because the mistake was absolutely heavenly! I really love crusty bread that is soft inside. It was delicious.
So, all you bread bakers out there, it will still be ok minus a cup of flour. Just bake in dish with higher sides, or put a cookie sheet unde it! I wouldn’t recommend leaving out 2 cups of flour, however!
I made this with active dry yeast and it worked very well. Thank you!
HELP , HIGH ALTITUDE adjustment. I love this bread sooooo easy & delicious to make & I have made many times. I have just moved to Colorado Springs. Do yo have any suggestions on changes that need to be made to the recipe?
I’m wanting to add ingredients to make jalapeño cheddar bread and pepperoni cheese bread. Do you feel I would have to make any adjustments to your recipe if I add these additional i ingredients?
I haven’t tried add-ins but it should work just fine to fold them in prior to rising and baking.
Why didn’t you set this recipe up to accept one packet of yeast? I didn’t realize until after the fact that 1 packet of yeast would not be enough for this recipe. You could have at least made a notation that a second packet would need to be opened. Every baking recipe I use indicates the number of packets of yeast that would be required, or it always matches what is already prepackaged. I don’t do enough backing to keep a jar of yeast in my house. Your recipe requires one full packet and part of another – you should have mentioned that in your notes.
This is pretty unnecessarily combative. When we select recipes to make, it’s incumbent on us to ensure that we understand what the recipe is asking of us, including double checking whether we have the ingredients. You can always scale down if you don’t have the right amount of yeast. It’s impossible to address every potential issue within a single blog post.
Hi Martha, sorry for the frustration regarding the yeast issue! I don’t keep packets of yeast on hand and so I don’t calibrate yeast measurements that way. It’s almost impossible for me to know if someone making one of my recipes is using yeast packets or a container of yeast. The good news is that if you are familiar with the amount of yeast in a packet, it should be able to quickly and easily tell if the amount of yeast called for in a recipe is more or less than what is in a packet. I apologize for any confusion and frustration this may have caused you!
Martha — this recipe doesn’t call for packets of yeast. You must not have read the entire recipe before starting. It is very snotty and rude of you to blame the author for your own mess up.
Martha, it must have been so frustrating to realize you didn’t have the correct amount of yeast in the midst of making the recipe. I just wanted to share something that has been a game changer for me: you can FREEZE the jar of yeast! It lasts a long, long time (like a year, or more). I just pull the jar out of the freezer, spoon out the amount I need, then pop the jar right back in the freezer. The small granules of yeast thaw almost immediately, especially when immersed in the warm water. Hope this helps.
The good news, Martha, is that the original recipe calls for 2 1/4 tsp yeast, with the other ingredients the same. So feel free to make it with only 1 package, it’ll still be delicious!
Oh goodness. I’m sorry you didn’t read the entirety of the directions. I did that once and had a mess up. Live and learn.. right? Although, I don’t recall bashing the recipe author.
Forgot to rate this recipe as I was busy guarding the rest of the loaf from my husband. Would give it more stars if I could.
Mel! You are a rock star and now I am a rock star after baking this amazing bread! My husband said he would take a small piece before lunch. Then, he wanted a bigger piece for lunch. Said he wanted some for dinner. Not sure if there will be any left for dinner as I had to pry the remaining loaf out of his hands after I caught him sneaking more before dinner! This bread is a Must Bake! Love all your recipes! Thanks for all your time you put into your website. You are appreciated!
I just made it again, the 3rd time in 2 weeks… This bread is BOSS! 🙂
WHERE has this bread been all my life. For real. So easy and SO YUMMY. Will make anyone feel like a rockstar.
You were right to be so emphatic about MUST. TRY. THIS. BREAD! Could not have been easier. One thing that’s kind of funny–I used active dry yeast, and based on this conversion table I regularly use (https://www.theartisan.net/convert_yeast_two.htm), based on your 1 tbs instant, the conversion is 3.75-4 tsp active. So when you said to wait for it to double, about 1.5-2 hrs, I settled in for the wait, and it doubled in 30 mins!!! So that plus cooking made this recipe take up only about an hour and a half TOTAL! And it tastes great, smells great, and looks just like your picture! Easy peasy! (I’ll just tell everyone I worked on this all day!)
Love this recipe so easy to make
I’ve been making a lot of bread to find just the right basic white sandwich bread. THIS IS IT!! Exactly what I wanted. So easy and ready so quickly. I am thrilled to find this! Thank you!!
This is amazing! Our ten-year old makes this on his own at least once a week for us! Thank you!
Love this bread! Did not want to go to the store just for bread so I looked for an easy recipe and this was it! I made it in a 9-in pie plate and when I pulled it out of the oven I swear I had a Martha Stewart moment it was so pretty. Perfect with soup, and makes good sandwich bread, too. From now on when I want bread I will go to the market and get the big bag of flour and make this bread. Thanks for such a great recipe!
There is no temperature listed for baking peasant bread
It’s in step #3: 425 degrees F.
Maybe she was asking about the internal temp? I was wondering that too. 🙂
Love it! So easy and delicious!
I have never made bread in MY LIFE, which is why this easy recipe was so appealing to me. And the bread was PERFECT on my first try. Two days later, and my boys will still cut off a slice and eat it – un-toasted, no butter. It’s that good. Although, trust me, you’ll love this bread toasted with butter. This particular recipe is so labor un-intensive, I think we are going to be replacing our store bought loaves with this for a while.
A couple of things… when I decided to make this bread on a whim at 10pm one night, I didn’t have any of the suggested baking bowls/pans. So I just used a low oval shaped baking dish I had, and it worked just fine. So definitely don’t worry about not having the “right dish.” You’ll most like have something in the house that will work. Also, I’ve been lining the baking dishes with parchment paper. And that worked really well for me. ENJOY!
I make this bread all the time now. We are full time RVers and I use my Ninja flip oven and it comes out beautiful every time!
I am a bread maker! Repeat… I am a bread maker! And not just any old bread maker, but one that pulls fluffy and delicious artisan bread out of her oven! I cannot believe how easy this was to make, how little time it took (I mean, I could make a loaf every night!), and truly how delicious it was. Thank you, Mel!
I’ve made this countless times and it is delicious. I just throw the dough into an oven safe medium sized mixing bowl i have (it’s a beautiful Polish pottery bowl) and it’s perfect every time. Thank you Mel for never letting me down.
Plus my two year old loves to help me make it! It’s a delight.
I had been looking at this recipe for a while and just got around to making it last week. It is amazing – make it! So easy to mix up and bake. I baked mine in a pie pan like Mel. It was gorgeous when it came out of the oven and both the taste and crumb are awesome. This will be a staple in my kitchen.
I hate baking but love fresh bread. This one is so easy I find myself looking forward to making it. And the bread is excellent!
I make this bread all the time. It is so easy! I had a super busy day today, so I mixed the dough at 7 am, covered it and stuck it in the fridge, took it out at 5:30 pm and put it in the pie plate and let it rise while the oven preheated. It baked up beautifully.
Very easy and my family loves it
Good morning,
I enjoyed your message, I made for the first time for Thanksgiving dinner 4 loaves of peasant bread, I have baked bread, rolls, pies, cookies, made candy for 53 years, but it’s the last several months I have been following Instagram, particularly Ali, Hannah, and Lizzy, also now Martha. my bread turned out fantastic, I used KA bread flour, baked the bread in Longaberger 1 Qt. Dish, 1 loaf in an old aluminum round pan, 2 in my old 1 Qt crock dishes., I also made sour dough starter last summer gave it to my grandaughter, and she made bread yesterday, and she shares the starter with her friends at work. We are enjoying bread baking together. Im apologize for long comment. I will add you to my contacts to follow. Regards,
I used 50% fresh ground whole wheat and 50% bread flour, but my dough was not wet. In fact, it is pretty dry. Should I add more water or is this because of the wheat?
It may be due to the wheat – how did you measure the flour? Take care that there isn’t too much flour packed into a cup.
I doubled the recipe and my two loaves were not quite evenly split. Then, my timer accidentally got turned off, so I was totally guessing on time. I thought the larger loaf might not be cooked all the way through, but turns out both loaves were perfect! Foolproof bread- guests loved it too. Thanks Mel! Served it with your beef stew recipe (we leave out the tomato paste and make a couple adjustments, but love it!)
This was so good and so very easy! I make a lot of yeast bread and I will definitely keep making this one. Can’t get any easier than this.
This bread was life changing!! One question though – what temperature would you say you get the water to when using instant yeast? My yeast jar had 3 different options so I kind of just guessed but luckily it worked!
I don’t really ever take the temperature but I just get the water like really warm bath water (not super helpful, I know, but it hasn’t failed me yet!)
Love this bread! So easy to make and delicious too!
Question—what would be the result of using cake flour or self-rising flour, if that were all you had around?
Cake flour would make for a finer crumb (possibly less structure to the bread). I’m not sure about self-rising, but if you had to choose between the two, I’d try self-rising first.
Love this recipe! Just made it tonight for the first time. I am NOT a baker but was able to make this and it was delicious. My whole family loved it. I doubled the recipe but otherwise followed the instructions to a “T”. The dough is certainly wet and sticky but don’t fret, it bakes up to perfection! I baked one loaf in a regular loaf pan and the other in a square glass baking dish. The bread will take the shape of whatever dish you bake it in, so don’t bother shaping your dough. Just plop it in to your baking dish and smooth the top. Did I say it was delicious? Such a pleasant and easy recipe, especially for us non-bakers. It’s fun to have a homemade loaf of bread with dinner! Had it with beef stew tonight. Thank you for sharing this recipe with us!
Love this recipe. I just made it tonight for the first time. Followed recipe exactly and it worked perfectly. I did double it. Baked one loaf in a loaf pan and another in a square glass baking dish. The bread will become whatever shape your baking dish is so don’t worry about shaping your dough. Yes, it is a wet, sticky dough and yes it will still bake into a nice loaf of bread! My entire family loved it. I have bookmarked this recipe and plan to make it all the time. Thank you for sharing!
I made this to go with beef stew! This was my second time making this recipe and I really loved it. I am on a low sodium diet, so I ditched the salt and added herbs instead! It was delicious!
This truly is an amazing, simple recipe. Easiest bread recipe I’ve ever made. I got up early Sunday morning and made 4 loaves. Gifted 3 to friends. I’ll be making this again.
This has become my go-to bread recipe. I bake it once or twice a week. Sometimes I switch out one cup white flour for one cup whole wheat flour. and use honey as the sweetener. Delicious and still easy. After 3months of this bread i asked my family if they wanted me switch to some other of their favorite recipes. The answer was a resounding NO!
Hi Mel!
I am so excited to taste this bread! I have a double batch rising now. I have a question- I added extra flour and really resisted adding more to keep the dough sticky. Now that I am trying to shape the dough for the pans it doesn’t hold a shape and is extremely soft and sticky. Should it hold a slight shape? It is humid here so maybe that factored in….. When you make yours how much can you work with the dough to shape it? Mine just dropped and spread and theres no way I could shape it at all. I’ve made many of your other bread recipes so I just need to find the trick for this one! Thanks 🙂
Hi April – the humidity may make a difference. I live in a dry climate. But the dough is meant to be quite sticky. Lots of people say they kind of plopped the dough into the pan and didn’t worry about shaping it. I like to grease my hands with cooking spray and quickly shape it into a rough ball shape. If it’s very humid where you live, you can try adding a bit more flour, too.
I have tried a few no knead bread recipes and all of them was quite dense. I want to try this one but was yours dense ? What was the feel of yiur dough? Thanks!
The dough is very sticky. It’s not dense if it has time to rest and rise.
We LOVE this bread… I make it all of the time. I was wondering about add-ins like cheddar and jalapeno. When would you add those… When I am mixing up the dough? Do you think that I would need to adjust anything else in the recipe? Thank you for great recipes!
I add shredded sharp cheddar cheese all the time! I mix it in with the dry ingredients before pouring in the water. Works great. I don’t adjust the other ingredients.